Table of Contents
Advertisement
Quick Links
Advertisement
Table of Contents

Related Manuals for LG AR502PS


Summary of Contents for LG AR502PS
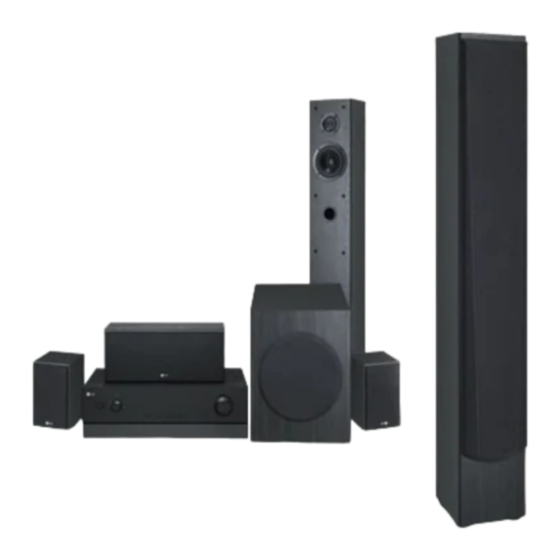
- Page 1 AR502’S_LGESA_ENG_MFL39518818 AV RECEIVER SYSTEM OWNER’S MANUAL MODEL: AR502PS Main Unit - AR502PS-A0 Speakers - SR52PS-F, SR52PS-C, SR52PS-S, SR52PS-W Before connecting, operating or adjusting this product, please read this instruction booklet carefully and completely.
- Page 2 (servicing) instructions in the authorized LG Service Centre. literature accompanying the product. Protect the power cord from physical or mechanical abuse, such as being twisted, kinked, pinched, closed...
-
Page 3: Table Of Contents
Contents Selecting setup menu ... . .28-31 Setup Configuration ....28 Introduction ....4-11 General operation of setup menu . -
Page 4: Introduction
Introduction Before use Analog audio/Composite video cable • To ensure proper use of this product, please read Yellow (video) this owner’s manual carefully and keep this manual White (L/audio) in an easily accessible place for future reference. • This manual provides information on the operation Red (R/audio) and maintenance of your unit. -
Page 5: Front Panel
Front Panel INPUT MASTER VOLUME SELECT DISPLAY 12. FM/AM 1. POWER ( Selects the unit’s tuner (FM and AM bands). Sets the unit to On and Standby. 13. SURROUND MODE 2. INPUT SELECT Selects various surround effect. Select the input source. 14. -
Page 6: Rear Panel
Rear Panel 4 5 6 7 10 11 12 13 1. VCR IN/VCR REC. OUT 7. COMPONENT VIDEO DVD IN Connect a VCR. Connect a DVD player with component video out jacks to COMPONENT VIDEO DVD IN jacks. 2. TV/STB IN 8. -
Page 7: Display Window
Display window VOLUME SLEEP MUTE PCM Virtual FM ST. kHz MHz ftms 1. SLEEP indicator 5. MUTE indicator Lights up when the Sleep function has been set. Flashes while the unit is muted. 2. Listening mode & format indicators 6. VOLUME indicator These indicators show the currently selected Displays the level of volume. -
Page 8: Remote Control
Remote Control Remote control operation range RECEIVER Mode RECEIVER Point the remote control at the remote sensor and To set the remote control to RECEIVER mode, press the buttons. press RECEIVER. • Distance: About 23 ft (7 m) from the front of the remote sensor •... - Page 9 4. DISPLAY 1. POWER ( Accesses On-Screen display. Switches the unit ON and OFF. MENU RECEIVER/DVD/TV/VCR Access the menu on a disc. To operate the desired function with this remote SETUP control, select the corresponding the buttons. Accesses or removes setup menu. TITLE 2.
- Page 10 DVD Mode To set the remote control to DVD mode, press 1. POWER ( DVD. Switches the unit ON and OFF. 2. STOP (x x ) Stops playback. PLAY (B) Starts playback. PAUSE(X X )/STEP Pauses playback temporarily. Press this button repeatedly to play Frame-by-Frame.
- Page 11 Switches the unit ON and OFF. Controlling the TV You can control the channel, sound level, input 2. STOP (x x ) source, and power switch of your LG TV with the Stops playback. supplied Remote Control. PLAY (B) Starts playback.
-
Page 12: Installation
Installation Connecting components with digital audio output jacks Connecting a DVD player (or Digital device), TV monitor or satellite tuner (or Set top box etc.) 1. Connect the audio jacks. For details of the required cables, see the page 4. DVD player (or Digital device) OPTICAL OUT COAXIAL OUT... - Page 13 2. Connect the video jacks. For details of the required cables, see the page 4. The following illustration shows how to connect a TV or satellite tuner (Set top box, etc) and a DVD player with COMPONENT VIDEO (Y, C ) output jacks.
-
Page 14: Connecting Components With Analog Audio Jacks
Connecting components with analog audio jacks Connecting audio components 1. Connect the audio jacks with analog audio cable. For details of the required cables, see the page 4. Satellite tuner (or DVD player CD player Set top box etc.) AUDIO OUT AUDIO OUT AUDIO OUT AUDIO OUT... -
Page 15: Connecting A Camcorder Or Game Console
Connecting a camcorder or game console 1. Connect the audio and video jacks. For details of the required cables, see the page 4. INPUT MASTER VOLUME SELECT DISPLAY AUDIO AUDIO OUT VIDEO OUT VIDEO Camcorder or game console 2. Connect the unit’s MONITOR OUT jack to the TV’s VIDEO IN jack with composite video cable. For details of the required cables, see the page 4. -
Page 16: Connecting Portable Device Or Usb Device
Connecting Portable device or USB device For details of the required cables, see the page 4. Select the input source to play the component after connecting. - For details, see the page 22. Portable device Connection (L) Connect the unit’s PORTABLE-IN jack to the corresponding jack of portable device with mini stereo (3.5mm) cable. -
Page 17: Connecting Video Components For Playback
Connecting video components for Playback 1. Connect the audio jacks. For details of the required cables, see the page 4. 2. Connect the video jack and then connect your TV to the MONITOR OUT jack. You can watch the video from the selected input. VIDEO VIDEO OUT VIDEO OUT... -
Page 18: Connecting Video Components For Recording
Connecting video components for Recording This section explains how to connect a VCR for recording from a TV or another VCR. 1. Connect the unit’s VCR REC. OUT jack to a video input on the recording VCR. 2. Connect the unit’s VCR REC. OUT L/R jacks to an audio input L/R on the recording VCR. 3. -
Page 19: Connecting The Antennas
Connecting the antennas Connect the supplied AM loop antenna and FM wire antenna. AM Loop Antenna (supplied) FM Wire Antenna (supplied) Notes • To prevent noise pickup, keep the AM Loop antenna away from the unit and other components. • Be sure to fully extend the FM wire antenna. •... -
Page 20: Connecting Speakers
Connecting speakers Front left and right speakers These output the overall sound. Their role in a home theater is to provide a solid anchor for the sound The unit allows you to use 5.1 channel system. image. They should be positioned facing the listener The ideal surround speaker system for this unit is 5- at about ear level, and equidistant from the TV. -
Page 21: Speaker System Connection
Speaker System Connection For the best surround sound, you should connect 5 speakers and/or subwoofer. Connect the your front, center, surround speakers, and subwoofer by using the speaker wires. Using a suitable cable, connect the SW (PRE OUT) to an input on optional powered subwoofer, as shown below. Front speaker (L) Passive subwoofer Front speaker (R) -
Page 22: Operation
Operation Turning On the unit Selecting the input source Before connecting the power cord, connect all your This section explains how to select the input source speakers and AV components. (i.e., the AV component that you want to listen to or watch). -
Page 23: Selecting The Input Mode
Selecting the input mode To mute the sound Press MUTE on the remote control. To cancel, press it again. If you connect a component to a digital input jack, you must assign that jack to an input source. 1. Select the input source that you want to assign. -
Page 24: Switching The Audio Signal
Switching the audio signal This section explains how to switch the audio input/output signal about each function mode. (O: Active, X: Inactive) Output Input Input/ Output • OPTICAL 1 Analog RCA input Speaker • OPTICAL 2 (VCR, TV/STB, DVD, Function terminal REC.OUT •... -
Page 25: Playing Music Files Using The Usb Feature
Playing music files using the Repeat During playback, press REPEAT on the remote USB feature control (or on the front panel) repeatedly to select a desired repeat mode. You can enjoy music files (MP3/WMA) saved in an Display Playback MP3 player or USB memory by connecting the storage device to the USB port of this unit. -
Page 26: Listening To Fm/Am Radio
Listening to FM/AM radio Presetting radio stations You can listen to FM and AM broadcasts through the You can preset up to 50 FM or AM stations. built-in tuner. Before operation, make sure you have Then you can easily tune in the stations you often connected the FM and AM antennas to the unit. -
Page 27: Setting The Display Brightness
Setting the Display Brightness Displaying Source Information You can adjust the brightness of the display window. You can display various information about the current input source. Press RECEIVER, and then press DIMMER on the remote control repeatedly. Press RECEIVER, and then press DISPLAY The brightness of the display window is on/off. -
Page 28: Selecting Setup Menu
Selecting setup menu 1. SURROUND (Enjoying surround sound) By using the Setup menu, you can make various adjustments to items such as sound. These settings provide for playing any 2-channel digital source such as Dolby Digital, or 2-channel Setup configuration analog/PCM source in the PLII Music listening mode. -
Page 29: Spk Type (Setting Speaker Type)
2. SPK TYPE (Setting speaker type) SMALL : If the sound is distorted, or you fell a • lack of surround effects when using multi channel surround sound, select “SMALL” You can set the size of the speakers connected to this to activate the bass redirection circuitry unit. -
Page 30: Spk Distance (Setting Speaker Distance)
4. SPK DISTANCE (Setting speaker 5. SPK LEVEL (Setting speaker level) distance) You can adjust the level of each speaker. These setting are applied to all sound fields. You can set the distance of the speakers connected to Initial value is 0dB. this unit. -
Page 31: Load Initial
7. LOAD INITIAL Enjoying the listening mode This procedure can be used to initialize settings you SURROUND mode have made to their factory. This mode lets you specify the type of decoding for 2 channels audio sources. This unit can reproduce 2 7 . -
Page 32: Dsp (Digital Sound Processor) Mode
DSP (Digital Sound Processor) mode ENHANCER mode Press RECEIVER, and then press DSP repeatedly This mode enhances the sound quality of compressed to select the DSP (Digital Sound Processor) mode input signal (MP3, WMA, etc) from front speakers and you want. subwoofer. -
Page 33: About Listening Mode
About Listening mode The following table lists all the listening modes and shows which modes can be selected for each input signal format. (O: Active, X: Inactive) Dolby Digital Analog/ 3/2.1 Input Signal PCM/ Surround (96/24) surround MP3/ Front L/R Front L/R Front L Front L... -
Page 34: Adjusting The Speaker Level
Adjusting the speaker level AV Sync. (Adjusting the audio delay) You can adjust the level of each speaker. You may compensate for the difference through the 1. Press RECEIVER, and then press SPK LEVEL. use of delay settings in your listening position. The audio delay is adjusted from 0msec to 300msec 2. -
Page 35: Using The Night Function (Dolby Digital Only)
Using the NIGHT function Storing the settings 1. Press RECEIVER, and then press M1, M2, or (Dolby Digital only) M3 on the unit. “M1 (M2 or M3) LOAD?” appears in the display With the NIGHT function, you can reduce the dynamic window. -
Page 36: Reference
Reference Mini Glossary for Audio Stream & Surround mode Dolby Digital DTS Neo : 6™surround 5.1 Manufactured under license from Dolby Laboratories. This mode applies conventional 2-channel signals such as digital PCM or analog stereo signals to the “Dolby”, “Pro Logic”, and the Double-D symbol are high precision digital matrix decoder used for DTS-ES trademarks of Dolby Laboratories. -
Page 37: Troubleshooting
Troubleshooting Check the following guide for the possible cause of a problem before contacting service. PROBLEM POSSIBLE CAUSE REMEDY No power. • The AC input cord is disconnected. • Connect cord securely. • Poor connection at AC wall outlet or the •... -
Page 38: Specifications
Specifications General Power supply Refer to main label. Power consumption 70 W Net Weight 4.94 kg External dimensions 430 x 150 x 300 mm (W x H x D) Operating conditions Temperature: 5°C to 35°C Amplifier Frequency response 10 - 22000 Hz Signal-to-noise ratio More than 80 dB (Analog : 1 kHz, NOP -3 dB, 20 kHz LPF/A-Filter) More than 95 dB (Digital : 1 kHz, NOP -3 dB, 20 kHz LPF/A-Filter) - Page 39 Speaker Front Speaker (SR52PS-F) Center speaker (SR52PS-C) Type Bass Reflex 2 Way 2 Speaker System Bass Reflex 2 Way 2 Speaker System Impedance 8 Ω 8 Ω Frequency Response 80 - 20000 Hz 80 - 20000 Hz Sound Pressure Level 81 dB/W (1m) 81 dB/W (1m) Rated Input Power...
- Page 40 P/NO : MFL39518818...
Need help?
Do you have a question about the AR502PS and is the answer not in the manual?
Questions and answers