Table of Contents
Advertisement
LIFE SMART® is a registered trademark of
Source Network Sales & Marketing Inc., All Rights Reserved.
This product is refurbished in the United States of America by
America's Remanufacturing Company.
ATTACH YOUR RECEIPT HERE
Purchase Date ____________Serial Number (
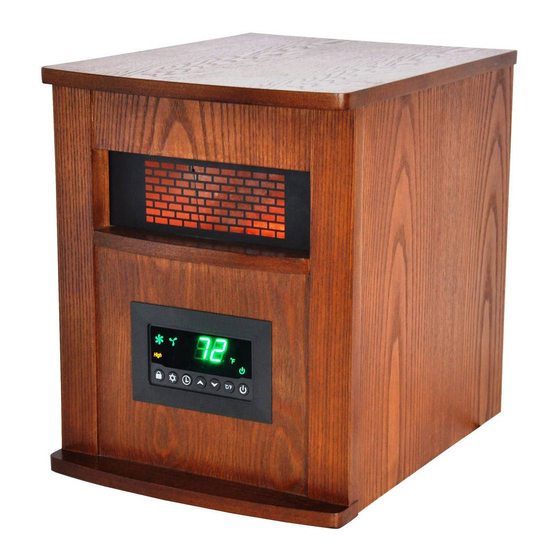
INFRARED QUARTZ HEATER
located on back of unit
1
REFURBISHED Model:
R-LS-W6-WIQH-M
) __________________
Advertisement
Table of Contents

Related Manuals for Life Smart R-LS-W6-WIQH-M


Summary of Contents for Life Smart R-LS-W6-WIQH-M
- Page 1 INFRARED QUARTZ HEATER LIFE SMART® is a registered trademark of REFURBISHED Model: Source Network Sales & Marketing Inc., All Rights Reserved. R-LS-W6-WIQH-M This product is refurbished in the United States of America by America's Remanufacturing Company. ATTACH YOUR RECEIPT HERE...
-
Page 2: Table Of Contents
TABLE OF CONTENTS Package Contents ............... 3 Safety Information .............. 4 Frequently Asked Questions ..•..•..•..•..•..•..•..•..•..•..•..•..•..•..•... 8 Preparation ..............1 D Troubleshooting ............... 10 Control Panel ..............11 Remote Control..............12 Operating Instructions ............13 Care and Maintenance .......... -
Page 4: Safety Information
SAFETY INFORMATION Please read and understand this entire manual before attempting to assemble, operate, or install the product . IMPORTANT SAFETY INSTRUCTIONS WARNING: POTENTIAL ELECTRICAL HAZARD IF NOT ADHERED TO . When using electrical appli- ances, basic precautions should always be followed to reduce the risk of fire, electric shock, and injury to persons, including the following: •... - Page 5 SAFETY INFORMATION Child Safety Lock Feature Press and hold the child lock button located on the control panel for 5 seconds or remote control for 3 seconds . Locking is confirmed when a buzzer rings and the control panel displays “CL” . When locked, the control panel and remote control (if provided) will not function .
-
Page 8: Frequently Asked Questions
FREQUENTLY ASKED QUESTIONS Please review these frequently asked questions on the next few pages prior to using your heater . Q. My heater emits a strange odor when I first open the box and when I turn the heater on for the first time. - Page 9 FREQUENTLY ASKED QUESTIONS Q. The temperature on my heater does not match the temperature display on my wall, or external thermostat. Why? A. This is completely normal . The temperature display on your heater may vary from the temperature display on another thermostat (like the one mounted to your wall or a purchased external thermostat) . This is because the temperature sensor on the heater reads the temperature directly around the heater .
-
Page 10: Preparation
PREPARATION Place the heater on a firm, level surface and plug into a grounded 120 V, 60 Hz power outlet and turn on the power switch on the rear of the unit . Only operate heater in upright position . Insert two AAA batteries into the remote control before using (batteries not included) . -
Page 11: Control Panel
CONTROL PANEL PART NAME DESCRIPTION Fan Indicator Light Indicates when the Fan is on Timer Indicator Light Indicates when the timer function is active Digital Display Readout of the set room temperature or timer value Celsius Indicator Light Indicates that the temperature is being displayed in Celsius Fahrenheit Indicator Light Indicates that the temperature is being displayed in Fahrenheit Power Indicator Light Indicates when the unit is receiving power from the wall outlet... -
Page 12: Remote Control
REMOTE CONTROL PART NAME DESCRIPTION Temp Up Button Increases the set temperature value Mode Button Toggles between the three heat modes available Temp Down Button Decreases the set temperature value Power Button Powers the heater on or off Short press: Shows Ambient temperature . Ambient/Lock Button Long press for 3 seconds to activate lock function . -
Page 14: Operating Instructions
OPERATING INSTRUCTIONS 4 . To set the timer power off, start the unit and press the Timer button on the control panel (C) or remote control (B) . Note: The timer-power-off function can only be set when the heater is in power-on mode . The digital display on the control panel (C) changes from the set temperature readout TIMER... -
Page 15: Care And Maintenance
CARE AND MAINTENANCE WARNING: Before performing any maintenance task, turn off the power switch in the rear of the unit, unplug the unit, and allow it to cool completely . 1 . To keep the heater clean, clean the outer shell with a soft, damp cloth . Use a mild detergent if necessary . -
Page 16: Limited Warranty
LIMITED WARRANTY America's Remanufacturing Company (ARC) warrants this heater against defects in materials and workmanship on functional parts, for a period of 30 days from the original date of purchase. Your sales receipt showing the date of purchase of the product is your proof of purchase. Keep it in a safe place for future reference. -
Page 17: Replacement Parts List
REPLACEMENT PARTS LIST , 9:00 a.m. - 5 For replacement parts, call our technical support department at 657-341-0362 p.m., CST, Monday - Friday PART DESCRIPTION PART # Control panel COPA-H2018 FAN-DC Power board POBO-H2018 Limit switch LIMITSW130 Infrared tube QUAR-R185 Thermostat Wire SENSOR Master Power Switch...
Need help?
Do you have a question about the R-LS-W6-WIQH-M and is the answer not in the manual?
Questions and answers