Advertisement
Quick Links
Advertisement

Subscribe to Our Youtube Channel
Summary of Contents for Kogan FORTIS FSBSKBLSD2A
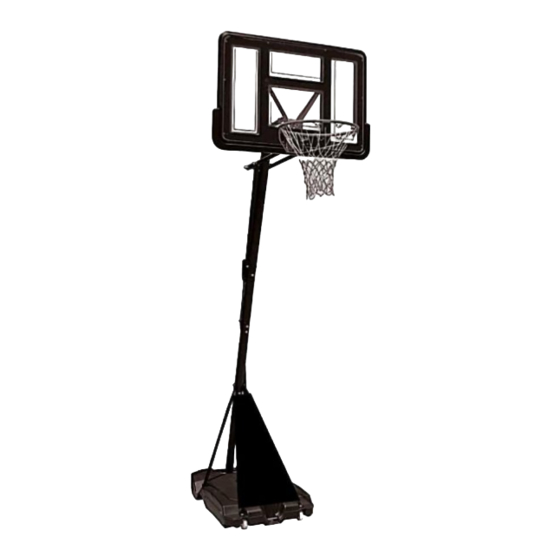
- Page 1 PREMIUM HEIGHT ADJUSTABLE BASKETBALL HOOP STAND FSBSKBLSD2A...
-
Page 3: Safety And Warnings
SAFETY & WARNINGS WARNING: IMPROPER INSTALLATION OR SWINGING ON THE RING MAY CAUSE SERIOUS INJURY OR DEATH NOTICE: All basketball systems, including those used for displays, must be assembled and ballasted according to instructions. Failure to follow instructions could result in serious injury. Please read all warnings and cautions before assembly. - Page 4 • Climate, corrosion, or misuse could result in system failure. • Minimum operational height is 6'6" (1.98 m) to the bottom of backboard. This equipment is intended for home recreational use only and NOT excessive • competitive play. • Read and understand the warning label affixed to pole. •...
- Page 5 • Do not use system during windy and/or severe weather conditions; system may tip over. Place system in the storage position and/or in an area protected from the wind and free from personal property and/or overhead wires. • Never play on damaged equipment. •...
- Page 6 COMPONENTS A M12 x 180 (x1) B M12 x 180 (x2) C (1-4) M12 x 180 (x1) C (5-8) M12 x 180 (x1) D M12 x 180 (x1) E M8 x 80mm (x5) F M8 x 110mm (x2) G M8 x 90mm (x1) H M8 x 45mm (x1) I M8 x 40mm (x2) J M8 x 16mm (x4)
- Page 7 L (x2) U1 (x1) M (x2) N (x1) U2 (x1) O (x2) K (x1) U3 (x1) P (x1) Q (x1) U4 (x1) R (x2) S (x2) V1 (x1) T (x2) V2 (x1) W (x1) V3 (x1)
- Page 8 X (x1) Y (x1) GG (x1) HH (x1) AA (x1) BB (x1) KK (x1) CC (x1) DD (x1)
- Page 9 ASSEMBLY Step 1: Insert shaft (V2) into bottom pole (Y) as per Figure 1a, then insert the bottom pole (Y) into base. Insert shaft (V3) into bottom pole (Y) then fix the shaft (V3) into the groove on the underside of the base, as per Figure 1b.
- Page 10 Step 2: Bolt G Bolt E Bolt J Figure 2 Fix the bottom end of pole brace (U1), (U2), (U3), (U4) on the base by J bolt set (J1, J2, J3) as per Figure 2. Pay close attention to the directions of the four-pole brace. Insert the middle pole (X) into bottom pole (Y), Fix the middle pole (X), bottom pole (Y) and top end of four pole braces together by x1 G bolt set (G1, G2, G3) and x1 E bolt set (E1, E2, E3) as shown in Figure 2.
- Page 11 Step 3: Figure 3a Fix the rim (AA), backboard (DD) and backboard bracket (CC) by F bolt set (Fl, F2, F3) and I bolt set (I1, I2, I3). Note that the x2 small springs (L) are fixed in front of the two “up”...
- Page 12 As shown in Figure 3c, pull the backboard bracket (CC) on both sides. Figure 3c Fix the top end of backboard bracket (CC) behind the backboard (DD) by bolt (K1). Figure 3d As shown in the figure, connect the backboard brace (S) and (T) on backboard bracket (CC) by B bolt set (B1, B2, B3, B4, B5).
- Page 13 Step 4: Install backboard brace (S) (T) by C bolt set (C1, C2, C3, C4) and (C5, C6, C7, C8) as shown in Figure 4, tighten all the nuts. Figure 4 Step 5: Install the pole (W), (X) together with x2 of E bolt set (E1, E2, E3), then install the adjustment mechanism (HH) &...
- Page 14 Step 6: Fix the bolt (D) on the two shorter backboard braces (S) for the next installation of hanging big springs (R). Figure 6 Step 7: As shown in below fixture, fix one end of big springs (R) on the hole of backboard bracket (CC).
- Page 15 Water lid (O) Figure 8 For safety reason, sand instead of water is recommended to fill up the base during the sub- freezing weather. Please note that sand cannot be poured out once filled in the base.
- Page 16 ADJUSTING Height Adjustment As shown in the figure, pinch the lifting handlebar (HH) inwards, then pull the rim in either direction. Figure 9 Product Moving Adjust the rim to the lowest level before moving Avoid friction with the ground while moving Move to the final desired location before slowly raising the product.
- Page 17 NOTES...
- Page 19 NOTES...
- Page 20 Need more information? We hope that this user guide has given you the assistance needed for a simple set-up. For the most up-to-date guide for your product, as well as any additional assistance you may require, head online to help.kogan.com...
Need help?
Do you have a question about the FORTIS FSBSKBLSD2A and is the answer not in the manual?
Questions and answers