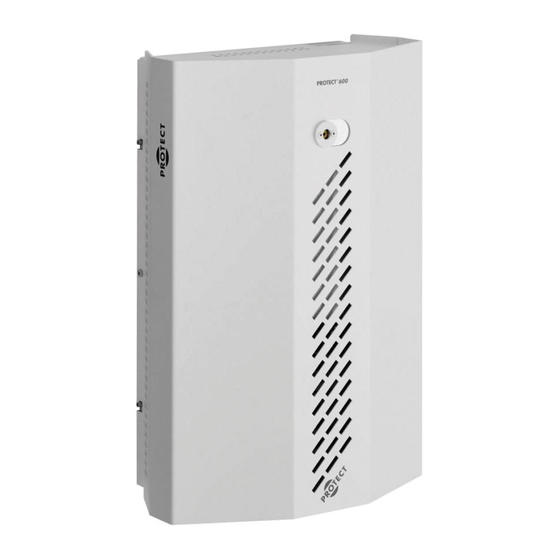
Protect 2200i Installation Manual
Hide thumbs
Also See for 2200i:
- Quick manual (9 pages) ,
- Installation manual (32 pages) ,
- Important information manual (16 pages)
Table of Contents

Summary of Contents for Protect 2200i
- Page 1 Installation Manual Version 4.6 Installation Manual Manuel d’installation Manuale installatore Manual de la instalación Installationsmanual PROTECT 2200i · PROTECT 1100i · PROTECT 600i ™ ™ ™ Copyright 2012, PROTECT A/S – Denmark...
-
Page 2: Table Of Contents
PROTECT 600i/1100i/2200i ™ Table of contents 1. Begin here – very important if you are installing a Fog Cannon for the first time Please read the installation manual ........4 Removal of cover . - Page 3 PROTECT 600i/1 100i/2200i ™ Contenido 1. Empezar por aquí – importante si es su primera instalación de un generador de niebla Por favor lea detenidamente el manual de instalación ..... . . 4 Retire las cubiertas .
-
Page 4: Begin Here - Very Important If You Are Installing A Fog Cannon For The First Time
Suggeriamo la partecipazione ad un corso di Formazione organizzato da PROTECT ITALIA Como instalador, debe participar en un curso de capacitación de PROTECT. Som installatør skal du have deltaget i et PROTECT træningskursus . When unpacking the Fog Cannon please read the installation manual carefully. -
Page 5: Mounting The Brackets
PROTECT 600i/1 100i/2200i ™ Measurements for installation of the Fog Cannon. Dimensions du générateur de fumée lors du montage. Dimensioni del generatore nebbiogeno. PROTECT 600i PROTECT 1100i PROTECT 2200i Medidas del generador de niebla. 475 mm 475 mm 633 mm... -
Page 6: Positioning
PROTECT 600i/1100i/2200i ™ To ensure the best possible coverage the fog needs free passage. Pour assurer une couverture optimale, la fumée doit être expulsée sans encombre. Il generatore di nebbia deve essere posizionato in modo da coprire istantaneamente i beni da proteggere. -
Page 7: Safety Instructions
PROTECT 600i/1 100i/2200i ™ Min. installation distance from objects. Ecart minimal entre le générateur et d’autres objets. Distanza minima per ottenere un buon effetto. Distancia de instalación mín. respecto a otros objetos. Min . installationsafstand til genstande . For horizontal mounting, place the Fog Cannon as shown in the picture. -
Page 8: Cabling
Undgå utilsigtet affyringer – fjern væskedunken under montage . Cabling of PROTECT 600i/1100i/2200i. Câblage par PROTECT 600i/1100i/2200i. Cablaggio del sistema PROTECT 600i/1100i/2200i Collegamento al sistema d’allarme. Cableado del sistema PROTECT 600i/1100i/2200i. LOW VOLTAGE Kabelføring af PROTECT 600i/1100i/2200i . -
Page 9: Connections, Setting And Test Printed Circuit Board
PROTECT 600i/1 100i/2200i ™ 2. Connections, setting and test Connections, réglages et tests Conexiones, configuración y prueba Collegamenti, impostazioni e test Tilslutning, indstillinger og test GB: Printed circuit board F: Carte à circuit imprimé (PCB) I: Circuito stampato E: Placa de circuito impreso (PCB) DK: Printkort GB: Voltage F: Tension I: Alimentazione E: Tensión DK: Spænding... -
Page 10: Typical Installations
PROTECT 600i/1100i/2200i ™... - Page 11 PROTECT 600i/1 100i/2200i ™...
-
Page 12: Dipswitch
PROTECT 600i/1100i/2200i ™ 1. GB: Dipswitch F: Dipswitch I: Dipswitches E: Dipswitch DK: Dipswitch GB: Function F: Fonction I: Funzione E: Función DK: Funktion ON = l’elemento termico è Heat disable Chauffage désactivé Desactivar calentamiento Heat disable disattivato quando è attivo il On = The heating element dis- On = l’élément chauffant s’éteint... -
Page 13: Fog Volume
EU standard EN 50131-8. The Fog Cannons of paréntesis, los nuevos estándares de acuerdo con la actual normativa PROTECT meets the requirements of EN 50131-8 (see certificate in this de la UE norma EN 50131-8. Los generadores de niebla PROTECT manual). - Page 14 EU standard EN 50131-8 . **Kan ikke bruges i lande med 115/130 V . Se tillæg til denne manual for lande med lav volt . PROTECT 2200i: (1250*). Capacità massima di un contenitore di fluido = 4 sequenze complete GB: Total time in pulse mode = 6,5 min.
-
Page 15: Connecting The Batteries
PROTECT 600i/1 100i/2200i ™ Check the control signals before testing. Contrôler les signaux de commande avant de tester. Controllare i segnali di attivazione prima di iniziare Il test. Controle las señales de mando antes de realizar el ensayo. Kontroller styresignaler før afprøvning. -
Page 16: Information And Registration
PROTECT 600i/1100i/2200i ™ 3. Hand over F: Remise I: Consegna dell’impianto E: Entrega DK: Aflevering Check the fluid level after testing (hand over the Fog Cannon with a full fluid container). Contrôler le niveau de liquide après l’essai (remettre le générateur de fumée le réservoir rempli). -
Page 17: Service And Maintenance Agreement
Brugerne skal oplyses, at flere informationer kan findes på www.ProtectGlobal.com Complete the warranty sheet and send it to PROTECT. Remplir le certificat de garantie et l’envoyer à PROTECT. La garanzia deve essere compilata ed inviata a PROTECT. -
Page 18: Contratto Di Manutenzione
PROTECT 600i/1100i/2200i ™ Finally, a contract of service must be made, which should contain an agreement for min. one test a year. Finalement, dresser un contrat d’entretien qui doit comprendre au minimum un essai par an. Si suggerisce infine di stipulare con il cliente un contratto di manutenzione. -
Page 19: In Case Of Faults Fault Finding
PROTECT 600i/1 100i/2200i ™ 4. In case of faults F: En cas de défauts I: In caso di funzionamento anomalo E: En caso de averías DK: I tilfælde af fejl An identified error can be reset by pressing the Reset button for approx. 4 seconds. The button is located in the centre of the circuit board. -
Page 20: Status Indicators/Fault Codes
PROTECT 600i/1100i/2200i ™ GB: External LED status indicator – a service function in arm and Indicador LED externo de estado - disarm status. encendido tanto en estado de armado como desarmado. LED exterieure d’ indicateurs d’état – DK: Dioder til ekstern statusmelding - en servicefunktion i frakoblet fonction mise en- ou hors- service du système (+/- 12v sur DIS).


Need help?
Do you have a question about the 2200i and is the answer not in the manual?
Questions and answers