
Subscribe to Our Youtube Channel
Related Manuals for Russell Hobbs RHCT04


Summary of Contents for Russell Hobbs RHCT04
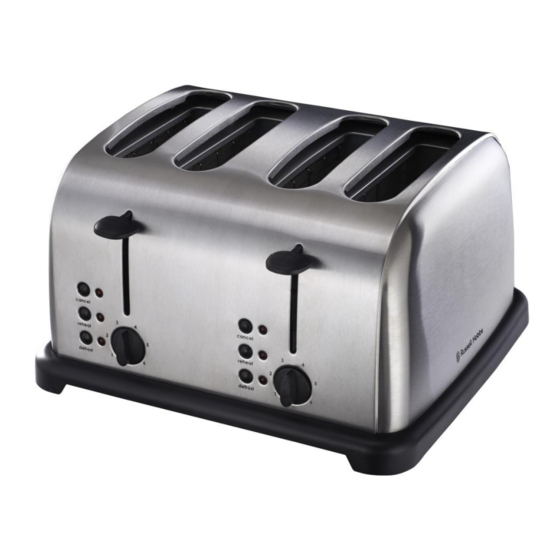
- Page 1 INSTRUCTIONS AND WARRANTY MODEL NO. RHCT04 RUSSELL HOBBS 4 SLICE WIDE SLOT TOASTER...
-
Page 2: Important Safeguards
Congratulations on purchasing our Russell Hobbs 4 Slice Wide Slot Toaster. Each unit is manufactured to ensure safety and reliability. Before using this appliance for the first time, please read the instruction manual carefully and keep it for future reference. - Page 3 9. Do not use the appliance if it has been dropped or damaged in any way. In case of damage, take the unit in for examination and/or repair by an authorised service agent 10. To reduce the risk of electric shock, do not immerse or expose the motor assembly, plug or the power cord to water or any other liquid.
-
Page 4: Additional Important Safeguards
25. Use of an extension cord with this appliance is not recommended. However, if it is necessary to use an extension lead, ensure that the lead is suited to the power consumption of the appliance to avoid overheating of the extension cord, appliance or plug point. - Page 5 6. Do not place it near a flame or heat or on a soft surface (such as carpet). Avoid placing it where it may tip over during use. Dropping the toaster could cause it to malfunction. 7. This appliance is hot during operation and retains heat for some time after turning off.
-
Page 6: Parts Diagram
PARTS DIAGRAM A. Toasting lever B. Defrost button C. Browning control D. Cancel button E. Bagel button F. Removable crumb tray BEFORE USING FOR THE FIRST TIME Remove all packaging materials including those that may be inside the toasting slots or toasting lever slot. -
Page 7: Automatic Centering Guides
Turn the browning selector knob to 1, the lightest setting. Lower the toasting lever until it locks in place. Operate without bread once or twice to burn off any manufacturing residue. You may notice a slight amount of smoke - this is normal and will stop as the heating elements continue to heat. - Page 8 12. Do not change the browning selector knob selection during the toasting cycle. First turn the browning selector knob to STOP, then turn the browning selector knob to adjust the browning level. 13. Lower the toasting lever and toast until the desired toast color is achieved. 14.
-
Page 9: Stop Toasting
STOP TOASTING 1. When the toasting lever is lowered, toasting will begin. 2. To stop or interrupt any toasting cycle, turn the browning selector knob to STOP. 3. The bread will automatically rise when toasting has completed - the toaster will turn OFF. -
Page 10: Changing The Plug
That the mains power supply is ON. That the plug is firmly in the mains socket. If the appliance still does not work after checking the above: - Consult the retailer for possible repair or replacement. If the retailer fails to resolve the problem and you need to return the appliance, make sure that: ... - Page 11 PLEASE AFFIX YOUR PROOF OF PURCHASE/RECEIPT HERE IN THE EVENT OF A CLAIM UNDER WARRANTY THIS RECEIPT MUST BE PRODUCED. W A R R A N T Y Home of Living Brands (Pty) Limited (“Home of Living Brands”) warrants to the original purchaser of this product (“the customer”) that this product will be free of defects in quality and workmanship which under normal personal, family or household use and purpose may manifest within a period of 1 (one) year from the date of purchase (“warranty period”).
-
Page 12: Salvaguardas Importantes
Hobbs. Cada unidade é fabricada de forma a garantir segurança e fiabilidade. Antes de utilizar este aparelho pela primeira vez, leia o manual de instruções atentamente e guarde-o para futura referência. CARACTERÍSTICAS DA TORRADEIRA DE RANHURA LARGA PARA 4 FATIAS DA RUSSELL HOBBS Função para reaquecer/ descongelar/ cancelar com luz indicadora ... - Page 13 8. Verifique o cabo de alimentação e a ficha regularmente para verificar a existência de quaisquer danos. Se o cabo ou a ficha estiverem danificados, devem ser substituídos pelo fabricante ou por uma pessoa qualificada de forma a evitar um perigo elétrico.
- Page 14 cuidado em superfícies onde o calor pode causar danos - é recomendável colocar uma base térmica isolada. 22. Não utilize este aparelho com quaisquer alimentos/preparação de alimentos que contenham açúcar, compota ou conservantes. 23. Não insira nenhum objecto na torradeira. Nunca tente extrair torradas presas, muffins, bagels ou qualquer outro item com uma faca ou qualquer outro objecto, uma vez que o contacto com elementos condutores pode causar electrocussão e/ou danos nos elementos.
- Page 15 SALVAGUARDAS IMPORTANTES ADICIONAIS 1. Este aparelho gera calor e a evacuação de vapor durante a utilização. Deverão ser tomadas precauções adequadas para impedir o risco de queimaduras, incêndios ou outras lesões em pessoas ou danos na propriedade. 2. Uma pessoa que não tenha lido e compreendido todas as instruções de funcionamento, para tostar e de segurança não está...
- Page 16 DIAGRAMA DE PEÇAS A. Alavanca de torragem B. Botão de descongelamento C. Controlo de torragem D. Botão para cancelar E. Botão para Bagel. F. Tabuleiro de migalhas amovível ANTES DE UTILIZAR PELA PRIMEIRA VEZ Remova todos os materiais da embalagem, incluindo os que se podem encontrar dentro das ranhuras para torrar ou ranhura da alavanca para torrar.
- Page 17 Desenrole o cabo de alimentação da área de armazenamento do cabo por baixo da torradeira e ligue-a a uma tomada eléctrica de 220-240V. Rode o botão de selecção para torrar para 1, a definição mais ligeira. Baixe a alavanca para torrar até ficar encaixada no devido lugar. Utilize sem pão uma ou duas vezes para queimar, extraindo assim quaisquer resíduos de fabrico.
-
Page 18: Manutenção E Limpeza
9. Atenção: a alavanca para torrar não se bloqueia na posição a não ser que a torradeira seja ligada a uma tomada eléctrica de 220 - 240 V. 10. Quando torrar uma única fatia, o pão pode ser colocado em qualquer ranhura para torrar. -
Page 19: Guardar O Aparelho
Para limpar, DESLIGUE A TORRADEIRA E DEIXE-A ARREFECER. Para remover quaisquer migalhas da torradeira, extraia o tabuleiro de migalhas de baixo da torradeira, esvazie e certifique-se de que está devidamente inserido no local antes de o voltar a utilizar novamente. O tabuleiro de migalhas deve ser limpo com regularidade. - Page 20 A unidade está devidamente embalada na sua embalagem original. Apresenta uma prova de compra. É fornecida uma razão para a devolução. Se o cabo de alimentação estiver danificado, deve ser substituído pelo fabricante ou por um agente de assistência autorizado de forma a evitar qualquer perigo. Caso seja necessário reparar o aparelho dentro do período de garantia, o aparelho deve ser devolvido a um centro de assistência da Home of Living Brands (Pty) Ltd aprovado.
- Page 21 ANEXE A SUA PROVA DE COMPRA/RECIBO AQUI EM CASO DE RECLAMAÇÃO AO ABRIGO DE GARANTIA, É NECESSÁRIO PRODUZIR ESTE RECIBO. GARANTIA A Home of Living Brands (Pty) Limited (“Home of Livng Brands”) garante ao comprador original deste produto (“o cliente") que este produto não apresenta defeitos de material e fabrico que se manifestam na utilização normal pessoal, familiar ou doméstica num período de 1 (um) ano desde a data de compra (“período de garantia”).
-
Page 22: Garanties Importantes
Félicitations pour l’achat de notre Grille-pain à large fente pour 4 tranches Russell Hobbs Chaque unité est fabriquée afin de d’assurer la sécurité et la fiabilité. Avant d’utiliser cet appareil pour la première fois, merci de lire le manuel avec soin et de le garder à titre de référence. - Page 23 8. Vérifier le cordon d’alimentation et brancher régulièrement pour éviter que le cordon ne soit endommagé. Si le cordon ou la prise sont endommagés, ils doivent être remplacés par le fabricant ou par une personne qualifiée afin d’éviter un danger électrique.
- Page 24 d’utilisation. Attention en cas d’utilisation sur des surface que la chaleur pourrait endommager - il est recommandé d’utiliser un matériau isolant. 22. N’utilisez pas l’appareil avec des produits/préparations alimentaires contenant du sucre ou de la confiture. 23. N’insérez pas d’objets dans le grille-pain. Ne jamais tenter d’extraire des tranches de pain, des muffins, des bagels ou autres à...
- Page 25 GARANTIES SUPPLÉMENTAIRES IMPORTANTES 1. Cet appareil génère de la chaleur et de la vapeur qui s'échappe au cours de l'utilisation. Prenez les précautions nécessaires pour éviter les brûlures, les feux, les dommages matériels ou de blesser des personnes. 2. Une personne n’ayant pas lu et compris m’ensemble des instructions relatives au fonctionnement, le fait de griller du pain et la sécurité, n’est pas qualifiée pour faire fonctionner cet appareil.
-
Page 26: Schéma Des Pièces
SCHÉMA DES PIÈCES A. Levier de mise en marche B. Bouton pour dégeler C. Contrôle de la puissance D. Bouton d’annulation E. Bouton pour les bagels F. Plateau récupérateur de miettes amovible AVANT LA PREMIÈRE UTILISATION Retirez tous les matériaux d’emballage, y compris ceux qui pourraient se trouver à l’intérieur des fentes du grille-pain ou dans la fente du levier pour griller. - Page 27 Déballez le cordon d’alimentation de sa zone de rangement sous le toaster et branchez-le dans une prise électrique de 220-240V. Tournez le bouton de sélection du brunissement sur 1, le réglage le moins élevé. Abaissez le levier pour griller, jusqu’à ce qu’il se verrouille en place. Faites fonctionner une ou deux fois sans le pain, afin de brûler tous les résidus de fabrication.
-
Page 28: Maintenance Et Nettoyage
9. RAPPEL : le levier pour griller ne se verrouillera pas en position, à moins que le grille-pain ne soit branché à une prise de 220 - 240 V. 10. Lorsque vous grillez une seule tranche, le pain peut être placé dans n’importe quelle fente pour griller. -
Page 29: Rangement De L'appareil
Pour le nettoyer, DÉBRANCHEZ LE GRILLE-PAIN ET LAISSEZ-LE REFROIDIR. Pour retirer les miettes présentes dans le grille-pain, ouvrez le plateau récupérateur de miettes qui se trouve sous le grille-pain, videz-le et assurez-vous qu’il est correctement remis en place avant de réutiliser l’appareil. Le plateau récupérateur de miettes devrait être nettoyé... -
Page 30: Maintenance De L'appareil
Ne jamais ranger l'appareil s’il est encore humide ou sale. Ne jamais enrouler le cordon d’alimentation autour du appareil. MAINTENANCE DE L’APPAREIL Il n’existe pas de pièces dans cet appareil, dont la maintenance puisse être faite par l’utilisateur. Si l’unité ne fonctionne pas correctement, veuillez vérifier les points suivants : ... - Page 31 Vert/jaune = Terre Bleu = Neutre Marron = Actif...
- Page 32 VEUILLEZ APPOSER VOTRE PREUVE D’ACHAT / RECU ICI EN CAS DE RECLAMATION PENDANT LA PERIODE DE GARANTIE CE RECUS DOIT ETRE PRESENTE. GARANTIE 1. Home of Living Brands (Pty) Limited (« Home of Living Brands ») garantie à l’acheteur d’origine de ce produit («...
Need help?
Do you have a question about the RHCT04 and is the answer not in the manual?
Questions and answers