Table of Contents
Advertisement
Quick Links
Advertisement
Table of Contents

Related Manuals for AEG FSE83710P


Summary of Contents for AEG FSE83710P
- Page 1 FSE83710P User Manual Dishwasher USER MANUAL...
-
Page 2: Table Of Contents
13. TECHNICAL INFORMATION................. 23 FOR PERFECT RESULTS Thank you for choosing this AEG product. We have created it to give you impeccable performance for many years, with innovative technologies that help make life simpler features you might not find on ordinary appliances. Please spend a few minutes reading to get the very best from it. - Page 3 ENGLISH manufacturer is not responsible for any injuries or damages that are the result of incorrect installation or usage. Always keep the instructions in a safe and accessible location for future reference. 1.1 Children and vulnerable people safety This appliance can be used by children aged from 8 •...
-
Page 4: Safety Instructions
Do not leave the appliance with the open door • unattended to avoid stepping accidentally onto it. Before any maintenance operation, deactivate the • appliance and disconnect the mains plug from the socket. Do not use high pressure water sprays and/or steam •... - Page 5 ENGLISH 2.5 Internal light • Ensure that there are no visible water leaks during and after the first use of the appliance. WARNING! • The water inlet hose has a safety valve Risk of injury. and a sheath with an inner mains •...
-
Page 6: Product Description
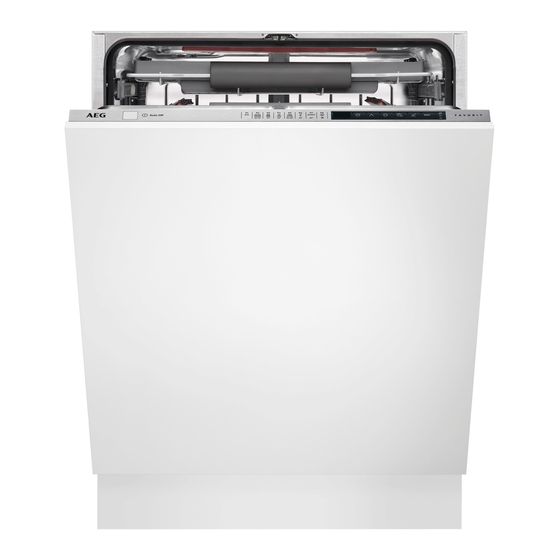
3. PRODUCT DESCRIPTION Top spray arm Rinse aid dispenser Upper spray arm Detergent dispenser Lower spray arm Lower basket Filters Upper basket Rating plate Cutlery drawer Salt container Air vent 3.1 TimeBeam The TimeBeam is a display that is shown on the floor below the appliance door. -
Page 7: Control Panel
ENGLISH When AirDry is activated during the drying phase, the projection on the floor may not be completely visible. To check the remaining time of the running programme, look at the control panel display. 4. CONTROL PANEL On/off button TimeSaver button Display XtraDry button Delay button... - Page 8 Programme Degree of soil Programme phases Options Type of load • All • Prewash • ExtraHygiene • Crockery, cut- • Wash from 45 °C to 70 • XtraDry lery, pots and °C pans • Rinses • Dry • Mixed soil •...
-
Page 9: Settings
ENGLISH 5.1 Consumption values Water Energy Duration Programme (kWh) (min) 0.857 7 - 14 0.6 - 1.6 40 - 170 14 - 16 1.2 - 1.5 160 - 180 12.5-14.5 1.4-1.7 170-190 12 - 14 0.7 - 0.9 82-92 9 - 10 1.1 - 1.3 230 - 250 1) The pressure and the temperature of the water, the variations of the mains supply, the options and the... - Page 10 How to set the programme a detrimental effect on the washing results and on the appliance. selection mode The higher the content of these minerals, The appliance is in programme selection the harder your water is. Water hardness mode when the display shows the is measured in equivalent scales.
- Page 11 ENGLISH 6.4 The rinse aid empty 2. Press notification • The indicators The rinse aid helps to dry the dishes are off. without streaks and stains. • The indicator still flashes. • The display shows the current The rinse aid is automatically released during the hot rinse phase.
- Page 12 There is also an acoustic signal that • The display shows a number and sounds when the programme is letter C. Each number refers to a completed. By default this acoustic different colour. signal is deactivated but it is possible to –...
-
Page 13: Options
ENGLISH How to deactivate AirDry • The indicators are off. The appliance must be in programme selection mode. • The indicator still flashes. 1. To enter the user mode, press and • The display shows the current hold simultaneously until setting: = AirDry activated. -
Page 14: Before First Use
7.3 ExtraHygiene If the option is not applicable to the programme, the related indicator does This option provides better hygiene not come on or it flashes quickly for a results by keeping the temperature at 70 few seconds and then goes out. -
Page 15: Daily Use
ENGLISH 8.2 How to fill the rinse aid 1. Open the lid (C). 2. Fill the dispenser (B) until the rinse dispenser aid reaches the marking ''MAX''. 3. Remove the spilled rinse aid with an absorbent cloth to prevent too much foam. - Page 16 Opening the door while the detergent on the inner part of the appliance door. appliance operates 4. Close the lid. Make sure that the lid locks into position. If you open the door while a programme is running, the appliance stops. It may 9.2 Setting and starting a...
-
Page 17: Hints And Tips
ENGLISH 10. HINTS AND TIPS 10.1 General we recommend that you use the tablets with long programmes. The following hints will ensure optimal • Do not use more than the correct cleaning and drying results in daily use quantity of detergent. Refer to the and also help to protect the instructions on the detergent environment. -
Page 18: Care And Cleaning
• Make sure that the spray arms can • The correct quantity of detergent is move freely before you start a used. programme. 10.6 Unloading the baskets 10.5 Before starting a 1. Let the tableware cool down before programme you remove it from the appliance. - Page 19 ENGLISH 11.2 Cleaning the upper spray We recommend to clean regularly the upper spray arm to avoid soil to clog the holes. Clogged holes can cause unsatisfactory washing results. 1. Pull out the upper basket. 2. To disengage the spray arm from the basket, press the spray arm upwards in the direction indicated by the lower arrow and simultaneously turn...
-
Page 20: Troubleshooting
11.4 Internal cleaning • Carefully clean the appliance, including the rubber gasket of the door, with a soft damp cloth. • If you use short duration programmes regularly, these can leave deposits of grease and limescale inside the appliance. To prevent this, we recommend running long duration programmes at least twice a month. - Page 21 ENGLISH Problem and alarm code Possible cause and solution The appliance does not fill • Make sure that the water tap is open. with water. • Make sure that the pressure of the water supply is not too low. For this information, contact your local water The display shows authority.
- Page 22 Refer to "Before first use", Authorised Service Centre. "Daily use", or "Hints and For alarm codes not described in the tips" for other possible table, contact an Authorised Service causes. Centre. Once you have checked the appliance, deactivate and activate the appliance.
-
Page 23: Technical Information
ENGLISH Problem Possible cause and solution Traces of rust on cutlery. • There is too much salt in the water used for washing. Refer to "The water softener". • Silver and stainless steel cutlery were placed together. Avoid to put silver and stainless steel items close to- gether. - Page 24 Water supply max 60 °C Cold water or hot water Capacity Place settings Power consumption Left-on mode (W) Power consumption Off-mode (W) 0.10 1) Refer to the rating plate for other values. 2) If the hot water comes from alternative source of energy, (e.g. solar panels, aeolian energy), use the hot water supply to decrease energy consumption.
- Page 25 ENGLISH...
- Page 26 www.aeg.com...
- Page 27 ENGLISH...
- Page 28 www.aeg.com/shop...
Need help?
Do you have a question about the FSE83710P and is the answer not in the manual?
Questions and answers