Table of Contents
Advertisement
Quick Links
Advertisement
Table of Contents

Subscribe to Our Youtube Channel
Related Manuals for Cycjet ALT360HP


Summary of Contents for Cycjet ALT360HP
- Page 1 Ink-jet Printer ALT360HP MANUAL SHANGHAI YUCHANG INDUSTRIAL CO., LIMITED...
-
Page 2: Table Of Contents
Table of contents Declare Safety Instruction Packing List Technical Data Environment/Electrical Requirement Install & Test Switch On/Off Operation <The main screen> <system> 1 “Print head management” 2. “Authority” 3 “disk” 4.Ink look 5.Appearance 6. System information 7 “date time’ 8 “calibrate” <Parameter>... -
Page 3: Declare
Our company reserves the right of update at any moment, and unnecessary to notify the users. Copyright reserved by CYCJET. Any unauthorized reproduction, articles picked or other non-approved usages shall bears the legal liability. * NOTE: After 5 minutes non-use, it’ll turn on blank screen saver automatically. -
Page 4: Safety Instruction
Safety Instructions Personal Safety Some inks & cleaners are harmful, please installing & running machine in well ventilated conditions. Some inks& cleaners are flammable, keep away from all sources of heat and ignition. Fire-extinguisher shall be equipped with nearby the machine. ... -
Page 5: Packing List
Packing List Name Quantity Handle Printer 1 PC Charger 1 PC U disk with editing software 1 PC Manual 1 Copy The Manual of Ink-jet Printer... -
Page 6: Technical Data
Technical Data System: 32-bit high-speed processor print head: 150height, 600dpi in vertical. print head number: 1 Print height from 1mm to12.7mm by one print head Print Lines capability: Multi-lines(up to character height) Line speed capability: Max.60mt/min. ... -
Page 7: Environment/Electrical Requirement
Environment/Electrical Requirement Electrical requirement:AC, 110V± 10% 50/60Hz,connect the ground cord. Max Power:15W (average﹤8W) Temperature:5-40℃ Humidity:10-90%(non-condensing) Electromagnetic interference: far away from electromagnetic radiation zone The Manual of Ink-jet Printer... -
Page 8: Install & Test
Install & Test Only trained technicians are authorized to carry out installation. Before install, confirm the machine was stay in a solid & smooth place without electromagnetic radiation. Installed as stipulated in manufacturer’s specification, do not change the relative position of ink system and print head. -
Page 9: Switch On/Off
Switch on/off Switch on: Checked up the power connection status before switch on. After switch on, it will enter into the operation system within 15 seconds. Remove the print head cap and press PRINT key to start printing when using oil-based inks. -
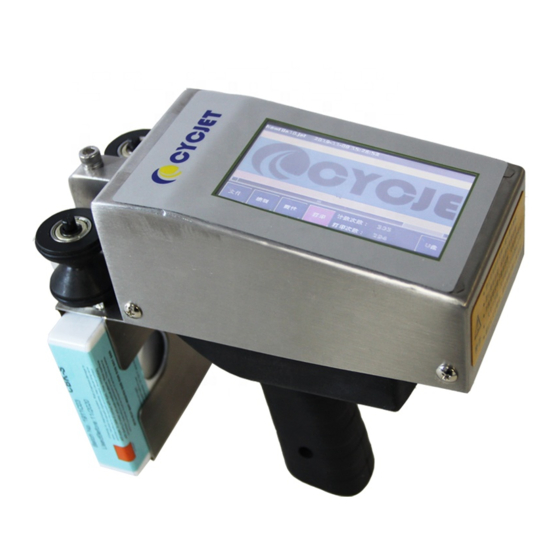
Page 10: Operation
Operation <The main screen> Power on the printer, it will display <the main screen > as photo 2. Pic 2 On the operator interface, you will clearly find five menu items : System 、 、print 、File 、 Edit Parameter Preview Area with scale is located in the middle of screen. -
Page 11: Print Head Management
Operation Pic3 1.print head management Click this button will open the interface of print head management. You can set the value of idle-jet and the continual serial no on this page. A.Idle-jet If you choose solvent ink system, in order to prevent the ink on the surface of the print head becoming dry out which will cause illegible printing result you may need to start idle-jet printing function according to the chosen ink type, temperature,moisture and air flow rate to set the period and line for idle-jet printing. -
Page 12: Authority
Pic 5 “ ” Authority Click the button “Authority” opens a screen as shown. and then, click <OK> button of photo5 to open screen as photo 6. Pic6 According to your requirement, two options is available if you need to set authority Select “Disable”... -
Page 13: Ink Look
Pic 7 It just can upload and download a bmp format single color files from a storage disk through USB interface. Click the required file from the left side of screen, and click an arrow <rightwards> in the middle part. When the required file shows in the right side of screen means download successful. -
Page 14: Date&Time
Pic 9 You can set the length of screen saver and the screen display format. 6. Date&time Pic 10 You can adjust time and date when click “date&time”button. Final value should be confirmed with button <setting> or back by button <cancel>. 8.“Calibrate”... -
Page 15: Parameter
Pic 11-2 Use nib to click the cross center as shown above. when target moving above the screen, please repeat it. After the first click, the latest calibration will be settled. If the second click is correct, please back to System interface and click OK to finish. - Page 16 Print head parameter 1. Print Speed Adjust print speed and print delay according to the speed of production line, the slower the print speed the shorter print delay is. After sensed by Photoelectric sensor, the print time will be reduced.-In about a few milliseconds.
- Page 17 2.2 Interval This setting sets the interval distance between consecutive same prints. 3. How to choose a photoelectric sensor In order to print in the exact position and prevent from error of printing, you are recommended to choose a photoelectric sensor according to the size and color of the product and speed of production line 4.How to choose an encoder If you want to prevent from unstable length and definition of the text printed out due to unstable...
-
Page 18: Print
Pic15-1 Pic 15-2 Use Load button to display possible files.Click on the file name to select the file. Then push OK. Repeat load button and select to load all the files want to print. After the list is produced press the close button. Select OK button to return to the running screen. File Link Example: If you link two files together. -
Page 19: File Browse
Pic16 File Browse Pic 17 You can change the file you want to print here. If you click not under print status, you will see the dialog box as pic 15.Here you can check all your saved file and latest revised time of the file.Click the top part, you can change the order of the files. If you need to change the file you want to print,choose the file you want to print and then click .Click to delete the file you don't need, so that you can store new file with the spare... -
Page 20: Edit
Edit “Edit”including:Text、Special symbol ; Image file ;Bar Code ;Date、 Time、serial number、shift group、BMP generation ,New file creation etc. Pic 18 Click Edit icon to enter Edit zone as picture below Pic 19 1.Image file If you want to print with a picture, please click "Image File" firstly. - Page 21 Pic 20 Note: Image file can only be single color BMP file.The bit map size should not over 160KB. 2. Bar Code Pic 21-1 Pic 22-2 If you want to choose a bar code, choose , then choose the type of the bar code you want to print form the dialog box, you can preview the bar code you choose in the bottom of the dialog box.After choosing the bar code you want,click Bar code content: Various bar code value can be imputed.
- Page 22 Operation 3.Date&Time If you want to generate a new date&time,click ,then choose "date" in the dialog box. Pic 23 Click Set Up Icon to set property of Date, then select the date&time format in the "date setting" dialog box. then set the offset of the date&time on below dialogue box as your actual request. You can preview the date what you have edited in the preview area at the bottom of the dialog box, Click OK to confirm.
- Page 23 Operation Pic 25 Date format: 18 different date formats can be chosen. Date offset:Date offset is available date as your requirement such as period of validity 1, period of validity 2. 4.Serial No( Continuous number) ,choose serial No in the dialog box.Then click Set Up If you want to generate a Serial No,click icon,select format of Serial No in the dialog box,click for certain.
- Page 24 Pic 27 now make your selection of file content by selecting Enter edit zone by selecting An edit function 1. Image file 2. Bar code 3. Date&Time 4. Continuous Number 5. Shift group 6. Text After editing select a new file name by editing the file name block or select OK button to update the present file name content.
- Page 25 Operation 5.Shift group Pic 28 Click if you want to generate shift group, then choose shift group in the dialog box. Click “Set Up” icon to set shift group,set the name and duration of the shift group in the "shift group" dialog box.Preview the shift group that you have edited in the preview area at the bottom of the dialog box.click and back to "Serial No"...
- Page 26 Operation 7.Text feature After you finish text editing, you can change the parameter of the text. Choose "Font" and then you can adjust the font type& font size. If you want to print with dot matrix , please select "dot" and then set the dot width and dot height,horizontal distance of dots ,vertical distance of dots, dot matrix size and round dot.
-
Page 27: Module Operation
Operation Module operation Module operation can work together with "Edit" to work out with perfect printing result. 5 main items : Select 、 location adjustment 、 、delete 、rotate 。 Setting 1. Select Select the text you need firstly, then the text you are choosing will become blue. Then click , you can choose the text according to the order of the text you have edited. - Page 28 Operation Pic 34 4.“Delete”:Choose the text you want to print firstly and then click to delete the text. Pic 29 5.“Rotate” : Choose the text you want to print firstly and then click , to 90 degree counterclockwise rotate the text Pic 35 Note: Module operation can work together with "Edit"...
Need help?
Do you have a question about the ALT360HP and is the answer not in the manual?
Questions and answers