Advertisement
A. Basic setup:
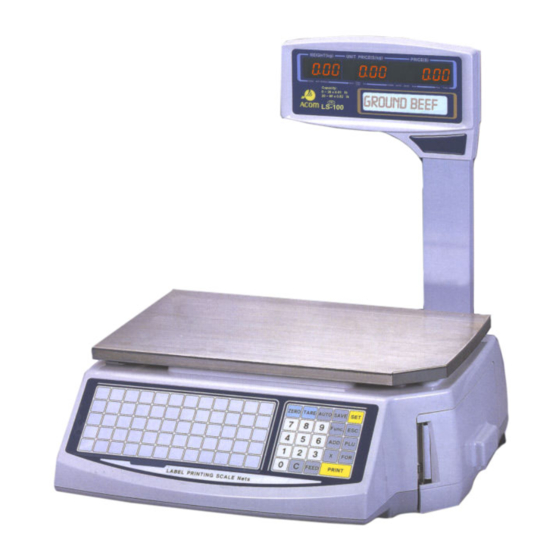
1. Take the scale, pole display, platter, and accessories bag out of the box.
Install the pole display:
2.
a. Connect the display connectors together.
b. Place the Pole Display properly into the bracket making sure that the connectors are slipped inside of the
pole (upwards.)
c. Attach the two display pole screws (2 larger screws) to securely fasten the pole to the bracket.
d. Finally, attach the bracket-plate to the bracket and fasten it with the 4 smaller screws.
Place the scale in the area where it will be used which should be a rigid and level surface. Using the leveling feet and
3.
leveling gage, make sure that scale is level. The leveling gage is located on the right-side rear of the scale by the pole
bracket; the leveling feet are located at the bottom of the scale chassis.
side of the bottom of the scale (closest to the numeric keypad) is not adjustable. Please do not try to adjust this leveling foot;
instead, use the other three feet to adjust the level.
4. Place the platter on the scale platform and then connect the AC cord to the LS-100-N. The AC cord (power cord) goes
connected to the left-side of the scale; there is a label on the scale by the connector ports which indicates what each
connector is for.
5. Make sure that the power switch is in the OFF position which is located above the AC cord connector.
Plug the scale into an AC source.
6.
7. Turn the power switch to the ON position. The scale will do the display test and then go to zero.
8. Press the
FEED
9. The scale should be in the Initial State; all the displays should read:
B. How to program PLUs:
Note: In order to save the PLU "as-is" you can press the
PLU, print a PLU Verification Label, and take you back to step 3.
1. Begin at the Initial State and then press the
2. Using the numeric keys, enter the 4 digit password and press
3. Enter the PLU number you wish to Create or Edit and then press
Initial State. PLU numbers can be up to 6 digits (1 to 9999.) Keep in mind that PLUs 1 to 60 will be automatically
assigned to Speed keys 1 to 60.
4. Press
for By Weight or
1
5. Using the Alpha-Keypad, type the name for this PLU's 1
6. Using the Alpha-Keypad, type the name for this PLU's 2
7. By Weight PLUs go to step 9; By Count PLUs go to step 8.
8. Enter the piece count for this By Count PLU and then press
To price something at "3 for $1.00", you would enter "3" here and at step 9 you would enter "1.00" to get 3 for $1.00.
If the By Count Multiply feature is set up by your Authorized Dealer, then this would function as "3 x $1.00" instead.
9. Enter the Unit Price for this PLU and then press
"Price-per-Pound" for a By Weight PLU or the "Price-per-Piece" for a By Count.
10. Enter the Shelf Life for this PLU and then press
days used to calculate the "Sell By" date that can be printed on the label. If you set the Shelf Life to 0 then the "Sell
By" date will not be printed on the label; if Shelf Life = 1 then the "Sell By" date will be the same as the "Packed On"
date; if Shelf Life = 2 then the "Sell By" date will be the "Packed On date + 1"; etc.
11. (By Count PLUs go to step 12) Enter the Tare weight for this PLU and then press the
can be 4 digits (0.00 to 29.99) and is the weight of the container for this PLU. Tare weight is in pounds.
12. (By Weight PLUs go to step 13) Enter the Net Weight Statement for this PLU and then press
Weight Statement can be up to 4 digits (0 to 9999) and is the approximate weight of the commodity for this PLU. Net
Weight is in ounces (not weighed by scale) and it needs to be "the same or less than" the actual weight of the product.
13. Enter the 1
Line of Ingredients for this PLU and then press
st
of Ingredients and there is a maximum of 10 lines.
14. Enter the 2
Line of Ingredients for this PLU and then press
nd
Line 10. Once you are done typing the Ingredients for Line 10, you can press
step 3; or you can press
Atron Systems, Inc.
4 York Avenue
Easy Weigh LS-100-N Quick Reference Guide
Note: Make certain that none of the wires are being crimped when you are installing the pole display.
Note: The AC source must be 85V ~ 240V DC 50/60 Hz +5%.
key 2 or 3 times collecting the labels as they are fed out each time you press the key.
for By Count.
2
to save the PLU, print a PLU verification label, and then go back to step 3.
SAVE
West Caldwell, NJ 07006
key at any point in PLU programming. Pressing this key will store the
SAVE
key.
SET
PRINT
1
PRINT
Line and then press
st
Line and then press
nd
. The piece count can be from 1 to 99 (2 digits).
PRINT
. The Unit Price can be 6 digits (0.00 to 9999.99.) This is the
PRINT
. The Shelf Life can be 3 digits (0 to 366) and is the number of
PRINT
. You can have up to 56 characters for every line
PRINT
. You can continue doing step 14 until you reach
PRINT
tel: 973-227-8882
Note: The leveling foot located on the front-right
.
; or press
ESC
SET
.
PRINT
3 times.
PRINT
key. The Tare weight
PRINT
to save the PLU and go back to
PRINT
fax: 973-227-8820
www.atronsystems.com
to go back to the
. The Net
PRINT
Advertisement
Table of Contents

Related Manuals for Atron Systems LS-100-N


Summary of Contents for Atron Systems LS-100-N
- Page 1 4. Place the platter on the scale platform and then connect the AC cord to the LS-100-N. The AC cord (power cord) goes connected to the left-side of the scale; there is a label on the scale by the connector ports which indicates what each connector is for.
- Page 2 LS-100-N Quick Reference Guide Ver: 1.90 February 2008 C. How to assign a PLU to a Speed Key: 1. Begin at the Initial State and then press the key. 2. Using the numeric keys, enter the 4 digit password and press PRINT 3.
Need help?
Do you have a question about the LS-100-N and is the answer not in the manual?
Questions and answers