Advertisement
Quick Links
BX-120+ 120 x 0.02 lb
BX-150 150 x 0.05 lb
BX-300+ 300 x 0.05 lb
BX-300 300 x 0.1 lb
BX-600+ 600 x 0.1 lb
BX-600 600 x 0.2 lb
Operating the Scale
Make sure the platter is sitting properly on top of the
platform and that there is nothing on top of the platter.
Also, make sure that the scale is plugged into the proper
outlet. Hold down
until the scale display begins to
show the self test and then release the key. This is the
Initial State and displays appear like this:
The number of zeroes and decimal places may vary
depending on model and capacity.
Simple Weighing:
1. Place an item on the platter
2. The Stable Lamp will indicate a stable weight
3. Remove the item from the platter
Weighing Using Tares:
1. Place the empty container on the platter
2. Press
and then place an item on the platter
3. The Stable Lamp will indicate a stable weight
4. Remove the item from the platter
Once you press
, you will notice that the NET Lamp
will come on indicating to you that the weight shown is a
net weight. For example, this is what the display would
look like after you press
However, after Step 4 the display may look like this:
In this example, the platter is empty and the tare was set
using an empty container that weighs 2.50 pounds.
Clearing Tares:
1. Make sure that there is nothing on the platter
2. Press
and the display will show:
You are back to the Initial State.
Side A
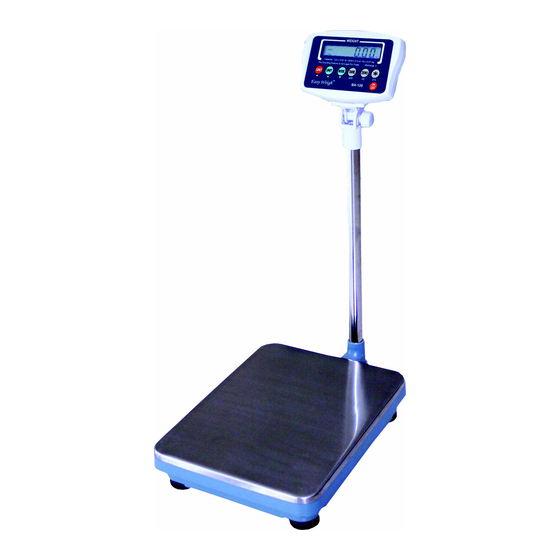
TM
BX-Series Checkweighing Floor Scale
Models &
Capacities
:
Installation & Assembly
Pole & Display: Assembly of the pole display is required.
Please follow the Assembly Instructions on Side B:
1. Insert load cell cable through pole and insert pole
into the bottom bracket. Tighten all screws.
2. Attach the top bracket to the Display Head and feed
the load cell cable through the top bracket and
connect it to the back of the Display Head.
3. Tighten all screws and adjust the Display Head.
4. Remove the Lock Bolt from underneath the platform.
Initial Setup: Plug the AC adapter cable into the rear of
the display head and then the adapter into an AC outlet.
Some units have a fixed AC Cord instead of an adapter.
On/Off Key:
The On/Off Key must be held down for
more than one second in order to turn the scale ON.
Using the Unit Key:
1. Press
and the weighing units will change
2. Repeat Step 1 until you reach the units you desire*
You can use the
key in combination with/without tares
or with/without any weight on the platter. The scale offers
the following units: Pounds (lb), Ounces (oz), Kilograms,
(kg), Grams (g), Counting (Pcs), Percentage (%), and
Pound-Ounce (lb oz). *Note however that Counting,
Percentage, and Pound-Ounce are not to be used in Legal
for Trade applications.
Counting and Percentage Weighing:
1. Follow Unit key instructions to get to Pcs or % units
2. Press and hold down
3. Release the
key. You can select to sample with
10, 20, 50, 100, or 500 pieces* by using the
4. Place the indicated number of piece on the platter and
then press
. The scale will show Pcs or % values.
*Note that when using Percentage, the scale will sample
with 10, 20, 50, 100, or 500 %.
Using the Mode Key:
1. Press
and the weighing units will change
2. Repeat Step 1 until you reach the mode you desire*
You can use the
key in combination with/without tares
or with/without any weight on the platter. The scale offers
the following modes:
Weighing1, Weighing2, Limit, and
Hold. *Note however that Weighing2 and Hold modes are
not to be used in Legal for Trade applications.
Charging the Battery
The
Lamp is located on the top left side of the display.
When it turns ON you need to recharge the battery. The
scale can be ON or OFF when recharging so long as it is
plugged into an AC outlet. The Recharge LED is located
above the
key and shows various states which are
explained on the other side of this guide. An overnight
charge of 12 hours, will yield approximately a 90% charge
or about 90 hours of continuous use (no-backlight.)
until the display shows:
key.
Advertisement

Related Manuals for Atron Systems Easy Weigh BX-120+


Summary of Contents for Atron Systems Easy Weigh BX-120+
-
Page 1: Operating The Scale
BX-Series Checkweighing Floor Scale Installation & Assembly Pole & Display: Assembly of the pole display is required. Please follow the Assembly Instructions on Side B: Models & 1. Insert load cell cable through pole and insert pole Capacities into the bottom bracket. Tighten all screws. 2. -
Page 2: Error Messages
BX-Series Checkweighing Floor Scale Nomenclature & Pole Assembly Recharge LED LED’s color indicates the 4 Charging States. Green: Fully charged, 100% Charge. Yellow: Recharging, 90% ~ 99%. Quick Charge. Red: Recharging, 0% ~ 89%. Keep Charging. Off: Scale running on battery only. No Charge. Keypad Gross/Net/Tare key, toggles the display between Gross, Net, or Tare weights.
Need help?
Do you have a question about the Easy Weigh BX-120+ and is the answer not in the manual?
Questions and answers