Advertisement
Replacing the TID bead on
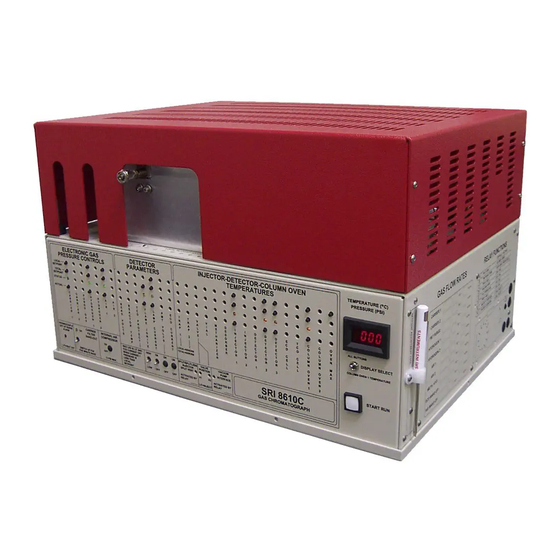
SRI 8610C and 310C GCs
The TID detector is mounted on
the right side of the GC's column
oven.
Use a phillip head screwdriver to
remove the screw holding the insu-
lation cover.
Remove the aluminum cover. Be
sure the detector is cool before
touching.
SRI Tech Support 310-214-5092
Page 1
www.srigc.com
Advertisement
Table of Contents

Subscribe to Our Youtube Channel
Related Manuals for Sri 8610C


Summary of Contents for Sri 8610C
- Page 1 Replacing the TID bead on SRI 8610C and 310C GCs The TID detector is mounted on the right side of the GC’s column oven. Use a phillip head screwdriver to remove the screw holding the insu- lation cover. Remove the aluminum cover. Be sure the detector is cool before touching.
- Page 2 Replacing the TID bead on SRI 8610C and 310C GCs Remove the insulation carefully to avoid breaking off any. Use a 9/16” wrench to remove the collector electrode. Note how far the white alumina insulation pro- trudes from the back of the nut.
- Page 3 Replacing the TID bead on SRI 8610C and 310C GCs Unplug the TID from the push ter- minals. Use a 7/16” wrench to loosen the detector body from the bulkhead fitting. Slide the detector body out of the bulkhead fitting.
- Page 4 Replacing the TID bead on SRI 8610C and 310C GCs Remove the detector cap so you can see better inside the detector body. When you look inside the detector body you will see the bead posi- tioned directly in front of the jet.
- Page 5 Replacing the TID bead on SRI 8610C and 310C GCs Insert the new bead carefully using a new 1/4” soft graphite ferrule if the old ferrule has been overtight- ened. Re-assemble the detector. Set the operating voltage to –300 ( bead volts ). Sometimes the op-...
Need help?
Do you have a question about the 8610C and is the answer not in the manual?
Questions and answers