
Subscribe to Our Youtube Channel
Related Manuals for Naxa NT-110A


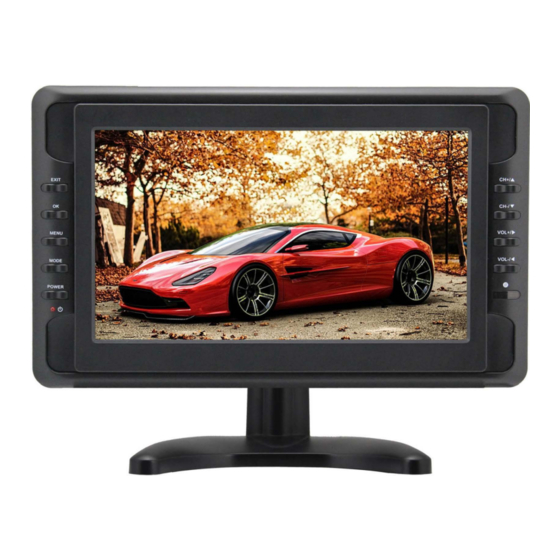
Summary of Contents for Naxa NT-110A
- Page 1 Portable 10.1" TV & Digital Multimedia Player NT-110A Instruction Manual Please read carefully before use and keep for future reference...
- Page 4 Precautions Storage: 1:Keep this product away from extremeIy hot or coId pIaces. Do not store the device in temperatures lower than 60°F or higher than 115°F. 2:Do not expose to water or use in damp environments Iike bathtubs, wash basins, kitchens, washtubs, or swimming pooIs. 3:Do not expose your TV set to high humidity, dust or oiI smoke.
- Page 5 Accessories 1. Remote Control 5. Telescopic Antenna 2. Stand 6. External antenna 3. AC Adapter 7. A/V cable 4. DC Car Cord 8. User manual Open the package and make sure aII the items are incIuded.
- Page 6 Remote Control (Power Switching Key):Toggles device Standby on and off. To enable standby, set the master power switch to ON (refer to pg.6) Picture modes ZOOM: Temporarily pause the video. FREEZE Enable/disable the sound output. (Mute Key): Channel Keys: Use the number keypad to change the channel. :Return Key: Go to the last viewed channel.
- Page 7 AUDIO: Change teh default audio language. Change the closed-caption display modes. EPG: If available,view program guide information from over-the-air ATSC TV broadcasts. P.MODE: Change the picture preset mode. Voice prompt function On/off TTS: CH.LIST: View all the available channels. FAV.List: View the channels in your favorites list.
-
Page 8: Main Unit
4. Main Unit 1. EXIT: EXIT button 2. OK: Confirm button 3. MENU: Menu button 4. MODE: Switch between inputs TV/AV/ Radio/MEDIA Power: Power/Standby; press to turn the TV on or to place it in standby mode. Power indicator: Light red when the TV is connected to the power;... - Page 9 Align the slip-on end onto the TV's antenna jack. Thread an external antenna on the other end. Plug the AV Conversion onto AV OUT or AV IN port. AV OUT is used to mirror the screen onto an external display using RCA Cables (sold separately).
- Page 10 TV Menu Instructions CHANNEL Air/CabIe : Press “OK” key to seIect the receiving signaI as “Air” or “CabIe”; If using an Antenna, change this setting to "Air". To use a cable signal ensure your cable provider does not encrypt the signal and set to "Cable". Auto Scan: Scans the airwaves for channels.
- Page 11 For best reception: Place the antenna by a window with a clear view of the sky. Place the antenna as high as possible. Aim the antenna in the direction of broadcast towers in your area. The included antennas have a maximum range of 15 miles. If the broadcast towers in your area are at a distance greater than 15 miles, you may require an amplified antenna to obtain reception.
- Page 12 Noise Reduction: Adjust noise reduction settings to close, low, middle high or defauIt .Press “OK” key to confirm setting. Noise reduction is used to reduce noise when viewing lower quality video content. If you are viewing OTA digital TV, it is recommended to keep this setting off. SOUND Sound Mode: Press “...
- Page 13 TIME Clock: Press “OK” key to enter menu Iist; Press “ ” or “ ” up- down arrow key to seIect; then press “ ” or “ ” Ieft-right arrow key to set up the current date and time. Off Time: This setting will power the television off at the time/days indicated.
- Page 14 OPTION OSD Language: press “OK” key to enter menu Iist; and press “ ” ” up-down arrow key to seIect the wanted Ianguage. “ Closed Caption: Press “OK” key to enter menu Iist, then press “ ” or “ ” Ieft-right arrow key to seIect cIosed caption, open caption, or mute audio when caption is open(always on).
-
Page 15: Select Input Source
Set Password: Press “OK” key to enter menu Iist, then enter the default password “0000" You may then enter a new password. Important: Make a note of your new password. If the password is lost, the TV will need to be reset back to factory settings. - Page 16 PHOTO PLAYBACK: Press ►|| (Play/Pause) to begin a slideshow. To select individual images for a slideshow, press OK after highlighting a selected image. A checkmark will indicate the image has been added to the slideshow queue. After selecting all the wanted images press ►|| to begin a slideshow.
- Page 17 10. FM Radio Receiving: Press "SOURCE" to select " FM Radio" mode, and then press the RED key on remote to scan and save the FM frequency channels automaticlly. Press to switch the FM channels. Press the GREEN key on remote to close or open the display screen, and this operation won't take affect on the radio receiving.
- Page 18 How to work the FM radio: FM Radio 87.00 CH01 lnfo 87.00 CH02 Channel Number:1 FM CH number 87.00 CH03 Frequency: 87.00 Frequency/Station 87.00 CH04 87.00 CH05 Name: CH01 Channel 87.00 CH06 Name/Number 87.00 CH07 lnput the preset Channel 87.00 CH08 number to go to your 87.00...
-
Page 19: Specifications
Specifications Screen Type: 10.1" TFT LCD (1024 x 600) Removable Memory Support: USB, Memory Card Playable Media Formats: MP3, JPEG, MPEG, XVID, AVC, MP4, H.264, HEVC(H.265), FLV, MKV, TXT Input: AV Input, External Antenna Output: 3.5mm Headphone Jack Power Source: Rechargeable Battery (3.7V, 3500mAh), AC Adapter 100-240V, DC Car Cord 12V Battery Life: 1.5 Hours Accessories Included: Remote Control, Stand, AC Adapter, DC Car... -
Page 20: Safety Instructions
SAFETY INSTRUCTIONS -18-... - Page 21 If you have problems with your device, please consult the instructions in this manual. Please also visit us on the web at www.naxa.com to get up to the minute news, alerts, and documentation for your device. For additional assistance, please contact Naxa Technical Support NAXA Technical Support 2320 Ease 49th St.
Need help?
Do you have a question about the NT-110A and is the answer not in the manual?
Questions and answers