Table of Contents
Advertisement
Quick Links
Advertisement
Table of Contents

Related Manuals for Firgelli FA-TVL-180 Series


Summary of Contents for Firgelli FA-TVL-180 Series
- Page 1 The FA-TVL-180 Series Pop-Up TV Lift...
-
Page 2: Tools Required
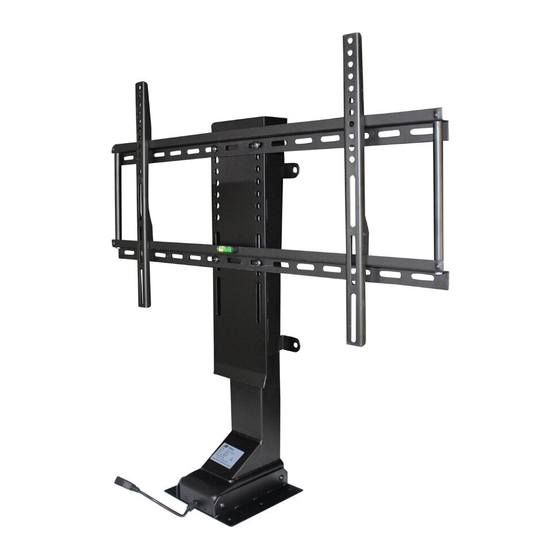
/carpeted area to avoid damage. TOOLS REQUIRED HARDWARE 2 Screws M5x50 4 Screws 8 Hex Bolts 4 Hex Bolts 4 Nuts 8 Spring Washers 8 Washers M5x50 M6x16 M6x14 M8x16 COMPONENTS Page | 2 Firgelli Automations Email: support@firgelliauto.com 1-866-226-0465 Ext. 2... - Page 3 Washers M6 Spring Washers M6 Hex Bolts M6x14 Screws M5x50 TV Mounting Bracket Nuts M8 Mounting Bracket Screws M6x16 Hex Bolts M8x16 Connection and Power Cable Remote Handset Control Box Page | 3 Firgelli Automations Email: support@firgelliauto.com 1-866-226-0465 Ext. 2...
-
Page 4: Assembly And Installation
Optional tabs for wall mounting 2. Use 4 Hex Bolts M6x14, each with a Spring Washer and Washer, to attach the Mounting Bracket to the top of the Column. Tighten the 4 Bolts. Page | 4 Firgelli Automations Email: support@firgelliauto.com 1-866-226-0465 Ext. 2... - Page 5 TV’s and gives you flexibility to position the TV relative to the Lift however you prefer. Page | 5 Firgelli Automations Email: support@firgelliauto.com 1-866-226-0465 Ext. 2...
- Page 6 4. Use 4 Hex Bolts M8x16, with 4 Nuts M8, to attach the TV Mounting Bracket to the Mounting Bracket. Tighten the 4 Bolts. The Mounting Bracket comes with different mounting positions to allow for different sized TV’s. Page | 6 Firgelli Automations Email: support@firgelliauto.com 1-866-226-0465 Ext. 2...
- Page 7 5. Secure the other 2 long arms of the TV Mounting Bracket onto the back of the TV set with 4 screws included with the TV set. Then hang the TV set onto the TV Mounting Bracket as shown. Use 2 M5x50 screws to tighten on the bottom. Page | 7 Firgelli Automations Email: support@firgelliauto.com 1-866-226-0465 Ext. 2...
- Page 8 (5 pin plug) with the 1st port on control box. Ports No.2-4 are blocked and cannot be used. Connect the power cable to the control box and plug into power source. Page | 8 Firgelli Automations Email: support@firgelliauto.com 1-866-226-0465 Ext. 2...
-
Page 9: Operation
Remote Controller as well as the STUDY button on the Hand Controller simultaneously and hold. The LED light will flash three times, which indicates studying is complete. Release buttons when studying process is complete. Page | 9 Firgelli Automations Email: support@firgelliauto.com 1-866-226-0465 Ext. 2... -
Page 10: Remote Controller
When the switch is conducted successfully, the red light will be on and the remote controller will flash to signal that the change has been saved. • The setting will be remembered for future remote use. Page | 10 Firgelli Automations Email: support@firgelliauto.com 1-866-226-0465 Ext. 2... -
Page 11: Hand Controller
It will return to normal operation after 16 minutes. When the system enters into working protection mode the indicator light will flash once every 3 seconds. If the lift stops working for any other reason, perform RESET procedure • Page | 11 Firgelli Automations Email: support@firgelliauto.com 1-866-226-0465 Ext. 2... -
Page 12: Specifications
10%, max 2 min. continuous use Operating +5° C - +40° C Temperature Overload Built-In Protection Material Powder Coated Steel Additional Feature Adjustable Height Thank you for purchasing our TV Lift. Page | 12 Firgelli Automations Email: support@firgelliauto.com 1-866-226-0465 Ext. 2...
Need help?
Do you have a question about the FA-TVL-180 Series and is the answer not in the manual?
Questions and answers