Table of Contents
Advertisement
Quick Links
Advertisement
Table of Contents

Related Manuals for Kogan CERTA POWERPLUS 20V


Summary of Contents for Kogan CERTA POWERPLUS 20V
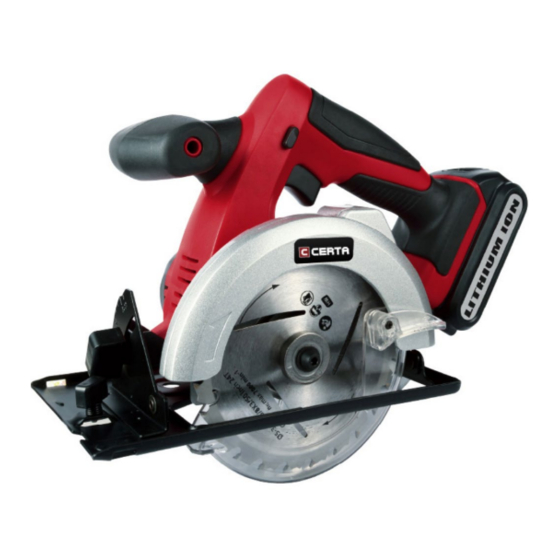
- Page 1 POWERPLUS 20V CORDLESS CIRCULAR SAW (SKIN ONLY) CT20VCIRCSWB...
-
Page 3: Safety And Warnings
SAFETY & WARNINGS Save all warnings and instructions for future reference. The term “power tool” refers to your mains operated (corded) power tool or battery-operated (cordless) power tool. Work area • Keep your work area clean and well lit. Cluttered benches and dark areas invite accidents. - Page 4 Personal safety Stay alert, watch what you are doing and use common sense when operating a power tool. Do not use tool while tired or under the influence of drugs, alcohol or medication. A moment of inattention while operating power tools may result in serious personal injury.
- Page 5 Do not use the circular saw if it has been damaged, left outdoors in the rain, snow, wet or damp environments or immersed in liquid. • Maintain labels and nameplates on the tool. These carry important information. If unreadable or missing, contact Kogan for a replacement.
- Page 6 Either of these situations could result in a serious accident. Kogan.com accepts no liability for accidents caused through misuse or not following the instructions supplied here. Usage of power tools carries the risk of property damage, serious...
- Page 7 Safety instructions for the battery charger • Before using battery or charger, read all instructions and cautionary markings on the battery charger, battery pack and product using the battery. • Use only the charger which accompanied your product or direct replacement. Do not substitute any other charger.
- Page 8 Safety instructions for the battery pack • Do not incinerate the battery pack even if it is severely damaged or is completely worn out. The battery pack can explode in a fire. Toxic fumes and materials are created when lithium-ion battery packs are burned. •...
- Page 9 OVERVIEW Battery Lock Knob for Rip Front Handle Release Lower Guard Guide Button Lock-Off Battery Pack Blade Washer Rip Guide Button (Not Included) Depth Adjustment Switch Trigger Base Plate Saw Blade Knob Bevel Battery Charger Main Handle Upper Guard Adjustment (Not Included) Knob...
-
Page 10: Operation
OPERATION Saw blade assembly/removal Assembly: Remove the battery pack (6) from the saw. Retract the lower guard (9). Slip the saw blade onto the inner blade washer. Replace the outer blade washer. Depress the spindle lock button and then replace the blade screw. Turn the screw counter-clockwise with the blade wrench. - Page 11 Spindle lock button Blade screw Blade wrench Removal: Remove the battery pack from the saw. Depress the spindle lock button and then turn the blade screw clockwise to loosen with the blade wrench. Remove the outer blade washer, then the saw blade.
- Page 12 Adjusting the cutting depth Remove the battery pack. Hold the saw firmly and loosen the depth adjustment knob (15) by turning it counter-clockwise. Move the base plate to obtain the desired depth of cut. Tighten the depth adjustment knob securely by turning is clockwise before operating the saw.
- Page 13 Lock-off button • The saw is equipped with a lock-off button (2) which reduces the possibility of accidental starting. • The lock-off button is located on the handle above the switch trigger. You must depress the lock-off button to pull the switch trigger. •...
- Page 14 Plunge cutting Mark out the line to cut so it is easily visible. Start inside the area to be cut. Set the base plate against the workpiece at an angle. Lift the lower blade guard with the handle. Depress the lock-off button and press the switch trigger down to start the saw. When the blade reaches full speed, slowly feed the blade into the work in the piece.
- Page 15 Whether there is proper contact at the charging contacts on the charger If the battery continues to fail to charge, contact the Kogan customer support team. To ensure that the battery pack provides long service you should take care to recharge it as soon as you notice that the power of the power tool drops.
-
Page 16: Care And Maintenance
Some of these include gasoline, turpentine, lacquer thinner, paint thinner, chlorinated cleaning solvents, ammonia and household detergents containing ammonia. Tool maintenance must only be performed by qualified repair personnel. If the tool is not working properly, do not attempt to repair it yourself. Contact the Kogan customer support team. -
Page 17: Specifications
SPECIFICATIONS Rated Voltage No load speed 0-3800/min Blade size 136mm Depth of cut 38mm at 90° Bevel range 0° - 50° Battery & charger Battery pack 20V 2000mAh Li-ion Battery Pack Charging time ~1 hour Input: 100-240V 50-60Hz Charger adapter Output: 21V 2A... -
Page 18: Troubleshooting
TROUBLESHOOTING Problem Possible Causes Likely Solutions • Check battery pack • Battery pack not installed installation. Tool will not start. properly. • Check battery pack • Battery pack not charged. charging requirements. • Insert battery pack into charger until red LED appears. - Page 19 NOTES...
- Page 20 Need more information? We hope that this user guide has given you the assistance needed for a simple set-up. For the most up-to-date guide for your product, as well as any additional assistance you may require, head online to help.kogan.com...
Need help?
Do you have a question about the CERTA POWERPLUS 20V and is the answer not in the manual?
Questions and answers