Table of Contents
Advertisement
USE AND CARE GUIDE
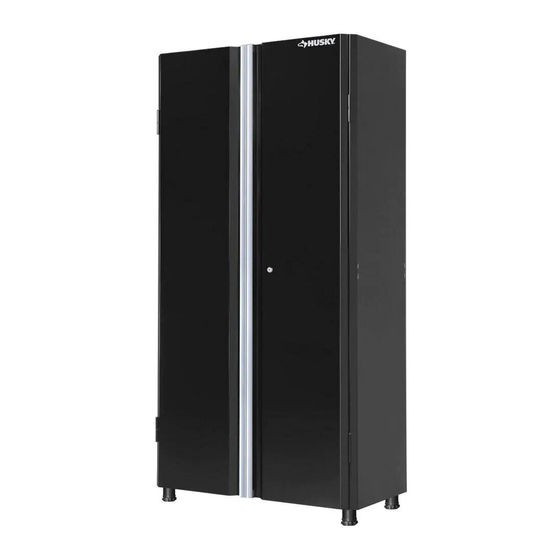
30 IN. STORAGE CABINET
Questions, problems, missing parts?
Before returning to the store, call
Husky Customer Service
8 a.m. - 5 p.m., EST, Monday - Friday
1-888-HD-HUSKY
WWW.HUSKYTOOLS.COM
Due to continuing improvements,
the actual product may differ slightly
from the product described herein.
We appreciate the trust and confidence you have placed in Husky through the purchase of this cabinet. We strive to continually
create quality products designed to enhance your home. Visit us online to see our full line of products available for your home
THANK YOU
improvement needs. Thank you for choosing Husky!
Item #
1003 244 675
Model #
G3002T-US
Advertisement
Table of Contents

Summary of Contents for Husky G3002T-US
- Page 1 THANK YOU We appreciate the trust and confidence you have placed in Husky through the purchase of this cabinet. We strive to continually create quality products designed to enhance your home. Visit us online to see our full line of products available for your home...
-
Page 2: Table Of Contents
This warranty excludes incidental/inconsequential damages and failures due to misuse, abuse or normal wear and tear. This full warranty gives you specific rights, and you may also have other rights, which vary state to state. Contact the customer service team at 1-888-HD-HUSKY or visit www.huskytools.com. -
Page 3: Specifications
NOTE: Hardware not shown to actual size. Part Description Quantity M6 x 16 hex socket head screw M6 x 40 hex tapping bolt Shelf bracket Adjustable foot Safety bracket M6 x 16 hex socket head cap screw Grommet WWW.HUSKYTOOLS.COM Please contact 1-888-HD-HUSKY for further assistance. - Page 4 Pre- Assembly (continued) PACKAGE CONTENTS Part Description Quantity Part Description Quantity Top panel Bottom panel Shelf Right side panel Back panel Left side panel Left door Safety strap Right door...
-
Page 5: Assembly
M6 x 16 hex socket head cap screws (FF) (security screws) and head screws (AA). six M6 x 16 hex socket head screws (AA). Two M6 x 16 hex socket head cap screws for additional door security X 16 WWW.HUSKYTOOLS.COM Please contact 1-888-HD-HUSKY for further assistance. - Page 6 Assembly (continued) ATTACHING THE TOP PANEL Attach the top panel (A) to the side panels (C & G) with eight M6 x 16 hex socket head screws (AA). Insert the screws by hand. DO NOT tighten. ATTACHING THE BACK PANELS CAUTION: Make sure your floor is free of debris or the cabinet face is protected before laying the cabinet on its face.
- Page 7 Slots on the inner back side of side X 12 panel magnet Slots on the inner front side of side panel WWW.HUSKYTOOLS.COM Please contact 1-888-HD-HUSKY for further assistance.
- Page 8 Assembly (continued) INSTALLING THE GROMMETS Insert the short side of hex wrench by half at your desired cord access holes, and pry the knock-outs towards your side. □ Drop off the knock-outs carefully and install the grommets (GG). □ After installation...
-
Page 9: Maintenance
□ Fasten the tall cabinet by using the safety strap (I) to tie the tall cabinet and safety bracket (EE) together. Tighten securely. Wall Wall 70.4 in. floor Check the safety strap periodically for tightness. Tighten it when necessary. WWW.HUSKYTOOLS.COM Please contact 1-888-HD-HUSKY for further assistance. -
Page 10: Service Parts
Service Parts Replacement Part Part Replacement Part # Description Quantity Part Quantity # Description Lock 304213 304212 Top panel Magnet 120524 312033 M6 x 16 hex socket head screw 241112 Shelf 320327 M6 x 40 hex tapping bolt 120522 320328 Left side panel Shelf bracket 203902... -
Page 11: Coordinating Products
72 In. Solid Wood Work Surface 36 In. Pegboard 28 In. Wall Cabinet 30 In. Storage Cabinet 28 In. 2-Door Base Cabinet 28 In. 1-Drawer 2-Door Base Cabinet 5 In. x 2 In. Caster Set WWW.HUSKYTOOLS.COM Please contact 1-888-HD-HUSKY for further assistance. - Page 12 Questions, problems, missing parts? Before returning to the store, call Husky Customer Service 8 a.m.-5 p.m., EST, Monday-Friday 1-888-HD-HUSKY WWW.HUSKYTOOLS.COM Retain this manual for future use.


Need help?
Do you have a question about the G3002T-US and is the answer not in the manual?
Questions and answers