
Related Manuals for Kohler Mira Advance 8.7


Summary of Contents for Kohler Mira Advance 8.7
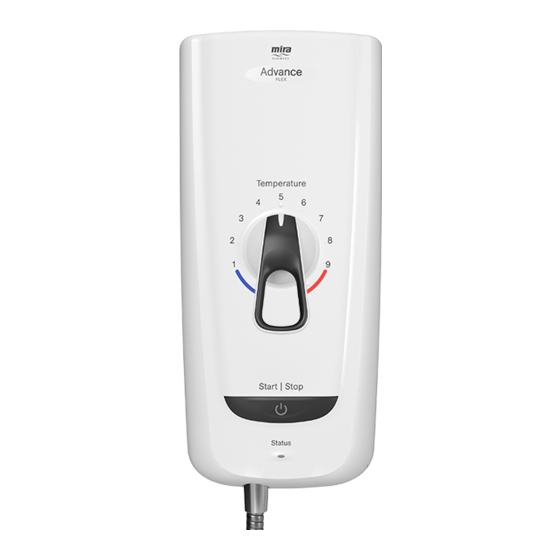
- Page 1 Mira Advance THERMOSTATIC ELECTRIC SHOWER 8.7 and 9.8 kW For SPARES, ADVICE or REPAIRS please call us free on 0800 001 4040 (UK only) These instructions must be left with the user Installation Guide 1306246-W2-D...
-
Page 2: Important Safety Information
Important Safety Information WARNING - This shower can deliver scalding temperatures, cause fire, electric shock or other personal injury if not operated, or maintained in accordance with the instructions, warnings and cautions contained in this guide and on the appliance. Please read the important safety information and the operation section of this guide before using the shower. - Page 3 9. Installation of the shower must be carried out in accordance with these instructions by qualified, competent personnel. Read all instructions before installing the shower. 10. DO NOT switch the shower on if water starts leaking from the shower case. Isolate the electrical supply to the shower immediately. 11.
- Page 4 Only Kohler Mira recommended accessories should be used. 23. DO NOT perform any unspecified modifications, or drill or cut holes in the product other than instructed by this guide.
-
Page 5: Products Covered
The Bluetooth® word mark and logos are registered trademarks owned by the Bluetooth SIG, Inc. and any use of such marks by Kohler Mira Ltd is under license. Other trademarks and trade names are those of their respective owners. -
Page 6: Recommended Usage
Recommended Usage Domestic Light Commercial Heavy Commercial Healthcare This product is classified as suitable for Domestic and Light Commercial Use and Healthcare, for installation in the UK only. For installation outside of the UK please contact Mira Showers/Rada for advice on suitability. Examples of Light Commercial use and Healthcare are given but not limited to those shown below. -
Page 7: Pack Contents
Pack Contents Tick the appropriate boxes to familiarise yourself with the part names and to confirm that the parts are included. 1 x Mira Advance Flex or Flex Extra 1 x Mira Advance Standard (Instantmatch by Whale® Pump supplied separately) 1 x Compression Nut 2 x Wall Plugs 1 x Cover Insert... -
Page 8: Specifications
Specifications Supply Source Mains pressure cold water only 50 kPa (0.5 bar) Minimum Dynamic Pressure* (100 kPa (1 bar) BEAB Care) Maximum Dynamic Pressure 500 kPa (5.0 bar) Maximum Static Pressure 1000 kPa (10 bar) Minimum Static Pressure** 20 kPa (0.2 bar) Maximum Inlet Temperature 30°C (20°C BEAB Care) Minimum Inlet Temperature... - Page 9 Hereby, Kohler Mira Ltd. declares that the radio equipment type Mira Advance Flex Extra (J09N) is in compliance with Directive 2014/53/EU. The full text of the EU declaration of conformity is available at the following internet address: www.mirashowers.co.uk.
-
Page 10: Tools Required
This could cause scalding or severe damage to the product and will invalidate the guarantee. Only Kohler Mira recommended showerheads, shower hoses and accessories must be used. - Page 11 Plumbing Refer to section: ‘Important Safety Information’ first. 1. Do not use sealing compounds on any pipe fitting or joints. 2. To avoid damage to the case when soldered fittings are used, pre-solder the pipework and fittings before connecting them to the inlet connector assembly. 3.
- Page 12 Electric Shower Zone of Backflow Risk 25 mm Minimum 30 mm Minimum 25 mm Minimum Bath or Shower Toilet or Bidet Hand Basin Tray FC3 Hose Retaining Ring fitted and shower fittings fixed at a suitable height preventing dirty water backflow. Note! There will be occasions when the hose retaining ring will not provide a suitable solution for Fluid Category 3 installations, in these instances an outlet double checkvalve must be fitted, this will increase the required supply pressure typically by...
- Page 13 4. For new installations a 30 mA Residual Current Device (RCD) must be incorporated into the electrical supply to the shower in accordance with the current wiring regulations. When replacing an existing electric shower we recommend that a 30 mA RCD is incorporated in accordance with current wiring regulations if not already provided.
- Page 14 BROWN B Shower Unit Wiring Diagram - Standard and Flex Product Only 1306246-W2-D...
-
Page 15: Installation
Fixing Hole Optional 1327483-W7-A Outlet Kohler Mira Limited, July 2017 Hole Connector Use the installation template provided to mark and drill the required fixing holes. Do not drill through the shower unit into the wall. Plaster and brick dust will damage the internal components of the product. - Page 16 Remove the cover screw. Remove the cover, the service tunnel and the bungs. Determine the cable and pipe supply either top or bottom or rear connection. Turn the inlet connector to suit supply Complete any soldering required away pipe. Do not trap the green wire. from the appliance.
- Page 17 DO NOT REMOVE TO FLUSH THE PRODUCT 1 Min 1 Min DO NOT flush through the product by removing the inlet filter. Debris may damage the product and invalidate the guarantee. Flush the pipework for approximately 1 minute prior to connection. Drill the fixing holes through the plastic case in the designated areas as required.
- Page 18 Connect the hose pointing into the bath Connect supply pipe, then turn the water or tray. supply on and check the shower unit for leaks. DO NOT overtighten. Note! Make sure that the hose washer is fitted. DO NOT fit the shower head at this stage. Important! Priming the Shower Make sure that the electrical supply is isolated!
- Page 19 N = Blue or Black = Green or Yellow/Green L = Brown or Red Feed the electrical cable into the case. Firmly connect the conductors. DO NOT exert strain on the terminal block. Refit the service tunnel. Important! Refer to set up before fitting the front cover. 1306246-W2-D...
- Page 20 Setup Maximum Temperature/BEAB/Eco (6 L/Min) You must set the product up to ensure it operates correctly for the users requirements. BEAB and Eco mode cannot be used together, if both modes are selected the shower will operate in BEAB mode and the Eco switch will not have any affect. Factory setting with all switches in the off position at maximum temperature of 48°...
- Page 21 Bluetooth Setup Mira Advance Flex Extra (J09N) for use with the Instantmatch by Whale® Digital Pump Instant Match Bluetooth Transformer SDS236T (755.678) Flex Extra J09N The bluetooth operation of the Advance Flex Extra (J09N) will only work with a Whale bluetooth transformer. Pre- vious Whale RF wireless transformers will not connect to the bluetooth Advance.
- Page 22 Hardwired Connection Mira Advance Flex Extra (J09N) for use with the Instantmatch by Whale® Digital Pump Flex Extra J09N Whale Instant Match Transformer SDS236T (755.678), SDS233T (755.617) SDS135T (755.649) Do not remove label BEAB CARE MODE 43 DEG C 45 DEG C RESERVED 1 RESERVED 2 BLE PUMP ENABLE...
- Page 23 Advance Relay Board Showing Hardwired Connection to the Transformer Caution! Take care not to damage the relay board when making connections. Configuration 1 Important! Make sure that you hold the connector when you tighten the screws. CN13 CN13 Brown Brown White Black TERMINAL BLOCK...
- Page 24 Hardwired Connection - Other Whale Transformer The Mira Advance 'Extra' models can be connected to the Instantmatch by Whale® Pump. This section describes how to identify and connect the shower to the drain pump. For full installation instructions of the Instantmatch by Whale® Pump, see separate guide.
- Page 25 Bluetooth Pairing Follow the steps below to pair the shower with a Bluetooth pump. If the shower has been paired previously and is required to pair with a different pump, it is necessary to unpair the shower first (see page 24). BEAB CARE MODE 43 DEG C 45 DEG C...
- Page 26 Bluetooth Unpairing (Transformer) Some spare part renewal e.g. control PCB, may require the shower and pump to be unpaired and then paired again. 1 2 3 4 5 6 7 10 30 60 1 2 3 4 5 6 7 10 30 60 10 30 60 1 2 3 4 5 6 7...
- Page 27 Post Installation Procedure Turn on the electrical Turn on the power to appliance, Turn the temperature to supply. check Start/Stop for white light. full cold. BEAB X 3 5 secs The shower will beep once when start/stop Start the shower to test for water button is pressed (3 times for BEAB mode).
- Page 28 Post Installation Procedure (Continued) Turn on the power to appliance, Turn on the electrical Turn the temperature check Start/Stop for white light. supply. control to number 8. Note! The shower will beep 3 times if set to BEAB mode Start the shower to test for water flow. The shower will beep once (3 times when set in BEAB mode) and the white start/stop light and orange status light...
-
Page 29: Fault Diagnosis
Important Cleaning Information Cleaning Always read the IMPORTANT SAFETY INFORMATION for your shower. Cleaning the showerhead Many household and commercial cleaners, including hand and surface cleaning wipes contain abrasive and chemical substances that can damage plastics, plating and printing and should not be used. These finishes should be cleaned with a mild washing up detergent or soap solution, and then wiped dry using a soft cloth. -
Page 30: Installer Checklist
Installer Checklist 1. Have you primed the flow valve? (See priming the shower) Failure to purge the air sufficiently from the flow valve could lead to pulsating water flow. 2. Is the water supply pressure sufficient? This shower is designed to be fitted to the mains water supply only. See specifications for minimum pressure information. -
Page 31: Diagnostic Procedure
Diagnostic Procedure Ensure the shower pull cord / isolator switch is in the OFF position, then turn ON the pull cord / isolator switch. Start the shower and observe light fault indication (if any) and refer to Error Codes to determine failure and rectify. - Page 32 Fault Indication Start/Stop Status Code Cause Initial Action Start/Stop button Flashing Contact customer services. stuck Red Blue Flashing Relay Board failure Contact customer services. Red White Should the fault remain after the initial action, press and hold the ‘Start/Stop’ button and note the Status light sequence. Flashing Cover PCB failure Contact customer services.
-
Page 33: Beab Care In-Service Tests
BEAB Care In-Service Tests The BEAB Care In-Service Tests apply to products operated and maintained within the BEAB Care approval requirements. To maintain the validity of the BEAB Care mark, the installation and appliance should be inspected regularly. The purpose of the in-service tests is to monitor and record the performance of the shower. - Page 34 Test Procedure This procedure should be conducted by qualified, competent personnel only. WARNING, LIVE ELECTRICAL WIRES ARE EXPOSED WHEN THE COVER IS REMOVED! 1. Turn the temperature control fully anti-clockwise. 2. Start the shower and allow it to run for at least two minutes 3.
-
Page 35: Maintenance
Maintenance Tradesperson Maintenance - Inlet Filter Cleaning/Replacing Read the section 'Important Safety Information' first. Electrical and water supplies to appliance Remove cover screw, cover and splash are turned off. guard. Disconnect ribbon cable from cover Hold a spanner or other suitable grips Make sure all plumbing connections are across flats of the metal connector. -
Page 36: Spare Parts
Spare Parts Warning! If the wiring layout is changed or amended, the product functionality and safety may be affected. In the interests of safety, spares requiring exposure to mains voltage should only be fitted by competent persons. 1785.590 Relay Board 1643.103 Terminal Block Earth Wire/Neutral Wire... - Page 37 1306246-W2-D...
- Page 38 Notes 1306246-W2-D...
- Page 39 Notes 1306246-W2-D...
-
Page 40: Customer Support
Kohler Mira Limited. Cromwell Road, K/E S.A.S. Cheltenham, 3 rue de Brennus, The company reserves the right Gloucestershire 93631, La Plaine Saint-Denis, to alter product specifi cations GL52 5EP France without notice. 14648 1306246-W2-D © Kohler Mira Limited, June 2021 1473739-W6-A...
Need help?
Do you have a question about the Mira Advance 8.7 and is the answer not in the manual?
Questions and answers