
Related Manuals for GoldenEar Technology Invisa SPS


Summary of Contents for GoldenEar Technology Invisa SPS
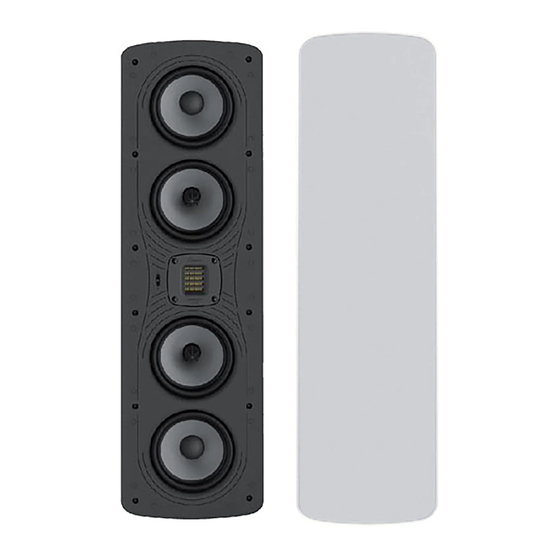
- Page 1 Invisa SPS ® Invisa Signature Point Source In-Wall/In-Ceiling Loudspeaker Owner’s Manual...
-
Page 2: Preventing Speaker Damage
Invisa Signature Point Source Owner’s Manual Congratulations! Congratulations and thank you for purchasing GoldenEar’s Invisa Signature Point Source ™ ® speakers! You are about to hear the spectacular difference these very special In-Wall / In- Ceiling speakers will make in your music and/or home theater system! Our engineers’... - Page 3 Amplifier Distortion — #1 Threat to your New Speakers! Amplifier distortion is the principal cause of speaker damage. When listening at loud levels your amplifier may run out of clean power. It will then begin to produce speaker-damaging distorted power. This will damage any brand of speaker very quickly! More powerful amplifiers are actually safer —...
-
Page 4: Speaker Placement
Invisa Signature Point Source Owner’s Manual Speaker Placement GoldenEar Invisa Signature Point Source speakers are designed to allow flexible placement while providing a ® very large window of sound throughout your listening room. Please remember that although the following recommendations are usually valid, all rooms and listening sets-ups are somewhat unique. Remember, whatever sounds best to you is correct. - Page 5 FOR BEST IMAGING: For in-wall installations of L/R mains, measure the distance from your main listening area to the left front speaker (we’ll call this distance “X”). For optimal imaging and largest soundstage, place speakers “X” distance apart from each other (and no less than of that distance —...
-
Page 6: Speaker Break-In
Invisa Signature Point Source Owner’s Manual 7.1 System Rear Speaker Location Options Speaker Break-in Your new Invisa Signature Point Source loudspeaker system should sound good as soon as you turn them on; however, ® an extended break-in period of 40-60 hours or more of normal playing time is required to reach full audiophile performance capability. -
Page 7: Installation Instructions
Installation Instructions Installation of your new Invisa Signature Point Source speakers requires use of tools such as a drill, screwdriver, saws ® and possibly other power tools. The installer should have knowledge of all applicable building and/or fire codes. Care must be taken to ensure the area behind the wall or ceiling where you plan to install the speakers is clear of obstruc- tions. - Page 8 Invisa Signature Point Source Owner’s Manual For In-Wall Mounting: • For optimum performance, loosely place two pieces of standard fiberglass insulation in the wall, one just above the hole and one just below. An 8" x 10" piece should work well, R-12 for a 2x4 wall, R-20 for a 2x6 wall.
- Page 9 8. Loosen the six rotating lock arms on the speaker by turning the arm screws on the front of the speaker counterclockwise 1/2 to 1 turn, just enough to allow the lock arm to move freely (Figure 4). • Make sure the rotating lock arms are positioned inwards (Figure 5) so that your speaker fits into your cutout hole. LOCK ARM SCREWS TURN COUNTER...
- Page 10 Invisa Signature Point Source Owner’s Manual 10. While holding in place, tighten the six lock arm screws with a screwdriver (Figure 7). This will rotate the lock arms and secure the speaker to the wall/ceiling. DO NOT OVERTIGHTEN the lock arm screws as this could damage the drywall.
- Page 11 Rotating Tweeter for Horizontal Installations When installing the Invisa Signature Point Source horizontally, as in a typical center channel application, you must rotate the tweeter 90 degrees for proper performance. See Figure 8. TWEETER CAN BE ROTATED BY REMOVING SCREW (4 PLACES), PULLING TWEETER ASSEMBLY OUT SLIGHTLY, ROTATING IT 90º...
- Page 12 Invisa Signature Point Source Owner’s Manual Complete Home Theater Systems We strongly suggest that you use matching GoldenEar Invisa loudspeakers and a ForceField subwoofer, for your ® ™ complete GoldenEar home theater system. Invisa Signature Point Source speakers are designed to be used as ®...
-
Page 13: Troubleshooting
Troubleshooting If you experience any difficulties with your Invisa Signature Point Source speakers, try the suggestions described ® below. If you are still having problems, please consult your GoldenEar Authorized Dealer for assistance. Make sure all your system interconnects, speaker cables and power cords are solidly in place. Check that no foreign objects or liquid has entered the speaker. -
Page 14: Specifications
Invisa Signature Point Source Owner’s Manual Specifications Invisa Signature Point Source ® Dimensions: SPEAKER: ⁄ " (70 cm) H x 7- ⁄ " (20.2 cm) W x 3- ⁄ " (8.25 cm) D Depth with Optional Back Box 3- ⁄ "... -
Page 15: Limited Warranty
Limited Warranty 5-YEARS FOR DRIVERS AND CABINETS, 3-YEARS FOR ELECTRONIC COMPONENTS GoldenEar™ warrants to the original retail purchaser only that this GoldenEar Loudspeaker Product (the “Product”) will be free from defects in materials and workmanship for a period of five (5) years covering the drivers and cabinets, and three (3) years for the electronic components from the date of the original purchase from a GoldenEar Authorized Dealer.
Need help?
Do you have a question about the Invisa SPS and is the answer not in the manual?
Questions and answers