Table of Contents
Advertisement
Advertisement
Table of Contents

Related Manuals for CALIENT S Series


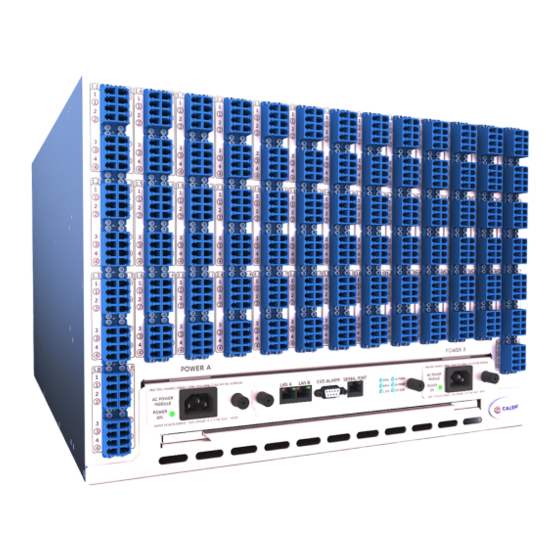
Summary of Contents for CALIENT S Series
- Page 1 CALIENT Optical Circuit Switch (OCS) WebGUI Quick Start Guide...
- Page 2 © 2015 CALIENT Technologies, Inc. All rights reserved. CALIENT, CALIENT Technologies, the CALIENT design logo, and the tag line “Move the light, not the fiber” are registered trademarks of CALIENT Technologies, Inc. in the U.S. and other countries. All other marks belong to their respective owners.
- Page 3 CALIENT OCS WebGUI Quick Start Guide Doc. Part No. 460185-00 July 28, 2015 Rev. 0.2 Revision History Date Version Description Author(s) 04/08/2013 — Legacy documentation T. Douglas 07/13/2015 Update with latest WebGUI info; implement T. Schilz new user doc formatting 07/28/2015 Incorporate VT’s review input...
-
Page 4: Table Of Contents
CALIENT OCS WebGUI Quick Start Guide Doc. Part No. 460185-00 July 28, 2015 Rev. 0.2 Table of Contents 1 INTRODUCTION.......................... 8 2 LOGGING IN ..........................9 3 HOME PAGE ..........................10 Home > Alarms/Events ....................10 Home > Change Password ....................12 4 NODE >... - Page 5 CALIENT OCS WebGUI Quick Start Guide Doc. Part No. 460185-00 July 28, 2015 Rev. 0.2 System Info > Ports Detail ....................37 System Info > Connections Detail ................... 38 6 CROSS CONNECTS ........................39 Cross Connects > Add ..................... 39 6.1.1 Cross Connects >...
- Page 6 CALIENT OCS WebGUI Quick Start Guide Doc. Part No. 460185-00 July 28, 2015 Rev. 0.2 List of Figures Figure 1 – Active Alarm Summary (Critical Alarms) ..............11 Figure 2 – Active Alarm Summary (All Alarms/Events) ..............11 Figure 3 – Configuring SNMP v1/v2c Get/Set Parameters ............20 Figure 4 –...
- Page 7 Rev. 0.2 PREFACE The CALIENT Optical Circuit Switch (OCS) WebGUI Quick Start Guide provides basic information on how to manage CALIENT’s S320 and S160 switches over the Web using a graphical user interface (GUI). AUDIENCE This guide is written for the network operations center and field service personnel who configure, provision, and monitor the equipment.
-
Page 8: Introduction
July 28, 2015 Rev. 0.2 1 INTRODUCTION CALIENT’s WebGUI provides an effective, user-friendly tool for managing one or multiple switches across the Web. The WebGUI enables system administrators to easily monitor and manage a variety system components and functionality, including: ... -
Page 9: Logging In
CALIENT OCS WebGUI Quick Start Guide Doc. Part No. 460185-00 July 28, 2015 Rev. 0.2 2 LOGGING IN The following procedure describes how to access the WebGUI: 1. Type the IP address of the OCS in your Web browser. 2. Press Enter on your keyboard to launch the WebGUI. The Login page will appear. -
Page 10: Home Page
CALIENT OCS WebGUI Quick Start Guide Doc. Part No. 460185-00 July 28, 2015 Rev. 0.2 3 HOME PAGE The WebGUI Home page is the gateway to key operational information and various tools for monitoring and managing the OCS. Upon opening, the page provides a quick snapshot of system information including the switch’s IP address, a list of Critical, Major and Minor alarms, and a scrolling banner at the bottom of the page displaying current activity on the switch. -
Page 11: Figure 1 - Active Alarm Summary (Critical Alarms)
CALIENT OCS WebGUI Quick Start Guide Doc. Part No. 460185-00 July 28, 2015 Rev. 0.2 Figure 1 – Active Alarm Summary (Critical Alarms) Figure 2 – Active Alarm Summary (All Alarms/Events) Alarms and events can be further filtered by selecting from the different options displayed in the dropdown menus for the Type, Severity, and Class fields. -
Page 12: Home > Change Password
CALIENT OCS WebGUI Quick Start Guide Doc. Part No. 460185-00 July 28, 2015 Rev. 0.2 For the Severity: field, menu options include: ALL – lists alarms for all severity levels CR – lists Critical alarms MJ – lists Major alarms ... - Page 13 CALIENT OCS WebGUI Quick Start Guide Doc. Part No. 460185-00 July 28, 2015 Rev. 0.2 The following procedure describes how to change the system password from the Home page: 1. Click the Change Password button. The Change Password screen will display.
-
Page 14: Node > Summary
CALIENT OCS WebGUI Quick Start Guide Doc. Part No. 460185-00 July 28, 2015 Rev. 0.2 4 NODE > SUMMARY A summary of the Node Configuration for the switch can be accessed from the navigation menu on the Home page. Clicking the Node option on the menu provides an overview of the OCS’s provisioning, services and alarms, as well as software, network and manufacture information. -
Page 15: General And Service Configuration
CALIENT OCS WebGUI Quick Start Guide Doc. Part No. 460185-00 July 28, 2015 Rev. 0.2 4.1.1.1 General and Service Configuration This section of the Node Configuration screen lets the user configure the name of the node and the services available on it. -
Page 16: Network, Scp Server And Cross Connects Configuration
The new name specified by a user will not take effect until it has been saved and the user has logged out and back into the WebGUI. Once this has been done, the new name will appear in the upper-left corner, beneath the CALIENT logo, on every page of the WebGUI. -
Page 17: Time, Security And Dynamic Update Configuration
CALIENT OCS WebGUI Quick Start Guide Doc. Part No. 460185-00 July 28, 2015 Rev. 0.2 The Network Configuration settings can be set by typing the appropriate information in the IP Address, Subnet Mask and Gateway fields for ethA and/or ethB. The MAC, Link Status and Interface Status fields are informational only and are not configurable. -
Page 18: Node > Summary > Node Config > Backup/Restore
CALIENT OCS WebGUI Quick Start Guide Doc. Part No. 460185-00 July 28, 2015 Rev. 0.2 The NTP Service and NTP Server settings cannot be set from the Node Configuration screen; however, they can be modified from the shell using the gxc-config-network utility. - Page 19 Restoring the configuration will purge the existing database by overwriting it with the backup copy. CALIENT recommends maintaining a copy of backups and performing a backup of current data prior to restoring the system. Page 19 of 63...
-
Page 20: Node > Summary > Node Config > Snmp Configuration
CALIENT OCS WebGUI Quick Start Guide Doc. Part No. 460185-00 July 28, 2015 Rev. 0.2 4.1.3 Node > Summary > Node Config > SNMP Configuration If SNMP Service has been enabled for the system (see section 4.1.1.1), it can also be configured using the WebGUI. -
Page 21: Table 2 - Snmp V1/V2C Trap Parameters
CALIENT OCS WebGUI Quick Start Guide Doc. Part No. 460185-00 July 28, 2015 Rev. 0.2 Table 2 – SNMP v1/v2c Trap Parameters Field Name Description Required Trap Destination The IP Address of the device to which the trap will be sent... -
Page 22: Snmp V3 Get/Set Parameters
CALIENT OCS WebGUI Quick Start Guide Doc. Part No. 460185-00 July 28, 2015 Rev. 0.2 4.1.3.3 SNMP v3 Get/Set Parameters To access the SNMP v3 agent, an SNMP v3 user needs to be configured. Table 3 lists the parameters that can be added, deleted or modified by the system administrator to configure a user. -
Page 23: Snmp Trap V3 Parameters
CALIENT OCS WebGUI Quick Start Guide Doc. Part No. 460185-00 July 28, 2015 Rev. 0.2 Field Name Description Required Priv Protocol Privacy Protocol; value can be Yes, if Security Level AES or DES is Auth/Priv ONLY Auth Password Authentication Password... -
Page 24: Figure 5 - Configuring Snmp V3 Trap Parameters
CALIENT OCS WebGUI Quick Start Guide Doc. Part No. 460185-00 July 28, 2015 Rev. 0.2 created before this can be done in the Trap v3 configuration. Table 4 lists the parameters that a system administrator can set to configure the SNMP v3 Trap. Figure 5 shows the parameters as they appear in the WebGUI. -
Page 25: Node > Summary > Node Config > Openflow
CALIENT OCS WebGUI Quick Start Guide Doc. Part No. 460185-00 July 28, 2015 Rev. 0.2 4.1.4 Node > Summary > Node Config > OpenFlow If OpenFlow is enabled for the system (see section 4.1.1.1), it can also be configured using the WebGUI. -
Page 26: Node > Summary > Alarm Config
CALIENT OCS WebGUI Quick Start Guide Doc. Part No. 460185-00 July 28, 2015 Rev. 0.2 5. Click the Save button at the bottom of the screen to save any changes, or click the Reset button to clear them. 4.2 Node > Summary > Alarm Config The following steps describe how to configure system alarms using the WebGUI: 1. -
Page 27: Node > Summary > Software Management
CALIENT OCS WebGUI Quick Start Guide Doc. Part No. 460185-00 July 28, 2015 Rev. 0.2 5. Select one of the following options from the dropdown menu to change the severity level of the alarm: CR – Critical alarm MJ – Major alarm ... -
Page 28: Node > Summary > System Management
CALIENT OCS WebGUI Quick Start Guide Doc. Part No. 460185-00 July 28, 2015 Rev. 0.2 4.4 Node > Summary > System Management The following procedure describes how to implement a System Reboot or System Shutdown on the OCS: 1. Log into the WebGUI. -
Page 29: Node > Summary > Session Management
CALIENT OCS WebGUI Quick Start Guide Doc. Part No. 460185-00 July 28, 2015 Rev. 0.2 System Shutdown – issues a shutdown of the entire system. Power has to be reconnected to bring up the system again. If the Standby CP is not reachable, the system will not be shut down. - Page 30 CALIENT OCS WebGUI Quick Start Guide Doc. Part No. 460185-00 July 28, 2015 Rev. 0.2 4. Click the check box for a listed session to select that session. A check mark () will appear in the box when it is selected.
-
Page 31: Node > Summary > User Management
CALIENT OCS WebGUI Quick Start Guide Doc. Part No. 460185-00 July 28, 2015 Rev. 0.2 a. Type a message in the Broadcast Message Area field. b. Click the Send to All Users button to send the message to all listed users, OR c. - Page 32 CALIENT OCS WebGUI Quick Start Guide Doc. Part No. 460185-00 July 28, 2015 Rev. 0.2 3. Specify the new user’s name and password by typing that information in the User Name and Password fields. 4. Click the down arrow () at the right of the User Role field to display a dropdown menu.
-
Page 33: Modifying A User
CALIENT OCS WebGUI Quick Start Guide Doc. Part No. 460185-00 July 28, 2015 Rev. 0.2 If no Port Groups have been configured for the system, none will be listed on the Create User screen. If this is the case, go to the WebGUI Home page and navigate to Port Group >... -
Page 34: Enabling, Disabling Or Deleting A User
CALIENT OCS WebGUI Quick Start Guide Doc. Part No. 460185-00 July 28, 2015 Rev. 0.2 4. Modify the selected user’s profile by altering the information displayed in the User Detail and Port Group sections of the screen. To change a user’s password, the small check box located at the upper-right corner of the Password field must selected/checked. - Page 35 CALIENT OCS WebGUI Quick Start Guide Doc. Part No. 460185-00 July 28, 2015 Rev. 0.2 2. Click the radio button for one of the listed users to select that user. The User Detail for the selected user will appear beneath the list of users.
-
Page 36: System Information
CALIENT OCS WebGUI Quick Start Guide Doc. Part No. 460185-00 July 28, 2015 Rev. 0.2 5 SYSTEM INFORMATION The following sections describe System Information—including boards, ports and connections— that can be monitored with the WebGUI. 5.1 System Info > Boards Detail The Boards Detail screen of the WebGUI provides detailed information for each board installed in the system, including the board type, its location (slot) and its alarm state. -
Page 37: System Info > Ports Detail
CALIENT OCS WebGUI Quick Start Guide Doc. Part No. 460185-00 July 28, 2015 Rev. 0.2 4. Click the Back button at the bottom of the Card Details screen to return to the Boards Detail screen. 5.2 System Info > Ports Detail The Ports Detail screen of the WebGUI lists all the ports (mirrors) on the system and the corresponding hardware component(s) driving/controlling each mirror. -
Page 38: System Info > Connections Detail
CALIENT OCS WebGUI Quick Start Guide Doc. Part No. 460185-00 July 28, 2015 Rev. 0.2 2. Click any column header (e.g., Alarm, Port, Conn, etc.) to sort the information listed in all rows and columns either up or down, according to the numerical or alphabetical sequence of the information in the selected column. -
Page 39: Cross Connects
CALIENT OCS WebGUI Quick Start Guide Doc. Part No. 460185-00 July 28, 2015 Rev. 0.2 6 CROSS CONNECTS The following sections describe how to manage cross-connects on the OCS. Topics covered include adding connections, accessing a detailed summary of existing connections, and saving/recalling cross-connects. - Page 40 CALIENT OCS WebGUI Quick Start Guide Doc. Part No. 460185-00 July 28, 2015 Rev. 0.2 3. Click + More in the upper-right corner of the screen to display additional settings at the top of the screen. These settings include: Lightband – specifies the lightband used for the connection. Options available from the dropdown menu include OBAND (1310 nm), SBAND (1490 nm), CBAND (1550 nm) and LBAND (1625 nm).
- Page 41 CALIENT OCS WebGUI Quick Start Guide Doc. Part No. 460185-00 July 28, 2015 Rev. 0.2 7. Click one of the free input (uncircled) ports on the tab/shelf specified in step 5 to select that port. As shown in the Status Symbol Key, the selected port will change from a blank white square to a pale-green square containing the word IN.
-
Page 42: Cross Connects > Add > Cross Connect Details
CALIENT OCS WebGUI Quick Start Guide Doc. Part No. 460185-00 July 28, 2015 Rev. 0.2 9. The default value for the Direction: field is Bidirectional. To change this value, click the down arrow () at the right of the field to display a dropdown menu, and click the Unidirectional option to select it. - Page 43 CALIENT OCS WebGUI Quick Start Guide Doc. Part No. 460185-00 July 28, 2015 Rev. 0.2 The Connection Detail and Delete Connection options will appear only if the selected ports are connected (blue). Right-clicking unconnected (white) ports will only display the View Port Details option.
- Page 44 CALIENT OCS WebGUI Quick Start Guide Doc. Part No. 460185-00 July 28, 2015 Rev. 0.2 This screen can also be accessed by going to Cross Connects > Summary and clicking one of the Connection Names displayed on the Cross Connections Summary screen.
-
Page 45: Cross Connects > Summary
CALIENT OCS WebGUI Quick Start Guide Doc. Part No. 460185-00 July 28, 2015 Rev. 0.2 6. Make any changes to the Threshold and/or Alias settings shown in the Port Monitor Configuration section of the screen by deleting the displayed settings and typing in new ones. - Page 46 CALIENT OCS WebGUI Quick Start Guide Doc. Part No. 460185-00 July 28, 2015 Rev. 0.2 The following steps describe how to access Cross Connects Summary information: 1. Log into the WebGUI. 2. Navigate the following path: Cross Connects > Summary. The Cross Connections Summary screen will open.
-
Page 47: Cross Connects > Summary > Cross Connection Details
CALIENT OCS WebGUI Quick Start Guide Doc. Part No. 460185-00 July 28, 2015 Rev. 0.2 5. Click any column header in the Cross Connections Summary screen to sort the information listed in all rows and columns either up or down, according to the numerical or alphabetical sequence of the information in the selected column. - Page 48 CALIENT OCS WebGUI Quick Start Guide Doc. Part No. 460185-00 July 28, 2015 Rev. 0.2 If the Direction setting for a connection is Bidirectional, the Conn-Half information for both halves of the connection will appear on the Cross Connections Summary screen (see below), and the Circuit ID information for both halves of the connection will appear on the Cross Connection Details screen (see below).
-
Page 49: Cross Connects > Save/Recall
CALIENT OCS WebGUI Quick Start Guide Doc. Part No. 460185-00 July 28, 2015 Rev. 0.2 Delete – deletes the selected connection. Activate – activates the selected connection. Deactivate – deactivates the selected connection. Clear Fault History – clears the fault history for the selected connection. - Page 50 CALIENT OCS WebGUI Quick Start Guide Doc. Part No. 460185-00 July 28, 2015 Rev. 0.2 Set Name – the name of the set on which the operation was attempted. Set User Id – the user ID associated with the set.
-
Page 51: Ports
CALIENT OCS WebGUI Quick Start Guide Doc. Part No. 460185-00 July 28, 2015 Rev. 0.2 7 PORTS This section provides information on how to monitor and configure ports on the OCS. 7.1 Ports > Summary The following steps describe how to access and use the WebGUI’s Port Summary screen: 1. -
Page 52: Ports > Summary > Port Details
CALIENT OCS WebGUI Quick Start Guide Doc. Part No. 460185-00 July 28, 2015 Rev. 0.2 7. Click the Refresh button to reload the Port Summary screen. 7.1.1 Ports > Summary > Port Details The following steps describe how to access and use the WebGUI’s Port Details screen: 1. - Page 53 CALIENT OCS WebGUI Quick Start Guide Doc. Part No. 460185-00 July 28, 2015 Rev. 0.2 The InPortPower for an item listed on the Port Summary screen will be rounded up or down to the nearest tenth when it is selected and displayed on the Port Detail screen.
- Page 54 CALIENT OCS WebGUI Quick Start Guide Doc. Part No. 460185-00 July 28, 2015 Rev. 0.2 Input Optical Power High Threshold – the incoming power threshold, in decibel- milliwatts (dBm), beyond which the system will generate a major (MJ) alarm.
-
Page 55: Ports Group
CALIENT OCS WebGUI Quick Start Guide Doc. Part No. 460185-00 July 28, 2015 Rev. 0.2 8 PORTS GROUP This section describes how to add and review port groups on the OCS. 8.1 Ports Group > Add The following procedure describes how to add a port group to the system: 1. - Page 56 CALIENT OCS WebGUI Quick Start Guide Doc. Part No. 460185-00 July 28, 2015 Rev. 0.2 5. Click the right-pointing arrow between the port lists. The selected ports will move from the Non-Members list to the Members list. Page 56 of 63...
-
Page 57: Ports Group > Summary
CALIENT OCS WebGUI Quick Start Guide Doc. Part No. 460185-00 July 28, 2015 Rev. 0.2 6. Make any desired changes to the threshold information displayed in the Port Group Configuration section of the screen. 7. Click the Save button at the bottom of the screen to save the port selections and changes. - Page 58 CALIENT OCS WebGUI Quick Start Guide Doc. Part No. 460185-00 July 28, 2015 Rev. 0.2 2. Navigate the following path: Ports Group > Summary. The Port group summary screen will open, listing the Port Group Name, individual Ports, and Port Count for each port group on the OCS.
- Page 59 CALIENT OCS WebGUI Quick Start Guide Doc. Part No. 460185-00 July 28, 2015 Rev. 0.2 5. To add ports to the Port Group, do the following: a. Click any port(s) in the Non-Members list located in the Member Ports section of the screen to select it.
-
Page 60: Independent Aliases
CALIENT OCS WebGUI Quick Start Guide Doc. Part No. 460185-00 July 28, 2015 Rev. 0.2 9 INDEPENDENT ALIASES This section describes how to create aliases for the input port (In Port) and output port (Out Port) that form a connection. -
Page 61: Setting Aliases From Cross Connects > Add
CALIENT OCS WebGUI Quick Start Guide Doc. Part No. 460185-00 July 28, 2015 Rev. 0.2 3. Click an item in the PortDescription column to select it. The Port Detail screen for the selected item will open. 4. In the Port Monitor Configuration section of the screen, type the appropriate alias information in the Port In Alias and Port Out Alias fields. - Page 62 CALIENT OCS WebGUI Quick Start Guide Doc. Part No. 460185-00 July 28, 2015 Rev. 0.2 3. Right click one of the ports in an established cross connection. A dialogue box will appear, listing the following options: Connection Detail, Delete Connection and View Port Details.
- Page 63 CALIENT OCS WebGUI Quick Start Guide Doc. Part No. 460185-00 July 28, 2015 Rev. 0.2 7. To verify the changes, go the Port Summary screen at Home > Ports > Summary to see the newly configured port aliases displayed. Page 63 of 63...
Need help?
Do you have a question about the S Series and is the answer not in the manual?
Questions and answers