CALIENT S320 Getting Started Manual
Photonic switch
Hide thumbs
Also See for S320:
- Hardware user's manual (46 pages) ,
- Getting started manual (42 pages) ,
- Repair and diagnostics field manual (22 pages)
Table of Contents
Advertisement
Advertisement
Table of Contents

Related Manuals for CALIENT S320


Summary of Contents for CALIENT S320
- Page 1 S320 Photonic Switch Getting Started Guide...
- Page 2 Document Part Number: 460166-00 Rev. C © 2013 CALIENT Technologies, Inc. All rights reserved. CALIENT, CALIENT Technologies, the CALIENT design logo, and the tag line "Move the light not the fiber" are registered trademarks of CALIENT Technologies, Inc. in the U.S. and other countries.
-
Page 3: Table Of Contents
HARDWARE INSTALLATION ....................... 8 Installation overview ......................... 8 3.1.1 Required Tools ........................8 3.1.2 Mounting the CALIENT S320 Photonic Switch into a Rack ..........8 Connecting communication interfaces ..................9 3.2.1 Connecting the Craft Serial Cable ..................9 3.2.2 Connecting Ethernet ......................10 Power connections ........................ -
Page 4: Getting Started
GETTING STARTED CALIENT Technologies Inc Document Part Number: 460166-00 Rev. C This document outlines the steps required to install and configure the CALIENT S320 Photonic Switch: Rack Cable Boot Configure Fiber Manage S320 Getting Started Guide... -
Page 5: Unpacking The S320 Switch
Unpacking the S320 Switch When unpacking, remove and retain the shipping lockdown baseplate, materials and containers for future shipments. The CALIENT S320 Photonic Switch can only be shipped using the original shipping lockdown baseplate and container; otherwise, the warranty will be void. -
Page 6: Contents Inventory
Miscellaneous: 12-24 Rack mounting screws (8). Before installing a CALIENT Photonic Switch for the first time, be sure to look for the latest software releases as well as the latest installation and configuration guides. All are available at library.calient.net. - Page 7 Document Part Number: 460166-00 Rev. C baseplate is removed. To remove the shipping lockdown baseplate, one person presses the shipping lockdown baseplate firmly down while the other lifts the S320. Retain the shipping lockdown baseplate (see Figure 1 below), anti-ESD bag, materials and containers for future shipments.
-
Page 8: Hardware Installation
We suggest users assemble the following before installing the CALIENT S320 Photonic Switch: 7 RU of rack space in a 19”, 23” or ETSI rack to house the CALIENT S320 Photonic Switch A mounting shelf for use with two-post racks or a support bracket set for use... -
Page 9: Connecting Communication Interfaces
TL1 operations. Connect one end of the serial cable to the serial connector on the front of the S320, as shown in Figure 2. Connect the other end of the cable to the serial connector on the host PC. -
Page 10: Connecting Ethernet
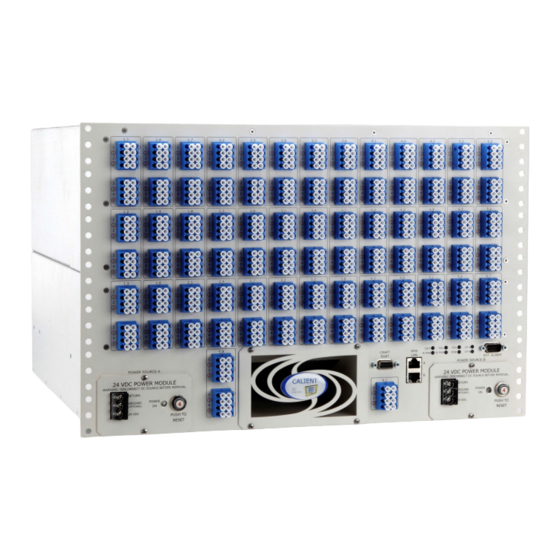
3.2.2 Connecting Ethernet Figure 2: The front panel of the S320 Switch shows the location of the Craft and LAN ports. The CALIENT S320 Photonic Switch has two Gigabit Ethernet (GbE) RJ-45 jacks labeled NMS LAN A and B on the front of the S320 as shown above. The Ethernet connection is used to control the CALIENT S320 using TL1 via a Telnet session, or using the browser- based graphical user interface (GUI). -
Page 11: Connecting External 48V Power Supply
1. Connect POWER SOURCE A: Connect the 48V power supply as shown in figure 3, with the BLACK lead connected to the -48 VDC position, the RED lead connected to the RETURN position, and the GREEN lead connected to the GROUND position. Figure 3 Power Source A S320 Getting Started Guide... - Page 12 CALIENT Technologies Inc Document Part Number: 460166-00 Rev. C 2. Connect POWER SOURCE B. With both power sources connected, the switch should appear as shown in Figure 4. Figure 4 Power Source B S320 Getting Started Guide...
- Page 13 Document Part Number: 460166-00 Rev. C 3. Grounding: The unconnected sides of the GREEN leads (Figure 5) are for the Protective Earth connection and should be attached to the Telco Chassis or other safety grounding point. Figure 5 Green leads S320 Getting Started Guide...
-
Page 14: Booting Up
If power is applied to the Power Source A input but not the Power Source B input (or vice versa), the CALIENT S320 Photonic Switch will boot up and function, but the B PWR LED will not be illuminated and a major alarm will be generated and communicated to the user via the S320 management interfaces. -
Page 15: Logging In
Eth0 : 192.168.0.2 Eth2 : Unassigned CALIENT requires that the IP address of Eth1 must not be changed at any time. This interface is used for internal communication between two control processors. To access the CALIENT S320 Photonic Switch, please use the default username (there is... - Page 16 Once the IP address is known, the user must configure the client IP network interface to be on the same subnet as the CALIENT S320 Photonic Switch. Then, the user can log into the GUI or telnet to the TL1 agent using the S320’s management interface Mapping of the interfaces in the hardware is as explained below: eth0 ...
- Page 17 CALIENT Technologies Inc Document Part Number: 460166-00 Rev. C Below is the complete block diagram explaining the mapping. Figure 7: Ethernet Interfaces Block diagram S320 Quick Start Guide...
-
Page 18: Connecting Using The Serial Port
Unlike the Telnet connection, the TL1 service over the serial port is always enabled. Connect a serial cable to the serial port on the front panel of the CALIENT S320 Photonic Switch. Once connected, interact with the TL1 Agent through the console or a PC, using a standard terminal emulation program. - Page 19 Press Enter to leave the current path unchanged, or specify a new search path, with spaces separating each entry. DNS Search Path : calient.net -------------------- Configuring Network Time Protocol -------------------- Enter NTP servers one at a time. When done, enter a blank value or 0.0.0.0.
- Page 20 Shutting down interface eth0: [ OK ] Stopping Switch-ctrl: [ OK ] Shutting down loopback interface: [ OK ] Bringing up loopback interface: [ OK ] Bringing up interface bond0: [ OK ] Bringing up interface eth1: [ OK ] S320 Quick Start Guide...
- Page 21 Press Enter to leave the current path unchanged, or specify a new search path, with spaces separating each entry. DNS Search Path : calient-s320 -------------------- Configuring Network Time Protocol ----------------- Enter NTP servers one at a time. When done, enter a blank value or 0.0.0.0.
- Page 22 -------------------------- Configuring Time Zone ----------------------- The S320 Switch can be set to use Coordinated Universal Time (UTC, sometimes called Greenwich Mean Time or GMT) or to a local timezone. Most S320 Switches use a local time zone. Will this system use UTC? [no] :<if not UTC, press enter>...
- Page 23 Starting ntpd: You must stop and start services on the switch in order for the changes to take effect. The stop/start service script is available by connecting to the serial interface and entering: Target# gxc-stop Target# gxc-start S320 Quick Start Guide...
-
Page 24: Stopping And Starting Services
Below is an example of the start-stop script including a summary: Stopping services login as: root root@Calient-S320:~# gxc-stop SnmpServices [STOPPED] PHPService [STOPPED] WebServices [STOPPED] TL1Service [STOPPED] xConnectProvisioner [STOPPED] SwitchMatrix [STOPPED] NodeServices [STOPPED] Authentication [STOPPED] DeviceManager [STOPPED] AlarmServices [STOPPED] CfgReg [STOPPED] EventServices [STOPPED] EventConsumer [STOPPED] NamingService [STOPPED] S320 Quick Start Guide... -
Page 25: Fiber Connections
Connect fiber cables from equipment and outside plant fibers to the LC-UPC bulkhead connectors on the CALIENT S320 Photonic Switch Fiber Interface. Connectors without circles on the port number labels are S320 inputs, and connectors with circles on the port number labels are S320 outputs (see Figure 8). - Page 26 Document Part Number: 460166-00 Rev. C Figure 8: Circled and non-circled ports As Figure 9 shows, because of the directionality of the S320 monitoring taps, the switch operates with light transmitted from the input fiber terminations to fiber terminations. User optical transmitters are connected to the inputs, and user optical receivers are connected to the outputs.
-
Page 27: Managing The S320 Using Tl1
CALIENT Technologies Inc Document Part Number: 460166-00 Rev. C This section describes management of the CALIENT S320 Photonic Switch via the TL1 command line interface using a Telnet or Serial port connection (see section 3.54 is using TL1 Agent Connection a serial port connection). - Page 28 Connection Type: SSH (leave as default) 2. Click Open to start the SSH session. If this is your first time connecting to the switch from this computer, you will see the following message displayed. Accept the connection by clicking Yes. S320 Quick Start Guide...
- Page 29 At this point, you can login to the switch using the TL1 command: ACT-USER. The default TL1 username is: admin. The default TL1 password is: pxc***. For more information on using TL1, refer to the S320 TL1 Command Reference Guide". S320 Getting Started Guide...
Need help?
Do you have a question about the S320 and is the answer not in the manual?
Questions and answers