
Related Manuals for Tecnoware EVO DSP PLUS TT 10 KVA


Summary of Contents for Tecnoware EVO DSP PLUS TT 10 KVA
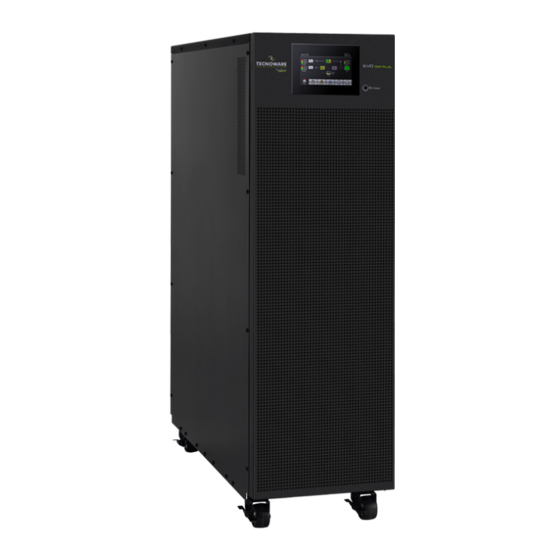
- Page 1 Uninterruptible Power Supply EVO DSP PLUS TT 10 KVA EVO DSP PLUS TT 20 KVA EVO DSP PLUS TT 30 KVA EVO DSP PLUS TT 40 KVA EVO DSP PLUS TT 60 KVA User’s manual Manuale utente...
-
Page 3: Table Of Contents
Index User’s Manual - English ................1 Safety Warnings ..................1 1 Introduction ..................2 2 General Characteristics ................3 3 Receipt and site selection ...............3 4 Operational Principles ................4 Block Diagram of UPS ............... 4 Operation Modes ................5 4.2.1 Standby Mode ..................5 4.2.2 Line Mode .................. - Page 4 Turn ON during Bypass mode ............. 34 Turn ON without AC Input Line............34 Turn OFF without AC Input Line in Battery Mode ........34 Battery mode operation ..............35 Load Control and Overload condition ........... 35 Maintenance Bypass mode ..............36 Battery Test ................
- Page 5 Indice Avvisi di Sicurezza .................. 47 1 Introduzione ..................48 2 Caratteristiche Generali ............... 49 3 Ricevimento e Collocazione ..............49 4 Principi di Funzionamento ..............50 Diagramma a Blocchi dell’UPS ............50 Modi di Funzionamento ..............51 4.2.1 Modo Standby ................... 51 4.2.2 Modo Line ..................
- Page 6 Accensione durante la modalità Bypass ..........80 Accensione in assenza di Linea d’Ingresso Rete ........80 Spegnimento durante la modalità Battery senza Linea d’Ingresso ....80 Funzionamento in modalità Battery ............. 81 Controllo del Carico e condizioni di Overload (Sovraccarico)......81 Modalità...
-
Page 7: User's Manual - English
ENGLISH User’s Manual - English Safety Warnings Read this manual carefully and completely before installing and using the TECNOWARE EVO DSP PLUS TT Uninterruptible Power Supply, which, from here after, will also be referred to as UPS. The UPS must be used only by properly trained personnel. To ensure correct and safe ... -
Page 8: Introduction
UPS EVO DSP PLUS TT is constantly being developed and improved: consequently, your unit may differ somewhat from the description contained in this manual. This manual includes the following models: • UPS EVO DSP PLUS TT 10 KVA • UPS EVO DSP PLUS TT 20 KVA • UPS EVO DSP PLUS TT 30 KVA •... -
Page 9: General Characteristics
ENGLISH 2 General Characteristics UPS EVO DSP PLUS TT has all the advanced features, which guarantee maximum reliability and safety: • Double-Conversion ON-LINE Transformerless technology • Sinusoidal wave generated by an IGBT Inverter • Output Voltage regulation 1% • Protection from overload and short circuits •... -
Page 10: Operational Principles
ENGLISH • In all circumstances, see the “Technical Characteristics” chapter for environmental specifications and check that the selected area meets these criteria. • During normal operation the UPS discharges a minimal amount of heat. So it is necessary to leave at least 25 cm of unobstructed space all around the UPS in order to keep it properly ventilated. -
Page 11: Operation Modes
ENGLISH 4.2 Operation Modes EVO DSP PLUS TT is a Three-Phase, Four-Wire On-Line, Double-Conversion UPS that permits operation in the following modes: • Standby Mode • Line Mode • Battery Mode • Bypass Mode • ECO Mode • Shutdown Mode •... -
Page 12: Line Mode
ENGLISH 4.2.2 Line Mode In Line Mode, the Rectifier delivers power from the mains and supplies DC power to the Inverter and the Charger charges the Battery. The Inverter filters the DC power and converts it into pure and stable AC power to the load. Figure 4.3 –... -
Page 13: Bypass Mode
ENGLISH 4.2.4 Bypass Mode Upon connecting to Utility Input Power, the UPS is in Bypass Mode before UPS is turned on (if BYPASS enable setting is Enabled), and Charger function will be active when Battery is connected. After UPS has been turned on, if the UPS encounters abnormal situations (over-temperature, overload …, etc.), the Static Transfer Switch (STS) will perform as a transference of the load from the Inverter to the Bypass source with no interruption. -
Page 14: Shutdown Mode
ENGLISH 4.2.6 Shutdown Mode When you want to switch off the UPS and the power supply is absent, the UPS will enter Shutdown mode. Or when the UPS has discharged the Battery to the cut-off level, the UPS will also enter into Shutdown Mode. When the UPS enters this mode, it is going to shut off the control power of UPS. -
Page 15: Control Panel And Lcd Touchscreen
ENGLISH 5 Control Panel and LCD Touchscreen 5.1 Introduction On the front panel of the UPS there is the control interface which consists of 2 parts: LCD Touchscreen and Power ON/OFF button , as shown in figure 5.1. All the electrical measurements, parameters, settings, UPS status, battery status and any alarms are displayed on the LCD Touchscreen. -
Page 16: Lcd Touchscreen Description
ENGLISH 5.2 LCD Touchscreen Description After initialization, the LCD will display MAIN Screen. There are five submenus: CONTROL, MEASURE, SETTING, INFORMATION and DATA LOG. The figure 5.2 shows che complete Menu Tree. ON/OFF UPS BATTERY TEST MUTE ALL CONTROL ON/OFF CHARGER MEASURE1 MEASURE2 MEASURE... -
Page 17: Control Submenu
ENGLISH After initialization, the MAIN Screen will display as shown below. On the bottom, there are five icons to represent five submenus: CONTROL, MEASURE, SETTING, INFO and DATALOG. Figure 5.4 – Main Screen 5.2.2 CONTROL Submenu Touch the icon to enter CONTROL submenu. Figure 5.5 –... -
Page 18: On/Off Ups
ENGLISH Enter No Or Back Confirm YES Turn ON /OFF UPS ON/OFF UPS Enter No Or Back Confirm YES Do Battery Test MAIN CONTROL BATTERY TEST Enter No Or Back Confirm YES Do MUTE ALL MUTE ALL Enter No Or Back Confirm YES Turn ON/OFF CHARGER ON/OFF CHARGER Enter No Or Back... -
Page 19: Batt Test
ENGLISH 5.2.2.2 BATT TEST This choice allows you to start or to cancel the Battery test. It will show “BATT Test?” if the UPS is not in test. Touch “YES” to start the Battery Test. Then, it will show “Battery testing……“ during Battery Test period. After few seconds, battery test result will show on the screen. Touch the icon or “NO”... -
Page 20: On/Off Charger
ENGLISH 5.2.2.4 ON/OFF CHARGER This choice allows you to turn ON/OFF the Battery Charger. It will show “Turn On Charger?” when the Charger is OFF. Touch “YES” to turn ON. Then, the screen will return to the MAIN Screen. Touch or “NO”... -
Page 21: Measure Submenu
ENGLISH 5.2.3 MEASURE Submenu Touch the icon to enter MEASURE Submenu. Touch the icon to browse information. Touch the icon to return to MAIN Screen. Touch to go back to previous menu. Figure 5.16 – MEASURE Screen page 1 The MEASURE Screen page 1 displays the following measurements: LINE VOL: the real time value of L1, L2, L3 phase voltages, L12, L23, L13 voltages and input frequency. - Page 22 ENGLISH The MEASURE Screen page 2 displays the following measurements: OUTPUT W: L1, L2 and L3 output power in Watt. ▪ OUTPUT VA: L1, L2 and L3 output power in VA. ▪ OUTPUT W (%): L1, L2 and L3 output power Watt in percentage. ▪...
-
Page 23: Setting Submenu
ENGLISH 5.2.4 SETTING Submenu This Submenu is used to set the parameters of UPS. Touch the icon to enter SETTING Submenu. Touch the icon to return to MAIN Screen. Touch to go back to previous menu. NOTE: not all settings are available in every operation mode. If the setting is not available in present mode, the LCD will keep its original setting parameter showed instead of changing the parameters. -
Page 24: Info Submenu
ENGLISH Language: set the LCD language. “English” is default setting. ▪ Input Source: select the input source. There are two options: “Line” (Utility) and “Generator”. “Line” is ▪ default setting. This setting value will show on the MAIN Screen. When “Generator” is selected, the acceptable input frequency will be fixed at the range of 40~75Hz. -
Page 25: Basic Information
ENGLISH 5.2.5.1 BASIC Information Figure 5.22 – BASIC Information page 1 MCU Version: MCU version. ▪ DSP Version: DSP version. ▪ Serial NO.: ▪ the serial number of UPS. Manufacturer: ▪ the information about manufacturer. Service Contact: the contact name is set in “GENERAL Setting”. ▪... -
Page 26: Rated Information
ENGLISH 5.2.5.2 Rated Information Figure 5.24 – RATED Information page Output VOL: ▪ it shows output rated voltage. Output FRE: it shows output rated frequency. ▪ CVCF Mode: Enable/Disable CVCF mode. ▪ Bypass Forbid: Enable/disable bypass function. ▪ Bypass UPS Off: ▪... -
Page 27: Datalog Submenu
ENGLISH Line VOL Range: the acceptable line input voltage range. ▪ Line FRE Range: the acceptable line input frequency range. ▪ Bypass VOL Range: the acceptable input voltage range for bypass mode. ▪ Bypass FRE Range: ▪ the acceptable input frequency range for bypass mode. ECO VOL Range: the acceptable input voltage range for ECO mode. -
Page 28: Fault Codes
ENGLISH Figure 5.27 – DATALOG Screen 5.3 Fault Codes The complete list of Fault Codes is below. Table 5-1: Fault Codes Fault Code Fault Event Fault Code Fault Event Bus Start Failure Charger Fault Bus Over Incorrect UPS Setting Bus Under MCU communication failure Bus Unbalance Phase Error on input and Output... -
Page 29: Warning Codes
ENGLISH Fault Code Fault Event Fault Code Fault Event Inverter L3 Negative Power Fault PFC IGBT Over-current in L1 phase Battery SCR short circuited PFC IGBT Over-current in L2 phase Inverter Relay open circuited PFC IGBT Over-current in L3 phase Line Wiring Fault INV IGBT Over-current in L1 phase Parallel Communication Failure... -
Page 30: Electrical Installation
ENGLISH 6 ELECTRICAL INSTALLATION 6.1 Breakers, Terminal Blocks and Interfaces EVO DSP PLUS TT 10KVA-20KVA-30KVA-40KV: the Breakers, Terminal Blocks and Interfaces are located on the rear side. Please refer to Figures 6,1-6.2-6.3-6.4. Figure 6.1 Figure 6.2 EVO DSP PLUS TT 10KVA-20KVA Rear Side EVO DSP PLUS TT 30KVA-40KVA Rear Side User’s manual UPS EVO DSP PLUS TT... - Page 31 ENGLISH Figure 6.3 Figure 6.4 EVO DSP PLUS TT 10KVA-20KVA Terminal Blocks EVO DSP PLUS TT 30KVA-40KVA Terminal Blocks EVO DSP PLUS TT 60K: the front door must be opened in order to access the Breakers, Terminal Blocks and Interfaces Please refer to Figure 6.5. Figure 6.5 - EVO DSP PLUS TT 60 KVA Front view with open door UPS EVO DSP PLUS TT User’s manual...
- Page 32 ENGLISH Computer Interface (DB9 female connector): it is the communication RS-232 port. Computer Interface (USB connector): it is the communication USB port. EPO (Emergency Power OFF) connector Share current port (only available for Parallel model) Parallel ports (only available for Parallel model) Slot for SNMP Interface (optional) External battery connector/terminal Input Line Q1 Breaker for Main AC Input Line...
-
Page 33: Output/Input Terminal Blocks
ENGLISH 6.2 Output/input Terminal Blocks EVO DSP PLUS TT 10KVA-20KVA-30KVA-40KVA: to access the Output/Input Terminal Blocks, remove the metallic cover (#10). Figure 6.6 – EVO DSP PLUS TT 10KVA-20KVA Terminal Blocks Figure 6.7 – EVO DSP PLUS TT 30KVA-40KVA Terminal Blocks UPS EVO DSP PLUS TT User’s manual... - Page 34 ENGLISH EVO DSP PLUS TT 60 KVA: to access the Output/Input Terminal Blocks, open the front door. Bypass Input Figure 6.8 – EVO DSP PLUS TT 60KVA Terminal Blocks User’s manual UPS EVO DSP PLUS TT...
-
Page 35: Communication Interfaces
RS232 cable only; to activate USB communication it is sufficient to connect the USB cable only. Connecting to the Web site www.tecnoware.com it is possible to download free of charge the updated UPS Management Software. 6.3.2 SNMP Interface It is possible to use a SNMP (Single Network Management Protocol) Interface to connect the UPS to a LAN (Local Area Network). -
Page 36: Installation
ENGLISH Figure 6.9 - EPO (Emergency Power OFF) The EPO terminals are isolated and do not need an external feeding Voltage. 6.4 Installation The electrical installation has to be done by qualified personnel. Follow all the Safety Standards (CEI Standards in Italy or IEEE elsewhere) for the Input/Output connections and for the right selection of Input/Output cables. - Page 37 Wiring spec (cross section) Model Input Output Neutral Battery Ground Phases Phases EVO DSP PLUS TT 10 KVA 6 mm 6 mm 8 mm 8 mm EVO DSP PLUS TT 20 KVA 8 mm 8 mm 10 mm 10 mm...
- Page 38 The instructions below describe the operations to correctly connect the UPS to a Battery Box supplied by Tecnoware. We suggest to use ONLY Battery Box supplied by TECNOWARE. TECNOWARE declines any responsibilities if this rule is not followed. Before starting whichever operation be sure that the Battery circuit breaker of Battery Box is in “OFF”...
-
Page 39: Functioning
ENGLISH 7 Functioning Do not start the UPS until the installation is completed. Make sure the wiring is connected correctly and the power cables are fixed firmly (refer to section 6.4 for details). Make sure all the breakers are switched OFF. 7.1 First Start Up Turning the UPS ON is very easy. -
Page 40: Turn Off During Line Mode
ENGLISH 7.2 Turn OFF during Line mode Use the following procedure: Touch “CONTROL” icon on the panel and then select “ON/OFF UPS”. It will show “Turn OFF UPS?” on screen and select “YES” (see section 5.2.2.1). Immediately, the UPS turns OFF the Inverter and starts to work in Bypass mode: the LCD panel will show the path of energy during Bypass mode. - Page 41 ENGLISH 7.6 Battery mode operation During Battery mode, the UPS warns operators by an acoustic signal according to different battery capacity. If the battery capacity is more than 25% (Low Battery level), the buzzer will beep once every 4 seconds. If the battery voltage drops to the Low Battery level, the buzzer will beep once every sec to remind users that the battery is at low level (Battery Low condition) If AC Input Line does not come back on within few minutes, the UPS shuts-down automatically thus preventing...
- Page 42 ENGLISH 7.8 Maintenance Bypass mode If any fault occurs on any one of power stages/modules, please follow below steps to transfer to Maintenance Bypass mode for maintenance or service. Maintenance and service may only be performed by authorized technical personnel. The procedure of switching into Maintenance Bypass mode shall only be executed by authorized technical service personnel.
- Page 43 ENGLISH 7.10 Operating Procedures for Parallel System EVO DSP PLUS TT UPS is very reliable and has been designed to ensure a high MTBF (Medium Time Between Failure); but if it is necessary to power a very critical load, a second (or more) UPS can be connected in parallel, to further increase the reliability of the power supply system.
- Page 44 ENGLISH Figure 7.3 - EVO DSP PLUS TT 60KVA - Connections for Parallel System Make sure all the external Input/Output circuit breakers are “OFF”. Connect each UPS one by one with the Parallel cable and Share current cable, by using the Parallel ports and Share Current ports (see figures 6.1-6.2-6.5).
- Page 45 ENGLISH 7.10.3 Remove one unit from the Parallel System The steps for correct operation are explained below. Note: this procedure permits to remove one UPS without interruption of Output power You can remove one unit of the Parallel System when whole System is running in Normal mode. The steps for correct operation are explained below.
- Page 46 ENGLISH 8 Technical Characteristics UPS EVO DSP PLUS TT Model Power 10 KVA 20 KVA 30 KVA 40 KVA 60 KVA Nominal Active Power 10 KW 20 KW 30 KW 40 KW 60 KW Power Factor Technology On-Line Double Conversion Transformerless (VFI-SS-111) Dimension (W x D x H) mm 626 x 250 x 826 815 x 300 x 1000...
- Page 47 ENGLISH EFFICIENCY Line Mode 95,5% Battery Mode 94,5% BATTERIES Battery Type Lead acid, sealed, free maintenance UPS with battery inside: Battery model 12 Vdc – 7 Ah / 9 Ah / 11 Ah No Battery inside UPS with battery inside: Battery number (10+10) (16+16) 2 x (16+16)
- Page 48 ENGLISH 9 Maintenance 9.1 UPS Cleaning Before starting any cleaning operation, be sure that: Q1, Q2 and Q3 breakers are switched OFF. The Battery Breaker of the Battery Box is “OFF”. The UPS is completely OFF (the graphic LCD panel is OFF). Use only a cloth dampened with water to clean the unit.
- Page 49 There are no internal parts in the UPS which are user serviceable. Any repair or maintenance work must be performed exclusively by qualified technical personnel authorized by TECNOWARE. TECNOWARE declines any responsibility if this warning is disregarded. LCD Message or Sympton Possible cause...
- Page 50 The L2 or L3 input fuse is broken. Replace the fuse. If the described anomalies should continue despite the advised troubleshooting, or should they manifest in any other form, please contact: TECNOWARE SERVICE www.tecnoware.com User’s manual UPS EVO DSP PLUS TT...
- Page 51 ENGLISH Conformity to the European Directives TECNOWARE S.r.l. confirms that EVO DSP PLUS TT models comply with the requirements set out in: the Low Voltage (Safety) Directive 2014/35/EU and following amendments, the EMC (Electro-Magnetic Compatibility) Directive 2014/30/EU and following amendments.
Need help?
Do you have a question about the EVO DSP PLUS TT 10 KVA and is the answer not in the manual?
Questions and answers