Table of Contents
Advertisement
Available languages
Available languages
Quick Links
Advertisement
Chapters
Table of Contents

Subscribe to Our Youtube Channel
Related Manuals for Pool Technologie Pro Dosing Ampero


Summary of Contents for Pool Technologie Pro Dosing Ampero
- Page 1 Notice d’utilisation Instructions for use PRO DOSING AMPERO Doseur de chlore par contrôle ampérométrique + Régulateur pH Chlorine dosing by amperometric control + pH regulator PAPI004234-M - Version 21.04...
-
Page 2: Table Of Contents
SOMMAIRE FRANCAIS 1. SCHEMA D’INSTALLATION ............................3 2. COFFRET ELECTRONIQUE ............................. 4 2.1. Première mise en service ............................. 4 2.2. Voyants ................................. 5 2.3. Ecran ..................................5 2.3.1. Généralités .............................. 5 2.3.2. Affichage par défaut ..........................5 2.4. Clavier ................................... 6 2.5. -
Page 3: Schema D'installation
1. SCHEMA D’INSTALLATION • Les visuels ci-dessous sont non contractuels. • Utiliser impérativement du chlore liquide antitartre. Tout dommage sur l’équipement dû à une cristallisation de tartre ne peut être soumis à la garantie. • Les bidons de chlore et de correcteur pH doivent être suffisamment éloignés : - l’un de l’autre. -
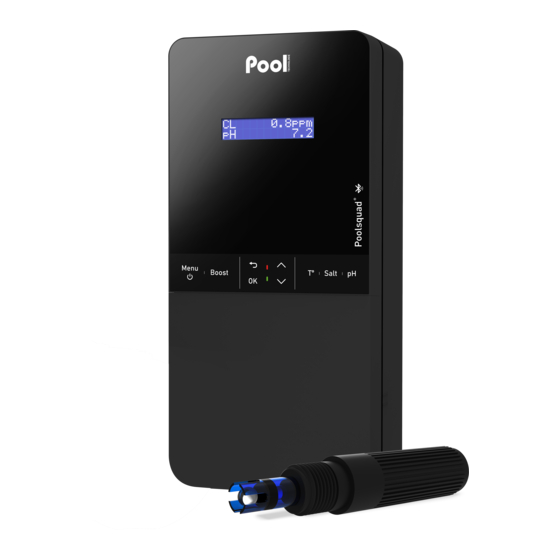
Page 4: Coffret Electronique
2. COFFRET ELECTRONIQUE 2.1. Première mise en service AVANT LA PREMIERE MISE EN SERVICE, lire attentivement le manuel fourni avec la sonde ampérométrique. Ce manuel contient des instructions primordiales pour réussir la mise en service et assurer un fonctionnement optimal de l'équipement. Suivre et respecter impérativement et rigoureusement l’intégralité de ce manuel. A la première mise sous tension du coffret électronique, effectuer la programmation ci-dessous. -
Page 5: Voyants
2.2. Voyants Couleur Etat Significations possibles Allumé en continu Coffret électronique en marche • Injection de chlore en cours Vert Clignotant • Injection de correcteur pH en cours • Coffret électronique à l’arrêt Allumé en continu • Alerte déclenchée Rouge Clignotant Alarme déclenchée 2.3. -
Page 6: Clavier
2.4. Clavier TOUCHE DE COMMANDE FONCTION (selon modèle) • Mise en marche du coffret électronique. → 30 minutes* après la mise en marche, le dosage de chlore et la régulation de pH démarrent automatiquement, à condition que ces fonctions ne soient pas désactivées et que certaines alarmes ne soient pas déclenchées. -
Page 7: Navigation Dans Les Menus
2.5. Navigation dans les menus MENU Menu Menu Menu Menu Menu Menu Dosage Régulation pH Paramètres Historique Communication Informations Dosage Régulation pH Paramètres Historique Communication Version Logiciel Injection Manu Injection Manu Date XX/XX/XX Etalonnage pH Bluetooth MASTER: XX.XX.XX Dosage Régulation pH Paramètres Historique Communication... -
Page 8: Dosage Chlore
2.6. Dosage chlore 2.6.1. Injection manuelle Réglages Réglage Menu Fonctions Instructions possibles par défaut • Pour lancer une injection : Valider réglage sélectionné. (La pompe • Amorçage de la pompe et tourne, et un décompte remplissage des tuyaux semi- temporel s’affiche rigides correspondants De 1 à... -
Page 9: Programmation De L'alerte " Info Gel Cl
2.6.6. Programmation de l’alerte « Info Gel CL » → L’alerte « Info Gel CL » est un appel à effectuer un remplissage/changement de gel électrolytique le jour-même du déclenchement de cette alerte. Délai de déclenchement après le dernier remplissage/changement de gel électrolytique Menu Sous-menu Réglages possibles... -
Page 10: Régulation Ph
2.7. Régulation pH 2.7.1. Injection manuelle Réglages Réglage Menu Fonctions Instructions possibles par défaut • Pour lancer une injection : • Amorçage de la pompe et Valider réglage sélectionné. pompe remplissage tuyaux tourne, et un décompte semi-rigides temporel s’affiche en temps correspondants De 1 à... -
Page 11: Réglage De La Consigne Ph
5) Effectuer la navigation avec les instructions ci-dessous : Régulation pH Etalonnage Etalonnage pH → Insérer la sonde dans la solution pH 7, puis patienter quelques minutes. Solution Etalonnage pH → Ne pas toucher la sonde. En cours (Patienter quelques instants) Etalonnage pH →... -
Page 12: Réglage Du Temps De Cycle De La Régulation Ph
2.7.8. Réglage du temps de cycle de la régulation pH → Le temps de cycle permet de paramétrer le cycle d’injection de la pompe, et donc de prendre en considération le temps de réaction du bassin entre l’injection et la mesure. →... -
Page 13: Réinitialisation Des Paramètres
Menu Capteur Paramètre Réglages possibles Réglage par défaut • OFF Mode • ON Bidon CL • NO Type • NC Paramètres Capteurs • OFF Mode • ON Bidon pH • NO Type • NC ON : capteur activé. OFF : capteur désactivé. Bidon XX : capteur de bidon vide. -
Page 14: Historique De Données
2.9. Historique de données Menu Sous-menu Contenu Historique Date du dernier étalonnage de la sonde pH Etalonnage pH Historique Date du dernier ajustage de la mesure du taux de chlore libre Ajustage CL Historique Date du dernier remplissage/changement de gel électrolytique Ajout Gel Filtration Durée de fonctionnement de la pompe de filtration le jour précédent... -
Page 15: Informations Complémentaires
2.11. Informations complémentaires Menu Signification Version Logiciel Programme de la carte de commande MASTER: XX.XX.XX ID Code: Code de configuration XXXXXXXX S/N: Numéro de série XXXX-XXXXXX-XXX Adresse MAC: Adresse MAC pour connexion Bluetooth XXXXXXXXXXXX Température Int: Température interne XX°C... -
Page 16: Sécurités
2.12. Sécurités 2.12.1. Alarmes et alertes OPERATION(S) AUTOMATIQUE(S) AU DECLENCHEMENT CONFIGURATION SECURITES ACQUITTEMENT* Arrêt immédiat PAR DEFAUT Message affiché du dosage du chlore et/ou de la régulation du pH Alarme Appuyer sur la touche OK ou Alarmes Activées (…) (appui court ou long, selon Info Alertes Activées... - Page 17 ARRET POSSIBILITE DE MESSAGE AUTOMATIQUE DESACTIVATION AFFICHE / IMMEDIAT CAUSE POSSIBLE VERIFICATIONS ET REMEDES VIA LE MENU DEFAUT « Dosage Régulation Paramètres - DETECTE » du chlore du pH Alarmes • Vérifier que le bidon de chlore n’est pas vide. •...
- Page 18 ARRET POSSIBILITE DE MESSAGE AUTOMATIQUE DESACTIVATION AFFICHE / IMMEDIAT CAUSE POSSIBLE VERIFICATIONS ET REMEDES VIA LE MENU DEFAUT « Dosage Régulation Paramètres - DETECTE » du chlore du pH Alarmes Vérifier les réglages dans les menus « Régulation pH – Injection trop importante », «...
-
Page 19: Garantie
3. GARANTIE Avant tout contact avec votre revendeur, merci de bien vouloir vous munir : - de votre facture d’achat. - du n° de série du coffret électronique. - de la date d'installation de l'équipement. - des paramètres de votre piscine (salinité, pH, taux de chlore, température d'eau, taux de stabilisant, volume de la piscine, temps de filtration journalier, etc.). - Page 20 TABLE OF CONTENTS ENGLISH 1. INSTALLATION DIAGRAM ............................. 3 2. ELECTRONICS UNIT ............................... 4 2.1. First commissioning .............................. 4 2.2. LEDs ..................................5 2.3. Screen ................................... 5 2.3.1. Overview ..............................5 2.3.2. Default display ............................5 2.4. Keypad .................................. 6 2.5.
-
Page 21: Installation Diagram
1. INSTALLATION DIAGRAM • The images below are non-binding. • It is essential to use anti-scale liquid chlorine. Any damage to the equipment due to limescale crystallisation is not covered by the warranty. • Chlorine and pH corrector container must be kept well away from: - each other. -
Page 22: Electronics Unit
2. ELECTRONICS UNIT 2.1. First commissioning BEFORE FIRST START-UP, carefully read the manual provided with the amperometric probe. This manual contains instructions that are essential for successful start-up and optimal operation of the equipment. It is imperative that you follow and strictly comply with all of this manual. The first time you power up the electronics unit, carry out the programming below. -
Page 23: Leds
2.2. LEDs Colour Status Possible meanings Continuously on Electronics unit on • Chlorine injection in progress Green Flashing • pH corrector injection in progress • Electronics unit powered off Continuously on • Alert activated Flashing Alarm activated 2.3. Screen 2.3.1. Overview Display Possible meanings •... -
Page 24: Keypad
2.4. Keypad COMMAND KEY (depending on FUNCTION the model) • Switch on the electronics unit. → 30 minutes* after switching on, chlorine dosing and pH regulation start automatically, provided that these functions are not disabled, and certain alarms have not been activated. * Time required to polarise the amperometric probe. -
Page 25: Menu Navigation
2.5. Menu navigation MENU Menu Menu Menu Menu Menu Menu Dosing pH regulation Settings History Communication Information Dosing pH regulation Settings History Communication Software Version Manual injection Manual injection Date XX/XX/XX pH calibration Bluetooth MASTER: XX.XX.XX Dosing pH regulation Settings History Communication ID Code:... -
Page 26: Chlorine Dosing
2.6. Chlorine dosing 2.6.1. Manual injection Possible Setting Menu Functions Instructions settings by default • To start injecting: Confirm selected setting. (The pump is • Primes the pump and fills the running, and the timer semi-rigid pipes From 1 to 59, in countdown is displayed in Dosing •... -
Page 27: Programming The 'Info Gel Cl' Alert
2.6.6. Programming the ‘Info Gel CL’ alert → The ‘Info Gel CL’ alert is a reminder to fill/change the electrolytic gel on the same day this alert is activated. Activation delay after the last refill/change of electrolyte gel Menu Sub-menu Possible settings Default setting Dosing... -
Page 28: Ph Regulation
2.7. pH regulation 2.7.1. Manual injection Possible Setting Menu Functions Instructions settings by default • To start injecting: Confirm selected setting. (The pump • Primes the pump and fills running, and the timer the semi-rigid pipes From 1 to 59, in countdown is displayed in pH regulation •... -
Page 29: Setting The Ph Setpoint
5) Navigate through the menus following the below instructions: pH regulation Calibration pH calibration → Insert the probe into the pH 7 calibration solution, then wait a few minutes. Solution pH calibration → Do not touch the probe. In progress (Wait a few seconds) pH calibration →... -
Page 30: Setting The Ph Regulation Cycle Time
2.7.8. Setting the pH regulation cycle time → The cycle time is used to set the injection cycle of the pump, and, therefore, to take into account the reaction time of the pool between injection and measurement. → The shorter the cycle, the more responsive the regulation will be. For very small pools, such as spas/Jacuzzis, use a 30 second cycle. -
Page 31: Settings Reset
Menu Sensor Setting Possible settings Default setting • OFF Mode • ON CL container • NO Type • NC Settings Sensors • OFF Mode • ON pH container • NO Type • NC ON: sensor activated. OFF: sensor disabled. XX container: empty container sensor. NO: switch normally open. -
Page 32: Data History
2.9. Data history Menu Sub-menu Content History Date of the last pH probe calibration pH calibration History Date of the last adjustment of the free chlorine rate measurement Cl calibration History Date of the last refill/change of electrolyte gel Gel added Filtration Duration of filtration pump operation the previous day Time D-1... -
Page 33: Additional Information
2.11. Additional information Menu Meaning Software Version Control board program MASTER: XX.XX.XX ID Code: Configuration code XXXXXXXX S/N: Serial number XXXX-XXXXXX-XXX MAC address: MAC address for Bluetooth connection XXXXXXXXXXXX Int temperature: Internal temperature XX°C... -
Page 34: Safety
2.12. Safety 2.12.1. Alarms and alerts AUTOMATIC OPERATION(S) UPON ACTIVATION DEFAULT SAFETY DISMISSAL* Immediate stop CONFIGURATION Message of chlorine dosing displayed and/or pH regulation Alarm Press the OK or button (press Alarms Activated (…) or press and hold, depending on Info Alerts Activated... - Page 35 IMMEDIATE OPTION TO MESSAGE AUTOMATIC STOP DISABLE VIA DISPLAYED/FAULT POSSIBLE CAUSE CHECKS AND REMEDIES Chlorine THE ‘ Settings - DETECTED ’ menu dosing regulation Alarms • Check the chlorine container is not empty. • At the chlorine injection circuit, check the condition of the: - filter with ballast.
- Page 36 IMMEDIATE OPTION TO MESSAGE AUTOMATIC STOP DISABLE VIA DISPLAYED/FAULT POSSIBLE CAUSE CHECKS AND REMEDIES Chlorine THE ‘ Settings - DETECTED ’ menu dosing regulation Alarms Check the settings in the ‘ ’, pH Regulation – Setpoint Too much acid corrector ‘...
-
Page 37: Warranty
3. WARRANTY Before contacting your dealer, please have the following to hand: - your purchase invoice. - the serial no. of the electronics unit. - the installation date of the equipment. - the parameters of your pool (salinity, pH, chlorine levels, water temperature, stabiliser level, pool volume, daily filtration time, etc.) We have used every effort and all our technical experience to design this equipment.
Need help?
Do you have a question about the Pro Dosing Ampero and is the answer not in the manual?
Questions and answers