
Subscribe to Our Youtube Channel
Related Manuals for Esatto EVD7


Summary of Contents for Esatto EVD7
- Page 1 Product: esatto.house Model Code/s: 7kg Vented Dryer EVD7 User Manual Exactly what you need Version : Online: V3.1 1121 esatto.house...
- Page 2 User Manual Appliances Exactly what you need...
- Page 3 Contents Welcome Safety Instructions Your Esatto Control Panel Vented Dryer Before Technical First Use Specifications Accessory Kit Installation Components Instructions Operation Cleaning & Instructions Maintenance Troubleshooting Warranty Information...
- Page 4 Head Office 165 Barkly Avenue At Esatto, we are customer obsessed and our Support Teams are there to ensure you get Burnley Victoria the most out of your appliance. Should you want to learn more about your dryer such as...
- Page 5 Safety Instructions GENERAL SAFETY INSTRUCTIONS DRYER SAFETY WARNING! Failure to follow these safety instructions could damage the clothes dryer or your clothes. You may then not be covered by warranty for this damage. Only plug this appliance directly into an AC power supply which is properly earthed and had the correct voltage. Refer to the appliance rating plate (located on the rear of your clothes dryer) for the voltage information.
- Page 6 User Manual Safety Instructions (Continued) • Item(s) that have previously been cleaned in, washed in, or spotted with petrol/gasoline, industrial chemicals used only for cleaning, dry-cleaning solvents or other flammable or explosive substances are highly flammable. Highly flammable or explosive commonly found around the house include acetone, (nail polish remover) denatured alcohol, petrol/gasoline, kerosene, some spot removers, turpentine, waxes and wax removers should not be put in the dryer.
- Page 7 Safety Instructions (Continued) OPERATING YOUR DRYER Your dryer is rated to 7kg of dry clothing. Loads must not exceed this rated capacity. Important! Always check your clothing’s care label information to ensure they are suitable for use within dryers.
- Page 8 User Manual Safety Instructions (Continued) DISPOSAL Old appliances should not simply be disposed of with normal household waste but should be delivered to a collection and recycling centre for electric and electronic equipment. A symbol shown on the product, the instruction manual or the packaging shows that it is suitable for recycling.
- Page 9 This page is intentionally left blank...
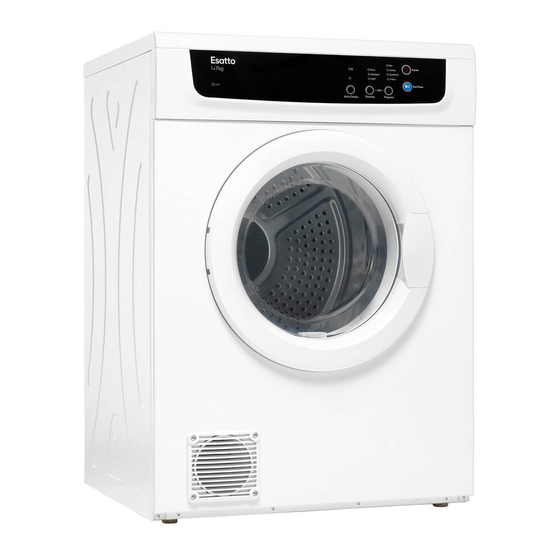
- Page 10 User Manual Your Esatto Vented Dryer Figure 3 - A diagram showing the main components of your vented dryer. 1. Top-board 2. Control Panel 3. Door 4. Front Panel 5. Side panel 6. Filter 7. Flex tube (only to rear vent) 8. Power plug 7.
- Page 11 Control Panel Your Esatto clothes dryer’s controls explained. Figure 4- The control panel for your vented dryer Power button. 2. Start or Pause drying program. 3. Drying program selector (1 Hour, Synthetic, Cotton, Mixed Items) 4. Dryness level selector (Light, Standard, Extra Dry).
- Page 12 User Manual Before First Use Step 1. Power source and grounding The dryer employs alternative current with the rated voltage and frequency. When the voltage fluctuates between 6% of rated voltage, the dryer can work normally. Your clothes dryer should be on a dedicated power socket for both convenience and safety.
- Page 13 ACCESSORY KIT CONTENTS Accessory Kit Components PART NAME IMAGE/DIAGRAM Figure 5- Contents of the Accessory Kit included with your vented dryer for wall hanging installation.
- Page 14 User Manual Installation Instructions Wall Hanging Installation Ma POWER SOURCE AND GROUNDING It’s recommended to use the dryer on its own dedicated power outlet for both convenience and safety. The power outlet (Applicable to 6kg and 7kg models) must be grounded. Important! If the power cord is damaged, it must be replaced by your local distributor or one of its authorised service representatives.
- Page 15 Fix the holder at th position of the two screws. esatto.house Installation Instructions (Continued) Step 4: Drill holes for expansion bolts. The drill diameter is 14mm. Drill 4 holes according to the positioning paper When hang drawing (hole depth 60mm). Find the hole mark on the positioning paper. Drill 4 holes orderly at the positioning paper straight,Hang th hole mark with a Ø...
- Page 16 User Manual Operation Instructions Step 6: Fix the holder to the dryer machine. Place the unpackaged dryer machine on the floor. Unscrew the two screws at the back of the machine with a cross screwdriver. Take out the holder in the kit. Press the screws into the holes on the holder and then fasten them into the original screw holes.
- Page 17 Operation Instructions (Continued) QUICK START Ensure the dryer is switched on at the power outlet and add your wet clothes into the tumble drum. 2. Press the “Power” button to switch the dryer on. 3. Press the “Program” button to select your desired drying program. The LED light will indicate which program you select.
- Page 18 User Manual Operation Instructions (Continued) DETAILED OPERATION Step 1: Preparation before drying • Clothes should be washed before use within the dryer. • Always ensure the same types of clothes are dried together. • Try to sort your clothes to be dried into load that take a similar time to dry (for example heavier items separate from light items).
- Page 19 Operation Instructions (Continued) DETAILED OPERATION (CONTINUED) Program Functions Note: Maximum capacity for loads is based on the clothing when dry. Tip! At the completion of a drying program, the clothes dryer will circulate cold air. This ensures that your clothing is left at a temperature and that your clothes aren’t damaged.
- Page 20 User Manual Operation Instructions (Continued) GENERAL HINTS • Never tumble dry the following: Delicate items such as net curtains, woollen, silk, fabric with metal trim, nylon tights, bulky materials such as blankets, eiderdown, sleeping bags, feather quilts and any item containing rubber foam or materials similar to foam rubber.
- Page 21 Cleaning and Maintenance By ensuring proper cleaning and maintenance of your Esatto Vented Dryer, you can ensure that it will have a long and fault free operation. WARNING! To avoid an electric shock, always unplug your dryer before cleaning.
- Page 22 User Manual Troubleshooting BASIC TROUBLESHOOTING Check the points listed here before you call for help, and make sure that you have followed the Important safety Instructions within this manual. PROBLEM POSSIBLE CAUSES My dryer will not start - Plug is not firmly in its power socket, or the power outlet is not switched on. - You have blown or tripped a fuse.
- Page 23 Troubleshooting (Continued) POSSIBLE FAILURES Certain problems are due to lack of simple maintenance or oversights, which can be solved easily without calling out a service technician. Before contacting your local Customer Care team, please check possible cause of malfunction and solution listed below.
- Page 24 User Manual Warranty AUSTRALIA WARRANTY TERMS & CONDITIONS IN THIS WARRANTY LAUNDRY APPLIANCES ‘acceptable quality’ as referred to in clause 10 of this warranty has the same meaning referred to in the This document sets out the terms and conditions of the ACL;...
- Page 25 Warranty (Continued) You will bear the cost of transportation, travel and For Appliances and services provided by Residentia delivery of the Appliance to and from Residentia Group in Australia, the Appliances come with a Group or its ASR. If you reside outside of the service...
- Page 26 User Manual Warranty (Continued) NEW ZEALAND WARRANTY TERMS & CONDITIONS APPLIANCES To help care for your investment, be sure to register your 7. That if the product is a freestanding microwave oven or appliance online. Registration will help you if you need to small appliance it must be returned to the dealer/ retailer arrange service in the future, and serves as a record of your for servicing.
- Page 27 This page is intentionally left blank...
- Page 28 User Manual Appliances Exactly what you need A RESIDENTIA GROUP INITIATIVE...
Need help?
Do you have a question about the EVD7 and is the answer not in the manual?
Questions and answers