Makita 5104 Manual
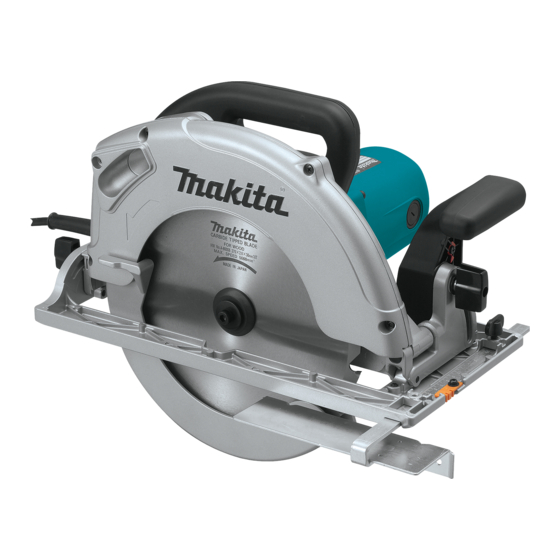
Circular saw 260mm (10-1/4")/ 270mm (10-5/8")
Hide thumbs
Also See for 5104:
- Instruction manual (61 pages) ,
- Parts breakdown (3 pages) ,
- Specifications (2 pages)
Advertisement
Quick Links
T
ECHNICAL INFORMATION
Models No.
Description
C
ONCEPT AND MAIN APPLICATIONS
Models 5104 and 5104S have been developed from Model 5103R
as a portable circular saw for heavy-duty applications.
Compact and lightweight design has been obtained without losing
advantages of Model 5103R.
Model 5104S feature electronic soft start while 5104 does not.
S
pecification
Model 5104
Voltage (V)
110
120
240
Rated amperage for USA: 14A
Model 5104S
230
Size of blade: mm (")
No load speed: rpm= min.
Max cutting capacity: mm (")
Electric brake
Electronic soft start
Protection against electric shock
Cord length: m (ft)
Net weight: kg (lbs)
S
tandard equipment
TCT saw blade 260 or 270 ............. 1
Guide rule ...................................... 1
Note: The standard equipment for the tool shown above may differ by country.
O
ptional accessories
Saw blades
5104, 5104S
Circular Saw 260mm (10-1/4")/ 270mm (10-5/8")
Current (A)
Cycle (Hz)
15
14
7.5
9.6
Model
Diameter
Hole diameter
-1
0 degree
45 degrees
Hex wrench ................ 1
Dust nozzle .................. 1 (for Europe only)
Continuous Rating (W)
Input
50/60
1,650
50/60
---
50/60
1,700
50
2,100
5104
260 (10-1/4)/ 270 (10-5/8)
North America: 15.88 (5/8)
Europe: 30.0
Other countries: 25.4 (1)
3,800
95 (3-3/4)/ 100 (3-15/16)
69 (2-3/4)/ 73 (2-7/8)
Yes
No
Double insulation
Australia, Chile: 2.0 (6.6)
Other countries: 2.5 (8.2)
8.3 (18.3)
W1
H2
H1
L
Dimensions: mm (")
Length (L)
Width (W1)
315 (12-3/8)
Height (H1)
323 (12-3/4)
Height (H2)
215 (8-7/16)
Base size: mm (")
Width (W2)
195 (7-11/16)
Max. Output (W)
Output
1,000
2,100
1,000
2,100
1,100
2,500
1.350
3,300
5104S
Yes
PRODUCT
P 1/ 13
W2
405 (16)
Advertisement

Related Manuals for Makita 5104


Summary of Contents for Makita 5104
- Page 1 Description Circular Saw 260mm (10-1/4")/ 270mm (10-5/8") ONCEPT AND MAIN APPLICATIONS Models 5104 and 5104S have been developed from Model 5103R as a portable circular saw for heavy-duty applications. Compact and lightweight design has been obtained without losing advantages of Model 5103R.
-
Page 2: Necessary Repairing Tools
1R346 Center attachment Attaching to 1R045 when removing Helical gear 39 [2] LUBRICATION Apply Makita grease N. No.1 to the following portions designated with the black triangle to protect parts and product from unusual abrasion. Item No. Description Portion to lubricate... - Page 3 P 3/ 13 epair [3] DISASSEMBLY/ASSEMBLY [3] -1. Base DISASSEMBLY 1) Base can be disassembled as illustrated in Figs. 2 and 3. Fig.2 1. Loosen M6 Wing nut slightly; no need to remove in this step. 2. Loosen M4x5 H.S. Set screw to remove Pin 6 smoothly.
- Page 4 P 4/ 13 epair [3] DISASSEMBLY/ASSEMBLY [3] -2. On-off Switch, Brake Switch, Power Supply Cord, Noise Supppressor, Controller DISASSEMBLY 1) Disassemble Handle set (L) in the order of Figs. 4 and 5. The electrical Parts can be replaced. Fig.4 Ring spring 12 M8 Hex nut Lever 54 Remove Lever 54 by levering...
- Page 5 P 5/ 13 epair [3] DISASSEMBLY/ASSEMBLY [3] -3. Armature DISASSEMBLY 1) Remove Brush holder caps and Carbon brushes (left in FIg.6). And then remove Ring spring 12, Lever 54 and M8 Hex nut as illustrated in Fig. 4. 2) Remove Handle set and Motor housing together from Blade case complete. (center in Fig. 6) 3) Remove Armature.
- Page 6 P 6/ 13 epair [3] DISASSEMBLY/ASSEMBLY [3] -4. Bearing Box, Gear Section with Super Joint System DISASSEMBLY 2) Gear section can be disassembled in the Order of Fig. 8 to 10. Fig.8 1. Disassemble Bearing retainer 34-62 by unscrewing M5x16 Countersunk head screws. M5x16 Countersunk head screw: 2pcs.
- Page 7 Take the disassembling step in reverse. Note: 1) Apply Makita Grease N.No.1 to the whole portion of Lock spring 20 and Lock spring 27. 2) When linking Safety cover with Blade case complete using Torsion spring 6, be sure to follow the instruction shown in Fig.
- Page 8 P 8/ 13 epair [4] ADJUSTMENT Squaring Adjustment of Saw Blade Fig.14 Adjustment to 90 degrees Adjustment to 45 degrees Saw blade Saw blade Hex wrench Triangular rule 1R208 Base Base Adjsut by turning Hex wrench until Set the machine to fully tilted position. both Saw blade and Base contact And adjust by turning Hex wrech until 1R208 closely.
-
Page 9: Circuit Diagram
P 9/ 13 ircuit diagram 5104 110V-127V (for North America and Taiwan, etc.) Fig. D-1A Color index of lead wires' sheath Orange Black White Yellow ON-OFF Noise Switch Ssuppressor Field Choke coil iring diagram 5104 110V-127V (for North America and Taiwan, etc.) Fig. - Page 10 P 10/ 13 ircuit diagram 5104 220-240V (for Australia etc.) Fig. D-1B Color index of lead wires' sheath Orange Yellow White Brown Purple Blue Brake switch Choke coil ON-OFF Switch Noise suppressor Field Choke coil iring diagram 5104 220-240V (for Australia etc.) Fig.
- Page 11 P 11/ 13 ircuit diagram 5104S 220-240V (for Europe, Turkey, Bhutan, South Aftrica, etc.) Fig. D-1C Color index of lead wires' sheath Orange Yellow Brown Purple Blue Black White Insulated connector Choke coil Noise Controller suppressor Brake switch ON-OFF Noise switch suppressor Field...
- Page 12 P 12/ 13 iring diagram 5104S 220-240V (for Europe, Turkey, Bhutan, South Aftrica, etc.) Fig. D-2C Insulated connector Noise Choke coil suppressor ON-OFF switch Brake Insulated connector Switch Controller Power supply cord Fix Lead wires with Lead wire holder. Noise suppressor Pull Field lead wires to Handle set side Insulated connector...
- Page 13 Destinations Model No. * Orange * Twiwan, * Red * North America * Yellow 5104 * Orange with Choke coil * Red Pulling Lead wires not to slacken in * Australia * Yellow Motor housing, install Field into Motor housing.
Need help?
Do you have a question about the 5104 and is the answer not in the manual?
Questions and answers