Behringer CRAVE Quick Start Manual
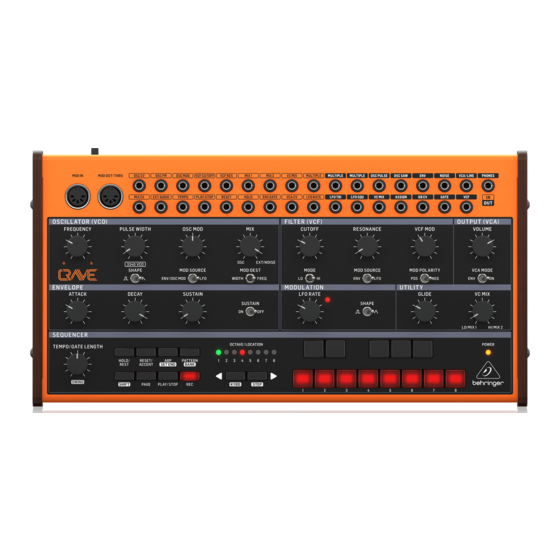
Analog semi-modular synthesizer with 3340 vco, classic ladder filter, 32-step sequencer and 16-voice poly chain
Hide thumbs
Also See for CRAVE:
- Quick start manual (27 pages) ,
- User support bulletin (6 pages) ,
- Quick start manual

Related Manuals for Behringer CRAVE


Summary of Contents for Behringer CRAVE
- Page 1 Quick Start Guide CRAVE Analog Semi-Modular Synthesizer with 3340 VCO, Classic Ladder Filter, 32-Step Sequencer and 16-Voice Poly Chain V 3.0 A54-00002-87519...
-
Page 2: Important Safety Instructions
CRAVE 1. Read these instructions. 15. The apparatus shall be connected Important Safety Instructions 2. Keep these instructions. to a MAINS socket outlet with a protective earthing connection. 3. Heed all warnings. 16. Where the MAINS plug or an 4. Follow all instructions. -
Page 3: Limited Warranty
Si el Tannoy, Turbosound, TC Electronic, enchufe suministrado con el equipo No hay piezas en el interior del equipo TC Helicon, Behringer, Bugera, no concuerda con la toma de corriente, que puedan ser reparadas por el Oberheim, Auratone and Coolaudio are usuario. -
Page 4: Garantía Limitada
Tannoy, Turbosound, TC Electronic, arrière. L’intérieur de l’appareil ne aparato: Este símbolo TC Helicon, Behringer, Bugera, possède aucun élément réparable par indica que este aparato Oberheim, Auratone y Coolaudio l’utilisateur. Laisser toute réparation à... -
Page 5: Garantie Limitée
électrique, appropriée de ce Turbosound, TC Electronic, TC Helicon, faites appel à un électricien pour produit: Ce symbole Behringer, Bugera, Oberheim, Auratone effectuer le changement de prise. indique qu’en accord et Coolaudio sont des marques ou avec la directive DEEE 10. - Page 6 Erdungskontakt dient Produkts: Dieses Symbol Gruppen, Lake, Tannoy, Turbosound, Ihrer Sicherheit. Falls das mitgelieferte weist darauf hin, das TC Electronic, TC Helicon, Behringer, Steckerformat nicht zu Ihrer Steckdose Produkt entsprechend Bugera, Oberheim, Auratone und passt, wenden Sie sich bitte an...
-
Page 7: Beschränkte Garantie
Quick Start Guide eingetragene Warenzeichen der exposto à chuva nem à humidade. Verifique particularmente nas fichas, Music Tribe Global Brands Ltd. Além disso, não deve ser sujeito a nos receptáculos e no ponto em que o © Music Tribe Global Brands Ltd. salpicos, nem devem ser colocados em cabo sai do aparelho. -
Page 8: Garantia Limitada
Se la spina fornita Turbosound, TC Electronic, TC Helicon, non si adatta alla presa, consultare un allegata. Si invita a leggere il manuale. Behringer, Bugera, Oberheim, Auratone elettricista per la sostituzione della e Coolaudio são marcas ou marcas Attenzione presa obsoleta. -
Page 9: Garanzia Limitata
Teknik, Lab Gruppen, Lake, Tannoy, Reparatiewerkzaamheden mogen corretto di questo Turbosound, TC Electronic, TC Helicon, uitsluitend door gekwalificeerd prodotto: questo Behringer, Bugera, Oberheim, Auratone personeel uitgevoerd worden. simbolo indica che e Coolaudio sono marchi o marchi questo dispositivo non registrati di Music Tribe Global Brands Attentie Ltd. -
Page 10: Beperkte Garantie
AEEA-richtlijn Gruppen, Lake, Tannoy, Turbosound, vervangen. (2012/19/EU) en de TC Electronic, TC Helicon, Behringer, 10. Om beschadiging te voorkomen, nationale wetgeving van uw land niet Bugera, Oberheim, Auratone en met het gewone huishoudelijke afval moet de stroomleiding zo gelegd... -
Page 11: Viktiga Säkerhetsanvisningar
Quick Start Guide 1. Läs dessa anvisningar. 15. Dra ur anslutningskontakten und Viktiga åskväder eller när apparaten inte ska säkerhetsanvisningar 2. Spara dessa anvisningar. användas under någon längre tid. 3. Beakta alla varningar. 16. Låt kvalificerad personal utföra 4. Följ alla anvisningar. all service. -
Page 12: Begränsad Garanti
Midas, Klark Teknik, Lab Gruppen, 3. Należy przestrzegać wszystkich wystarczająco wysokie napięcie Lake, Tannoy, Turbosound, TC elektryczne, aby stworzyć ryzyko wskazówek ostrzegawczych. Electronic, TC Helicon, Behringer, porażenia prądem. Używaj 4. Należy postępować zgodnie z Bugera, Oberheim, Auratone och wyłącznie wysokiej jakości instrukcją obsługi. -
Page 13: Ograniczona Gwarancja
że tego produktu nie Lab Gruppen, Lake, Tannoy, należy wyrzucać razem Turbosound, TC Electronic, TC Helicon, ze zwykłymi odpadami Behringer, Bugera, Oberheim, domowymi, tylko zgodnie z dyrektywą Auratone i Coolaudio są znakami w sprawie zużytego sprzętu towarowymi lub zastrzeżonymi elektrycznego i elektronicznego... - Page 14 CRAVE CRAVE Hook-up Step 1: Hook-Up (EN) Paso 1: Conexión (ES) Studio System Sistema para estudio de grabación Système de studio Etape 1 : Connexions (FR) Studio-System Sistema de Estúdio Schritt 1: Verkabelung (DE) Studio System Studio-systeem Studio-systemet Passo 1: Conexões...
- Page 15 Quick Start Guide Band / Practice System Sistema para un grupo/ensayos Système pour répétition Band/Proberaum-System Sistema Banda/Prática Sistema band / pratica Band / oefensysteem Band / övningssystem Zespół / system ćwiczeń MIDI Keyboard MIDI OUT Expression Pedal Footswitch MIDI IN Power Adapter Headphones...
- Page 16 CRAVE CRAVE Hook-up Step 1: Hook-Up (EN) Live System Sistema para actuación en directo Paso 1: Conexión (ES) Système pour représentation Live-System Sistema Ao Vivo Etape 1 : Connexions (FR) Sistema live Live-systeem Schritt 1: Verkabelung Live-system (DE) System na żywo Passo 1: Conexões...
- Page 17 Poly Chain System Poly Chain System Sistema Poly Chain Poly Chain-systeem Poly kedjesystem Poly Chain System MIDI Keyboard MIDI OUT To next CRAVE MIDI IN MIDI THRU MIDI IN MIDI THRU MIDI IN MIDI THRU From next CRAVE Mixing console...
- Page 18 CRAVE CRAVE Controls (2) (3) (4) (5) (6) (7) (8) (9) (10) (11) (12) (13) (14) (15) (20) (16) (17) (18) (19) (21) (22) (23) (24) (25) (26) (27) (28) (29) (30) (37) (31) (32) (33) (34) (35) (36) (38)
- Page 19 Quick Start Guide (73) (74) (75) (76)
-
Page 20: Modulation Section
ARP (SET END) - In ARP mode, an arpeggio will play, (27) Output (VCA) Section based on the held notes using the CRAVE’s 13 keyboard VOLUME - adjust the overall synthesizer output level. (14) switches. Double-press ARP, or press HOLD and ARP, to play and hold an arpeggio. - Page 21 USB PORT - this USB type B jack allows connection (74) with a MIDI interface, etc. to a computer. The CRAVE will show up as a class- MIDI OUT/THRU – passes through MIDI data received at compliant USB MIDI device, capable of supporting MIDI (39) the MIDI INPUT and sends MIDI data to an application.
- Page 22 ARP (SET END) - En el modo ARP se reproducirá un (27) arpegio basado en las notas mantenidas usando los 13 botones de teclado del CRAVE. Haga una doble pulsación de este botón para que un arpegio continúe reproduciéndose. En el modo de secuenciador, el pulsar a la vez SHIFT y SET END, seguido por un botón STEP, hará...
- Page 23 Quick Start Guide PATTERN (BANK) - Este botón se usa para acceder al KYBD - pulse SHIFT + KYBD para cambiar el secuenciador (28) (35) patrón actual o al número de banco de la siguiente forma: al modo de teclado. PATRÓN: Pulse PATTERN y uno de los 8 pilotos LOCATION STEP - pulse SHIFT + STEP para cambiar el secuenciador al (36)
-
Page 24: Panel Trasero
MOD SOURCE - sélection de la source de modulation du (74) (11) conexión con un ordenador. El CRAVE aparecerá como un VCF : l’enveloppe ou le LFO. dispositivo MIDI class-compliant USB, con capacidad de VCF MOD - réglage de l’intensité de la modulation du VCF. - Page 25 Ce bouton peut également être utilisé CRAVE. Appuyez rapidement deux fois pour jouer l’arpège conjointement avec le bouton SHIFT lors de la procédure en boucle. En mode Sequencer, appuyez simultanément de sauvegarde du pattern.
-
Page 26: Face Arrière
USB PORT - ce port USB de type B permet la connexion à (74) EXT AUDIO - entrée audio externe. (50) un ordinateur. Le CRAVE est reconnu nativement comme TEMPO - tempo du séquenceur. (51) un appareil USB MIDI capable d’envoyer et de recevoir des signaux MIDI. - Page 27 ARP (SET END) - Im ARP-Modus wird ein Arpeggio auf (27) Basis der Noten wiedergegeben, die mit den 13 Keyboard- Schaltern des CRAVE gedrückt gehalten werden. Bei doppeltem Tastendruck wird ein Arpeggio abgespielt und ausgehalten. Wenn man im Sequencer-Modus die SHIFT- und SET END-Tasten zusammen und danach eine STEP-Taste drückt, wird mit diesem Step das aktuelle...
- Page 28 CRAVE CRAVE Controls Schritt 2: Bedienelemente KYBD - Drücken Sie SHIFT + KYBD, um den Sequencer in (DE) (35) den Keyboard-Modus zu schalten. STEP - Drücken Sie SHIFT + STEP, um den Sequencer in den (36) PATTERN (BANK) - Mit dieser Taste greift man wie folgt (28) STEP-Modus zu schalten.
- Page 29 VCF MOD - ajusta a profundidade da modulação do VCF. (12) USB PORT - Über diesen USB Typ B-Port kann man (74) den CRAVE mit einem Computer verbinden. Der CRAVE MOD POLARITY- seleciona a polaridade da (13) erscheint als standardkonformes USB MIDI-Gerät, das MIDI modulação VCF.
- Page 30 ARP (SET END) - No modo ARP, um arpejo toca, baseado Se SHIFT for apertado ao mesmo tempo, isso iniciará o (27) nas notas apertadas, usando os 13 botões CRAVE do procedimento de salvar o padrão. teclado. Aperte duas vezes para tocar e segure um Arpejo.
-
Page 31: Painel Traseiro
USB PORT - esta tomada USB tipo B possibilita conexão a (74) EXT AUDIO - entrada de áudio externo. (50) um computador. O CRAVE aparecerá como um dispositivo TEMPO - cadência de sequenciador. (51) MIDI compatível com a classe USB, capaz de suportar entrada e saída MIDI. - Page 32 (27) un arpeggio, basato sulle note tenute utilizzando i 13 Sezione busta interruttori della tastiera di CRAVE. Premi due volte ARP, ATTACCO - controlla il tempo impiegato per raggiungere il (16) o premi HOLD e ARP, per riprodurre e tenere premuto livello massimo dopo la pressione di un tasto.
- Page 33 Quick Start Guide PATTERN (BANCA) - Questo pulsante viene utilizzato KYBD - premi SHIFT + KYBD per cambiare il sequencer (28) (35) per accedere al pattern corrente o al numero di banco, in modalità tastiera. Premere per cambiare l’ottava della come segue: tastiera a 13 note.
- Page 34 PORTA USB - questa presa USB di tipo B consente il (74) Uitgang (VCA) sectie collegamento a un computer. Il CRAVE si presenterà come un dispositivo MIDI USB conforme alla classe, in grado di VOLUME - pas het algehele uitgangsniveau van de (14) supportare MIDI in e out.
- Page 35 13 toetsenbordschakelaars van de patroon speelt, zullen de STEP-LED’s de stappen laten zien CRAVE. Druk tweemaal op ARP of druk op HOLD en ARP om die op de huidige pagina worden gebruikt. een arpeggio af te spelen en vast te houden. Door in de...
- Page 36 MENGELING 2 - mix 2 CV in, intern aangesloten op (46) USB POORT- deze USB type B-aansluiting maakt (74) VC MIX. aansluiting op een computer mogelijk. De CRAVE zal VC MIX - VC mix control CV in, intern aangesloten op verschijnen als een klasse-compatibel USB MIDI-apparaat, (47) VC MIX.
- Page 37 VCA-LÄGE - välj kuvert och VCA moduleras av kuvertet. I (27) (15) spela, baserat på de hållna tonerna med CRAVE: s 13 PÅ-läge är VCA-utgången den senast spelade tangenten tangentbordsomkopplare. Dubbeltryck på ARP, eller tryck och är oberoende av kuvertet.
- Page 38 CRAVE CRAVE Controls Steg 2: Kontroller (SE) MIDI-avsnitt BANK: Tryck på SKIFT och MÖNSTER, och en av de 8 LOCATION-lysdioderna visar det aktuella banknumret MIDI IN - detta 5-stifts DIN-uttag tar emot MIDI-data från (38) (från 1 till 8). För att byta till ett annat banknummer, håll en extern källa.
-
Page 39: Bakre Panel
USB UTTAG - det här USB-uttaget av typ B möjliggör wewnętrznym generatorem szumów. Jeśli używane jest (74) anslutning till en dator. CRAVE kommer att visas som en zewnętrzne wejście audio, jest ono dodawane do miksu zamiast szumu. klass-kompatibel USB MIDI-enhet, som kan stödja MIDI in och ut. - Page 40 Jest to również używane z SHIFT podczas procedury arpeggio w oparciu o przetrzymane nuty za pomocą 13 zapisywania wzoru. przełączników klawiatury CRAVE. Naciśnij dwukrotnie ARP lub naciśnij HOLD i ARP, aby zagrać i przytrzymać arpeggio. KYBD- naciśnij SHIFT + KYBD, aby zmienić sekwencer w (35) W trybie Sequencer, jednoczesne naciśnięcie SHIFT i SET...
-
Page 41: Tylny Panel
PORT USB - to gniazdo USB typu B umożliwia podłączenie wewnętrznie z VC MIX. (74) do komputera. CRAVE pojawi się jako zgodne z klasą WIELOKROTNOŚĆ - każdy wprowadzony tu sygnał jest (48) urządzenie USB MIDI, zdolne do obsługi wejścia i przekazywany na oba wyjścia MULTIPLE. -
Page 42: Step 3: Getting Started
SOFTWARE SETUP The low-pass filter reduces the level of signals that are The CRAVE is a USB Class Compliant MIDI device, and so no driver above the cutoff frequency. It reduces the levels of the installation is required. The CRAVE does not require any additional higher-order harmonics. - Page 43 Use the main volume control to adjust the sound level in your FIRMWARE UPDATE headphones or speaker system. The SynthTool App is available as a free download from the CRAVE Keep the level down low when first putting on headphones. product page of our website: behringer.com. The latest file can be downloaded and stored on your computer, and then used to Keep the CRAVE power turned off when making any connections.
-
Page 44: Paso 3: Puesta En Marcha
Realice todas las conexiones en su sistema. Utilice los interruptores orden inferior. MIDI del panel trasero para ajustar el CRAVE a un canal MIDI único de su sistema. Conecte un teclado MIDI externo directamente a la El filtro pasabajos reduce el nivel de las señales que están por toma de entrada de tipo DIN de 5 puntas MIDI IN del CRAVE. -
Page 45: Actualización De Firmware
Las salidas de 3.5 mm solo deberían ser conectadas a entradas capaces de recibir los voltajes de salida. El no cumplir con estas instrucciones puede producir daños tanto en el CRAVE como en las unidades externas. SECCIÓN DE SECUENCIADOR El secuenciador aparece descrito con mayor detalle en este documento. -
Page 46: Étape 3 : Mise En Œuvre
CONFIGURATION LOGICIELLE Essayez de modifier la fréquence de coupure et le réglage de Le CRAVE est un appareil MIDI reconnu nativement en USB, il n’est résonnance puis écoutez les effets produits sur le son. Les filtres donc pas nécessaire d’installer de pilote pour qu’il fonctionne sous passe-haut et passe-bas 24 dB/octave permettent de modifier Windows et MacOS. - Page 47 Les sorties MiniJack 3,5 mm doivent être connectées uniquement à des entrées compatibles avec la tension de sortie produite. Le non-respect de ces instructions peut provoquer des dommages causés au CRAVE ou au reste de votre équipement. SECTION SEQUENCER De plus amples détails quant au séquenceur sont donnés dans les...
-
Page 48: Schritt 3: Erste Schritte
MIDI-Kanal ein. Schließen Sie ein externes MIDI Harmonischen höherer Ordnung. Keyboard direkt an die 5-polige MIDI IN DIN-Buchse des CRAVE an. Der Resonance-Regler hebt den Pegel der Signale im Bereich der Versorgen Sie den CRAVE nur über den mitgelieferten Netzadapter Crossover-Frequenz an. -
Page 49: Firmware Update
Mal aufsetzen. Lassen Sie den CRAVE ausgeschaltet, solange Sie Kabelverbindungen herstellen. Schalten Sie zuerst den CRAVE und danach Ihre Endstufen ein. Schalten Sie zuerst die Endstufen und zuletzt den CRAVE aus. Dadurch verhindern Sie „Popp- und Ploppgeräusche“ in Ihren Lautsprechern, die beim Ein- und Ausschalten des Systems entstehen können. -
Page 50: Passo 3: Primeiros Passos
Faça todas as conexões ao seus Sistema. Use os botões MIDI do O filtro passa-baixa reduz o nível dos sinais que estão acima da painel traseiro para ajustar o CRAVE a um único canal MIDI em seu frequência de corte. Ele reduz os níveis da harmonia de ordem sistema. -
Page 51: Atualização De Firmware
O controle de VC MIX age como se houvesse um mini- e então usado para atualizar o CRAVE. Ele vem com instruções mixer separado ou fonte de tensão variável. Ele opera detalhadas sobre o procedimento de atualização. - Page 52 TEMPO DI RISCALDAMENTO il VCO e il VCF. La frequenza dell’LFO può essere variata e la forma Si consiglia di lasciare 15 minuti o più per il riscaldamento di CRAVE d’ o nda selezionata tra quadrata o triangolare. Un LED indica la prima della registrazione o dell’...
-
Page 53: Aggiornamento Del Firmware
(Questa soglia solo a ingressi in grado di ricevere le tensioni di uscita. Il mancato di velocità dell’accento può essere regolata o questa funzione rispetto di queste istruzioni può danneggiare il CRAVE o le unità disabilitata, utilizzando l’APP SynthTool). esterne. - Page 54 Stap 3: Aan de slag (NL) OVERZICHT FILTER (VCF) GEDEELTE Deze ‘aan de slag’-gids helpt u bij het instellen van de CRAVE analoge Speel met de afsnijfrequentie en resonantiecontroles, en luister naar synthesizer en introduceer kort de mogelijkheden ervan. hun effecten op het geluid.
- Page 55 CRAVE indien Houd de CRAVE-stroom uitgeschakeld wanneer u aansluitingen maakt. nodig bij te werken. Schakel de CRAVE in voordat u eindversterkers inschakelt, en schakel deze als laatste uit. Dit zal helpen voorkomen dat uw luidsprekers worden in- of uitgeschakeld.
- Page 56 Gör alla anslutningar i ditt system. Använd MIDI-omkopplarna på baksidan för att ställa in CRAVE till en unik MIDI-kanal i ditt system. VCF-moduleringskällan kan antingen vara kuvertet eller LFO. Anslut ett externt MIDI-tangentbord direkt till CRAVE MIDI IN 5-stifts DIN-ingång.
- Page 57 Håll CRAVE-strömmen avstängd när du gör några anslutningar. Tryck två gånger på den för att spela upp och hålla inne Slå på CRAVE innan du slår på några effektförstärkare och stäng av accentstatusen. (LED-lampan blinkar långsamt.) den sist. Detta hjälper till att förhindra att du slår på eller stänger av “poppar eller dunkar”...
- Page 58 USTAWIENIA OPROGRAMOWANIA Filtr dolnoprzepustowy zmniejsza poziom sygnałów, które są powyżej częstotliwości odcięcia. Zmniejsza poziomy harmonicznych CRAVE jest urządzeniem MIDI zgodnym z klasą USB, więc nie jest wyższego rzędu. wymagana instalacja sterowników. CRAVE nie wymaga żadnych dodatkowych sterowników do pracy z Windows i MacOS.
- Page 59 Podczas pierwszego zakładania słuchawek utrzymuj niski produktu CRAVE na naszej stronie internetowej: behringer.com. poziom głośności. Najnowszy plik można pobrać i zapisać na komputerze, a następnie użyć do aktualizacji CRAVE, jeśli jest to wymagane. Podczas wykonywania jakichkolwiek połączeń, wyłącz zasilanie CRAVE. Włącz CRAVE przed włączeniem jakichkolwiek wzmacniaczy mocy i wyłączaj jako ostatni.
-
Page 60: Step 4: Sequencer Operation
(If you cannot select REC, then repeat step 1.) Press PLAY/STOP to listen to the current pattern. Press any note on the CRAVE keyboard, or a rest as shown If you decide not to save it, you can repeat the recording below. -
Page 61: Live Performance
Quick Start Guide LIVE PERFORMANCE While playing a pattern, you can: Press HOLD/REST to hold the current step. During playback, temporary adjustments can be made as follows. (None of these are saved with the pattern.) Press RESET/ACCENT to return to step 1. To add Ratchet to all steps of the pattern, press SHIFT and Press SHIFT and any STEP, and you can edit the gate length, adjust the GLIDE control. - Page 62 CRAVE CRAVE Sequencer operation Step 4: Sequencer operation (EN) CREATING A PATTERN IN STEP MODE Press SHIFT and STEP> to select the Sequencer’s STEP mode. The flashing LOCATION LED will turn from green (Keyboard mode) to yellow (Step mode). Initialise the current pattern by pressing SHIFT, RESET, and PATTERN at the same time.
- Page 63 Quick Start Guide CRAVE Parameters Selection Step 5: Parameter Selection Mode (EN) Programming Tempo Input Modes: The parameters may be changed using the following procedure: Press SHIFT+ HOLD/REST + 8 to enter the setting mode. 1PPS The LOCATION LED 1 will blink yellow.
- Page 64 CRAVE CRAVE Poly Chain Function Step 6: Poly Chain Function (EN) SUSTAIN POWER LED System Mode POWER LED Mode Amber Normal Mode Poly Chain Mode Please use the “SynthTool.exe” to configure the Poly Chain mode. The POWER LED will turn red during Poly Chain mode.
- Page 65 SYSTEM EXCLUSIVE COMMANDS Some CRAVE parameters can be changed using MIDI system exclusive (SysEx) commands. A MIDI utility such as MIDI OX can be used to send the SysEx command data string to the CRAVE using the USB MIDI connection between the computer and the CRAVE.
- Page 66 CRAVE Name State Command Para range(D0 … Dn) Set Clock Source valid F0 00 20 32 00 01 05 1B D0 F7 D0: The value of clock source is 0x00~0x04 → 0x00: INT 0x01: MIDI 0x02: USB 0x03: EXT 0x04: AUTO...
- Page 67 1. Connect your host computer to the CRAVE using the USB connection. 2. Run the latest SynthTool, and the main CRAVE menu will appear, as shown in the typical general interface below. 3. Various parameters can be selected and adjusted.
- Page 68 CRAVE Patch Sheet Patch Number DATE: AUTHOR: TITLE: NOTES:...
- Page 69 Quick Start Guide...
-
Page 70: Specifications
CRAVE Specifications Synthesizer Architecture Number of voices Monophonic Type Analog Oscillators 1 (8.176 to 8.372k Hz) 1 (0.1 to 350 Hz) 1 low pass, high pass (24 dB/octave slope) Envelopes ADS, selectable for VCO, VCF, VCA Connectivity Power input DC input connector... - Page 71 Quick Start Guide Modulation Section Controls LFO rate: 0 to 10 Switches Shape: pulse, triangular LFO rate Utility Section Controls Glide time: 0 to 10 (0 to 2 s) VC mix: lo/mix 1 to hi/mix 2 Sequencer/Arpeggiator Section Number of step 32 steps maximum per pattern Number of patterns 64 patterns maximum...
- Page 72 CRAVE Power Requirements External power adaptor 12 VDC, 1000 mA (use only the supplied adapter) Power consumption 3 W maximum Indicator Power LED Environmental Operating temperature range 5°C – 40°C (41°F – 104°F) Physical Dimensions (H x W x D) 47 x 320 x 164 mm (1.85 x 12.6 x 6.46")
-
Page 73: Register Online
“Support” de nuestra página web dans la liste, essayez de résoudre votre at behringer. com. Alternatively, please behringer. com. En caso de que su país no problème avec notre “aide en ligne” submit an online warranty claim at aparezca en ese listado, acceda a la sección que vous trouverez également dans la... - Page 74 “Suporte” Fulfiller per il vostro paese, elencato in prüfen Sie bitte, ob Ihr Problem von em behringer. com. Se seu país não estiver “Support” @ behringer.com. Se la vostra unserem „Online Support“ gelöst werden na lista, favor checar se seu problema pode nazione non è...
-
Page 75: Belangrijke Informatie
Quick Start Guide Belangrijke informatie Viktig information Ważna informacja 1. Registreer online. Registreer 1. Registrera online. Registrera 1. Zarejestrować online. uw nieuwe Music Tribe-apparatuur din nya Music Tribe-utrustning direkt Zarejestruj swój nowy sprzęt Music Tribe direct nadat u deze hebt gekocht door efter att du köpt den genom att besöka zaraz po zakupie na stronie musictribe. -
Page 76: Federal Communications Commission Compliance Information
CRAVE FEDERAL COMMUNICATIONS COMMISSION COMPLIANCE INFORMATION CRAVE Responsible Party Name: Music Tribe Commercial NV Inc. Address: 5270 Procyon Street, Las Vegas NV 89118, United States Phone Number: +1 702 800 8290 CRAVE This equipment has been tested and found to comply with the limits for a Class B digital device, pursuant to part 15 of the FCC Rules. - Page 77 Quick Start Guide...
- Page 78 CRAVE...
- Page 79 Quick Start Guide...
- Page 80 We Hear You...
Need help?
Do you have a question about the CRAVE and is the answer not in the manual?
Questions and answers