Table of Contents
Advertisement
Quick Links
Advertisement
Table of Contents

Summary of Contents for Zetronix BlueLine
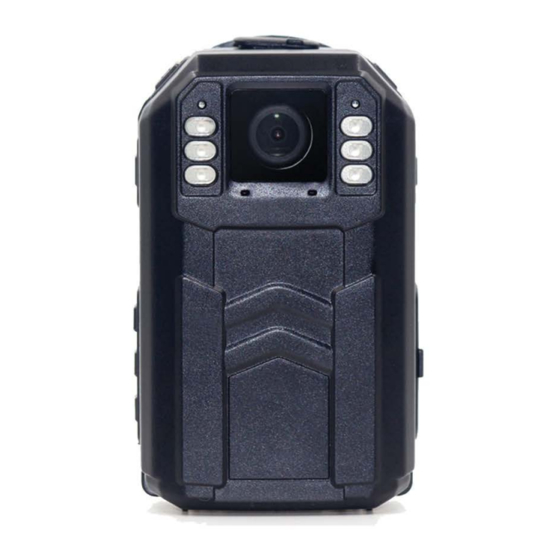
- Page 4 Turning On the Blueline Body Camera Hold the Power button for 3 seconds, after a beep, the camera will be turned on and automatically enter preview mode and the status light will turn green. In the preview mode, the following screen will appear:...
-
Page 5: Audio Recording
1.4 Recording a Video In preview mode, press the video button to begin recording video, the status light will turn red. Press the video button again to stop recording. The video will be saved as an .MP4 file. 1.5 Quick start video recording If the camera is powered off and you want it to begin recording video immediately, hold the video button there will be a beep and the... - Page 6 Playback on Camera In preview mode, press the playback button to enter playback mode. Icons indicating video, photos, and audio will appear as shown below. Use the video button to move your selection to the left, use the photo button to move to the right.
- Page 7 1.11 Camera Settings From preview mode press the multi-function button to bring up the camera’s settings menu. From here you will have the following options: Adjust the frame size and frame rate of video Video Resolution Select the size in megapixels of still photos taken with the Photo Pixel camera Choose the number of photos the camera will take when the...
-
Page 8: Charging The Battery
IR. 2.1 Charging the Battery The Blueline Body Camera has a built-in rechargeable battery. It can be charged via the USB connection. The battery will charge while it is connected to your computer or you can use the provided AC to USB adapter to power your camera from an AC power source such as a wall plug. -
Page 9: Installing Software
‘My Computer” of “This PC” and open your CD/DVD disk drive. Run the program BWC-Tool-setup.exe. Follow the on-screen instructions to continue and complete the install. Setting Up Your Blueline Body Camera 4.1 Connecting your camera Once installed you should find the BTC Tool Shortcut link on your desktop. - Page 10 After connecting, you will see the main menu prompting for a “Device password”. The default Password: 000000 The device can be accessed in 3 different modes: Data Importing: for importing or backing up the media stored in the camera. Parameter Settings: for setting user access and the watermark. Removable Disk: for accessing the camera as a drive in your computer.
- Page 11 4.2 Data Importing Enter the device password and choose “Data Importing”. Hit apply, and all the media will be imported to your local hard drive. You can specify where in your computer the files are to be stored under the “Setting”...
-
Page 12: Parameter Settings
4.3 Parameter Settings After connecting the camera, from the main menu, enter the device password and choose “Parameter Settings”. Hit apply. From here you can change the password, user name and add a watermark to the video recordings. -
Page 13: Removable Disk
4.4 Removable Disk After connecting the camera, from the main menu, enter the device password and choose “Removable Disk”. Hit apply. The application will convert the device into a drive in your computer and automatically open a window where you can see the DCIM folder with all the included media. NOTE: To return to the main menu, you must unplug the camera and then plug it back in to exit the current mode. - Page 14 4.3 Media Data The media data is accessible under the Data Importing mode, under the “Local Data” tab. The Media data tab allows you to sort through files in the import folder on your computer. It is mostly for users who have multiple body cameras or cameras with many users to manage.
- Page 15 Zetronix Corporation (“Zetronix”) warrants this product against defects in material or workmanship as follows: PRODUCT: Zetronix will repair this product with new or refurbished parts, free of charge, for a period of one (1) year from the date of original purchase in the event of a defect in materials or workmanship. REPAIRS: Zetronix will repair...
- Page 16 Still Have Questions? Do NOT return your camera! We can help! Contact Zetronix Tech Support (877) 644-7592 By Phone support@zetronix.com By Email On the Web http://help.zetronix.com http://help.zetronix.com ©2018 Zetronix Corp. Ver.2...


Need help?
Do you have a question about the BlueLine and is the answer not in the manual?
Questions and answers