Advertisement
Quick Links
LUXOMAT
Installation and Operating Instruction for
1. Mounting preparations
Work on the 230 V mains supply
may only be carried out by quali-
fied professionals or by instructed
persons under the direction and
supervision of qualified skilled
electrical personnel in accordance
with electrical regulations.
Disconnect supply before installing!
The device is not suited for safe
disconnection of the mains supply.
When in Master/Slave mode of op-
eration, the Master-appliance must
always be installed at the location
where there is least daylight.
4. DIP switch functions
DIP-
ON
switch
1
Corridor mode
2
LED OFF
3
Semi automatic mode
Corridor function: After deactivation by an external push
button, the detector switches off and returns to automatic
mode after 5 sec.
5. Putting into operation / Settings
Self test cycle
After an initial 60-second self-test cycle, the LUXOMAT
for operation.
R1
LUX
Follow-up time for light control
2000
1200
The time can be set infinitely variably at between 1 and 30 minutes.
600
18 16
10
5
6
200
22
Symbol TEST: Test mode
3
25
40
1
Every movement switches on the light for a period of 1 second, switching
30
TE
it off for a period of 2 seconds after that regardless of the level of
brightness
LUX
Twilight-switch for light control (relay 1)
2000
1200
The switch-on value for the light can be set at between 10 and 2000 Lux.
600
200
Using the rotary control, the luminance set points can be set as desired.
3
40
1
Symbol
:
Night-time operation
E
Symbol
:
Daytime/Night-time operation
Orientation lighting (fixed to 20 %)
KL
20%
R1
The orientation lighting can be set infinitely variably at between 5 and
40
50 30
18 16
30
10
10
5
60
15
60 minutes resp. "ON" for permanent orientation lighting or "OFF"
6
22
3
25
5
1
for no orientation lighting.
30
TE
7. Option:
LUXOMAT
B.E.G.
®
IR-PD-DIM-HKL
30
60
5
15
min
min
R2
min
min
1500
1000
750
500
max
min
250
100
50
1
5
10
15
30
min
min
min
min
min
R1
1
10
30
60
ON
min
min
min
min
20 %
OFF
RESET
TEST
IR-PD-DIM-HKL
Wall bracket for remote
control IR-PD-DIM-HKL
2. Installation of the LUXOMAT
PD4-M-DIM-HVAC-FC
The DIP settings are enabled again by
OFF
• Adjusting the DIP switches when closed
• Reset with test sun setting at the potentiometers
Standard mode
• Reset when open
LED ON
Fully automatic mode
Function LEDs OFF: In the open state and in test mode, the
LEDs are always ON.
PD4-M-DIM-HVAC is ready
®
LUX
2000
1200
600
200
40
8. Settings by remote control
Resetting when-
50
to
Lux
open: Deletes all
values set with
or
the remote con-
trol, light OFF.
or
1
min
5
min
20%
max
ON
OFF
1
to
min
50
t < 5 sec.
Lux
max
PD4-M-DIM-HVAC 16 A
®
B.E.G.-Occupancy detectors
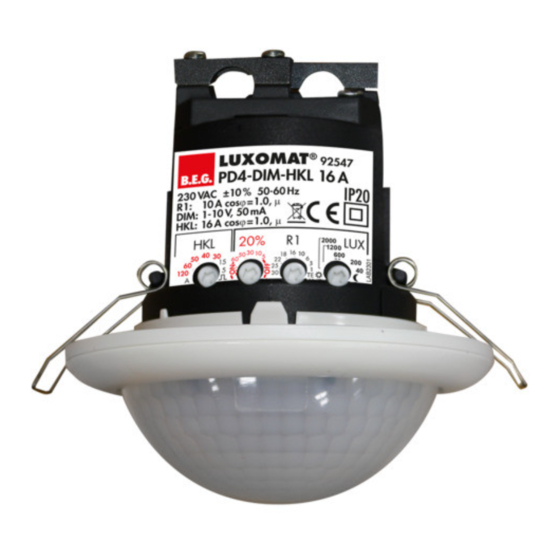
3. Position DIP-Switches, LEDs and Potentiometer
®
A circular opening of
diameter 68 mm must first
of all be produced in the
ceiling.
Having connected up the
cables in accordance with
regulations, the detector is
inserted into the opening
as shown in the drawing
opposite and fixed into
position with the assis-
Potentiometer A HVAC Channel 2
tance of the spring clip.
Potentiometer B Orientation lighting
Potentiometer C Time Channel 1
Potentiometer D Lux Channel 1
HKL
Follow-up time for appliance-control
20%
R1
The time can be set infinitely variably at between 5
40
50 30
30
10
18 16
50
5
60
60
15
22
minutes and 120 minutes. After 15 minutes the switch-
120
25
5
on delay is activated. If there is no further movement
30
A
detected within 5 min. period, the switch-on delay
would start again.
Symbol
:
Impulse = 2.5 sec.
Symbol A:
Alarm impulse = 2 sec.
Alarm impulse
In order to set off an alarm impulse, at least 3 move-
ments within 9sec. have to be detected.
Pulse spacing PD-Slave
9s
2s
2 or 9 seconds can be set for the pause between 2
pulses sent to the master. The setting can be made with
activated (
) or deactivated ( ) LED indicator.
LED ON
LED OFF
For devices with a separate slave input, 2 sec. can
be set.
Unlocking device – Activation of
the programming mode
Luminance set point for constant
1500
Lux
light control
Dimming of the lighting on the
desired luminance value
Automatic reading in the current light
value as new luminance set point
Follow-up time Channel 1
30
min
50
1500
1 - 30 min.
Lux
Lux
Follow-up time Channel 2 (HVAC)
60
min
50
5 - 60 min. or impulse
1500
max
Lux
Lux
Fully automatic/semi automatic
mode => (see page 2, point10)
ON
Orientation lighting ON/OFF
OFF
20 % of the nominal light
max
Orientation lighting and its
60
min
follow-up time
ON
Preset/user mode
OFF
=> (see page 2, point 11 )
Locking device – Exit programming
mode
1500
LED flashes
Lux
Permanent protection against
sabotage
PD4-M-DIM-HVAC-FC 16 A
A
B
C
D
1
2
LED I white
LED II red
LED III green
6. Settings carried out using remote
control (optional)
HKL
20%
40
50 30
50
30
10
ON
OFF
60
15
60
120
1
5
A
DIP
2
3
1. Check Battery:
Open battery compartment by pressing the plastic
springs together and removing the battery-holder.
R1
1
18 16
10
6
22
25
30
2. IMPORTANT
Please pay attention, that the setting is Potentiometer
1 at "TEST" and Potentiometer 2 not at "SUN". All
LUX
2000
values which have been programmed using the remote
1200
600
10
control will be deleted in the event of power failure in
6
200
3
40
1
the position "TEST/SUN". Please switch Potentiometer 2
TE
over to"MOON" or any other value.
Caution:
Settings with remote control supersede the settings
by courtesy of potentiometers.
9. Explanation of the remote control button functions
Light on / off when closed
=> (see page 2, point 12)
Dimming in the closed state
=> (see page 2, point 11)
Test operation in the closed condition to enable
Disable the test mode: press reset
Resetting when closed
The lighting relay is switched off, i.e. opened and the follow-up times
reset.
Permanent protection against sabotage
This function blocks the unit permanently (green LED is illuminated). This
operating mode can only be activated during the period of 5 seconds
t < 5 sec.
after pressing the "lock" button. This status will only permit actuating the
function "Light on/Light off". The procedure for leaving this mode is as
follows:
1. Switch off the current
2. Apply current for 31 - 59 seconds
3. Switch of the current again
4. Apply current
5. Open detector
50
1500
Lux
Lux
Dim in the open state
To set a target value, proceed as follows (example workplace): Place
one lux meter flat on the desk. Set the light. With the help of remote
50
control IR-PD-DIM-HKLby pressing the buttons "max" or "min" as neces-
Lux
sary. Wait until the desired light level is reached.
50
Confirmation by the preset value
1500
max
Lux
Lux
Light during the initialization
The light is on by default in the initialization time.
max
ON
On / off with the "Light" button during Initialization. The final condition
is then active.
Orientation light ON / OFF when open
ON
OFF
Note: Also during the orientation phase of the light constant light control
is active: With sufficient brightness is <20 % dimmed and turned off the
OFF
lights if necessary.
GB
3
The DIP switch settings are
using the remote control.
riden
R1
LUX
2000
1200
18 16
600
10
5
6
200
22
3
25
40
1
Remote control LUXOMAT
30
®
TE
IR-PD-DIM-HKL
LUX
R1
LUX
2
2000
1
2
2000
1200
1200
600
600
18 16
10
200
6
200
22
3
3
40
25
40
1
1
30
TE
TE
1500
Lux
over-
Advertisement

Related Manuals for B.E.G. LUXOMAT PD4-M-DIM-HVAC 16A


Summary of Contents for B.E.G. LUXOMAT PD4-M-DIM-HVAC 16A
- Page 1 LUXOMAT PD4-M-DIM-HVAC 16 A ® Installation and Operating Instruction for PD4-M-DIM-HVAC-FC 16 A B.E.G.-Occupancy detectors 1. Mounting preparations 2. Installation of the LUXOMAT 3. Position DIP-Switches, LEDs and Potentiometer ® PD4-M-DIM-HVAC-FC Work on the 230 V mains supply A circular opening of may only be carried out by quali- diameter 68 mm must first fied professionals or by instructed...
- Page 2 10. Fully / Semi automatic mode 14. Wiring diagrams 19. Technical data PD4-M-DIM-HVAC 16 A (for IR-PD-DIM-HKL functions see page 1) Standard mode with master-DIM-HVAC-occupancy detectors Sensor and power supply in one case for onwall-, ceiling- and flushmounting The system switches over when the “Light” push-button is open (see remote control functions, page 1).