Table of Contents
Advertisement
Quick Links
SW2500ZB
Installation guide
Smart Light Switch
1
Make sure that the breaker for your switch
is OFF at the main electrical panel then
remove the old switch.
Line
3
Use the provided screws to secure the
light switch to the electrical box.
Then, replace the wall plate.
Warnings
The installation of this light switch should be made by a
certified electrician and must be installed in conformity
with the national and local Electrical Codes.
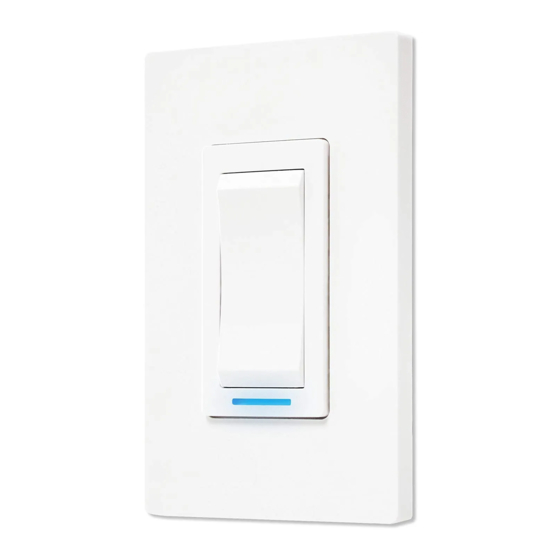
YOUR SW2500ZB LIGHT SWITCH
Light turned ON = Blue
Light turned OFF = Amber
The intensity of the indicator light can be changed from
Neviweb and some compatible Zigbee gateways.
zigbee 3.0
INSTALL YOUR LIGHT SWITCH
Neutral
(white)
4
Power up
the switch.
Turn ON the light
Turn OFF the light
Indicator light
Use the provided connectors to
2
connect the wires as follows:
Red
Load
Black
Line
White
Neutral
Blue
None*
Neutral
(white)
*Note: For a single pole installation, do
not remove the label on the blue wire.
For a 3-way installation, consult the
3-way wiring diagram on the next page.
This light switch requires a neutral wire. If your electrical
box does not have a neutral wire, you can either add
one or install the light switch at a different location.
SINGLE POLE WIRING DIAGRAM
Electrical
Panel
SW2500ZB
White (neutral)
Red (load)
Black (line)
blue (3-way)
3-WAY WIRING DIAGRAM
Electrical
Panel
Single Pole
switch
SW2500ZB
White (neutral)
Line
Black (line)
Load
Blue (3-way)
Make sure to firmly tighten the
wire connectors for a secure
connection. A loose
connection can be a fire
hazard. Special CO/ALR
solderless connectors must be
used when connecting with
aluminum conductors.
Load
Load
Red (load)
Advertisement
Table of Contents

Related Manuals for Sinope SW2500ZB


Summary of Contents for Sinope SW2500ZB
- Page 1 Electrical Codes. SINGLE POLE WIRING DIAGRAM YOUR SW2500ZB LIGHT SWITCH Load Electrical Panel SW2500ZB...
- Page 2 3-year limited warranty 1/2 HP: Ceiling fan SINOPE TECHNOLOGIES INC. warrants the components of their products against defects in material and workmanship for a 3-year period from the date of purchase, under normal use and service, when proof of purchase of such is provided to the Zigbee 3.0 profile...
Need help?
Do you have a question about the SW2500ZB and is the answer not in the manual?
Questions and answers