Advertisement
Table of Contents
SOLAR
LED FLOOD
LIGHT
5W 500LM 4,000K
1460 Park Avenue.
Please read and follow all instructions to operate. Save this
Emeryville CA 94608 USA
manual for future reference.
www.soltechlighting.com
01 1
INTRODUCTION
1. This is a solar powered lamp, please install it in a
location where it can get enough sunshine.
2. Please note the duration of the light depends on sun
intake & weather.
3. The lamp will automatically turn on at dusk.
4. Built-in IC with over-charge, over-discharge, and
over-voltage protection.
Warning
1. The lamp is equipped with internal batteries. Non-professionals
please do not disassemble the lamp.
2. Please do not dispose the battery in household garbage to
avoid explosion.
WATERPROOF
SUPER
CORDLESS
BRIGHT
DUSK TO
MOTION
LOW
DOWN SENSOR
SENSOR
COST
SOLTECH offers
advanced LED
technology that
is eco-friendly
and utilizes
clean energy.
SOLTECH LLC reserves the right to update all product data sheets at any time. Consult
SOLTECH marketing specialists for publication updates at www.soltechlighting.com
Copyright©2021–2022 SOLTECH LLC, All Rights Reserved.
02
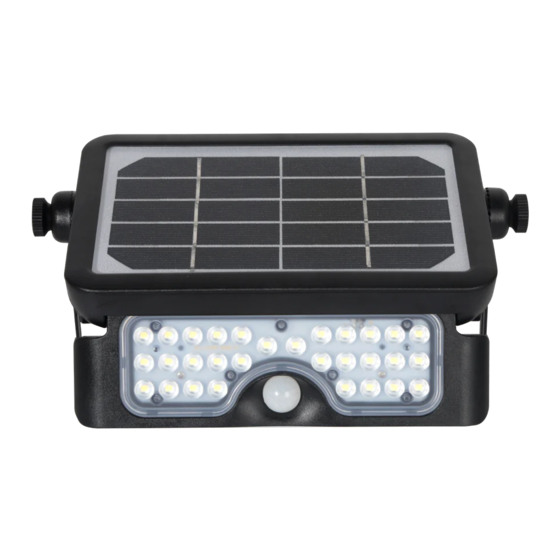
POWER / LUMEN
LED
LI-ION BATTERY
SOLAR PANEL
LIGHTING PANEL
BRACKET
WORKING MODE
DETECTION ANGLE / AREA
BEAM ANGLE
IP DEGREE
WARRANTY
LIFESPAN
Installation HEIGHT
PACKING
5W / 500LM
SMD 2835 X 30PCS
3,000mAh / 3.7V
2.3 Wp, Mono-crystalline Silicon
135° Adjustable
360° Adjustable
3 Different Modes
120° / 19.7ft
90°
IP65
3 YEARS
35,000 hrs
≤13.1 ft
Solar Light X 1, Screw Bag X 1,
User Manual X 1
Advertisement
Table of Contents

Related Manuals for Soltech SOLPAD


Summary of Contents for Soltech SOLPAD
- Page 1 SOLTECH LLC reserves the right to update all product data sheets at any time. Consult 1460 Park Avenue. Please read and follow all instructions to operate. Save this SOLTECH marketing specialists for publication updates at www.soltechlighting.com Emeryville CA 94608 USA manual for future reference.
- Page 2 INSTALLATION A: Wall Mounted 1. Prepare lamp, accessories, and tools. 2. Use the Allen wrench to loosen the bracket and adjust to the appropriate angle then screw tightly. 3. Use the Allen wrench to loosen the light module then pull it out and adjust to appropriate lighting angle.
Need help?
Do you have a question about the SOLPAD and is the answer not in the manual?
Questions and answers