Table of Contents
Advertisement
Available languages
Available languages
Manual de Servicio
Service Manual
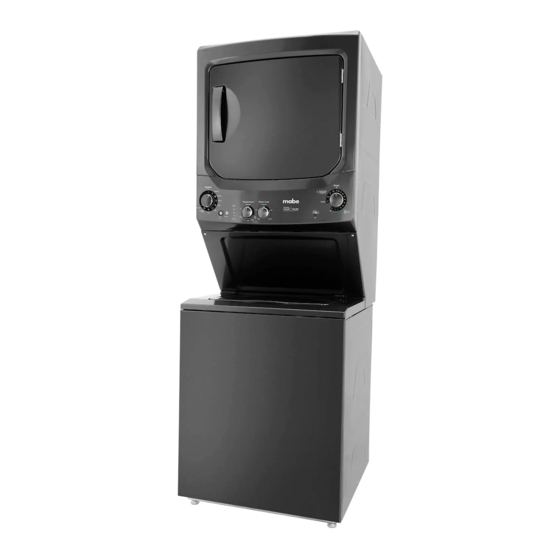
Centro de Lavado Centauro | Centauro Laundry Center
Centauro Estandarización
Julio 2020
July 2020
1
|
Manual de Servicio
Modelos | Models
ICL2040..., CLME70204...,
CLMG70204...,
CLGG70214...,
MCL2040..., MCLC2040...,
MKTG15...
Pub. MSL-0120
Ingeniería de Servicio
Ingenieria de Servicio
Advertisement
Chapters
Table of Contents

Subscribe to Our Youtube Channel
Related Manuals for mabe Centauro ICL2040 Series


Summary of Contents for mabe Centauro ICL2040 Series
- Page 1 Manual de Servicio Modelos | Models Service Manual ICL2040…, CLME70204…, CLMG70204…, CLGG70214…, MCL2040…, MCLC2040…, Centro de Lavado Centauro | Centauro Laundry Center MKTG15… Centauro Estandarización Julio 2020 Pub. MSL-0120 July 2020 Ingeniería de Servicio Manual de Servicio Ingenieria de Servicio...
- Page 2 AVISOS IMPORTANTES DE SEGURIDAD, ADVERTENCIAS Y RECOMENDACIONES Aviso Importante de Seguridad • Mantenga la ropa libre de grasas o aceite. La información en este documento de servicio está dirigida a individuos que poseen conocimientos adecuados y experiencia eléctrica, electrónica y En caso de necesidad de soldar (aplica para algunos mecánica.
-
Page 3: Table Of Contents
CONTENIDO ADVERTENCIAS DE SEGURIDAD INTRODUCCIÓN NOMENCLATURA UBICACIÓN DE ETIQUETAS CARACTERÍSTICAS Y MODELOS INSTALACIÓN O GUÍA MECÁNICA DATOS TÉCNICOS GENERALES CONTROLES Y FUNCIONES LOGICA DE LAVADO CARTAS DE TIEMPOS CICLO DESENSAMBLE Y REFACCIONAMIENTO HERRAMIENTAS PARA DESENSAMBLE TARJETA ELECTRÓNICA DIAGRAMA ELÉCTRICO SOLUCIÓN DE PROBLEMAS CODIGO BINARIO DE PROTECCIONES CODIGOS DE FALLA O PROTECCIONES BORRADO DE FALLAS... -
Page 4: Introducción
Estos nuevos modelos de Centros de Lavado también tomarán de Kraken la etiqueta con código QR para dirigir al cliente al canal de videos de mabe en you tube, con el fin de poder aclarar dudas sobre el funcionamiento del... -
Page 5: Nomenclatura 1
NOMENCLATURA 1 Marca: Combustible: M = Mabe E = Eléctrico I = IO Mabe G = Gas Natural P = Propano Color / Acentos: Producto: BB = Blanco CL = Centro de Lavado DG = Diamond Gray Número de Perillas: Digito de Ingeniería:... - Page 6 4 = 24” L M E 7 Generación Marca: Capacidad: V / Hz: M = Mabe Invertida A = 120 / 60 02 = 20 Kg B = 220 / 60 C = 220 / 50 D = 110 / 50...
-
Page 7: Ubicación De Etiquetas
La segunda etiqueta contiene directorios de los Centros de Servicio de cada localidad, modelo y número de serie, así como un código QR que direcciona al cliente a la página de videos explicativos de mabe en you tube. Dichas etiquetas se encuentran al abrir la puerta de la secadora, en el marco superior. -
Page 8: Característicasy Modelos
CARACTERÍSTICAS Y MODELOS DIFERENCIAS ENTRE MODELOS DE CENTROS DE LAVADO CARACTERISTICAS COMUNES ENTRE MODELOS DE CENTROS DE LAVADO Las diferencias entre los Centros de Lavado se basan en las siguientes características: ANCHO DE GABINETE: 27” TIPO DE COMBUSTIBLE PARA LA SECADORA: Se dividen en ELÉCTRICOS, GAS PROPANO, GAS ... - Page 9 GUÍA MÉCANICA DE INSTALACIÓN Requisitos de instalación: Indicaciones Generales Ubicación: Se debe instalar en un piso firme, no colocar Guía rápida de conexión para Centros de Lavado sobre tapetes ni estar expuesto a la intemperie o factores climáticos. Este producto debe estar colocado en un área A fin de reducir el riesgo de lesiones ventilada con salida al exterior, libre de obstrucción, lejos de graves, siga las instrucciones detalladas en el manual de...
- Page 10 GUÍA MÉCANICA DE INSTALACIÓN 2G.- Prepare el escape para la instalación del Asegure que el equipo este nivelado y posicionado de forma electrodoméstico y asegure que quede limpio el ducto, sólida sobre las cuatro patas con los siguientes pasos: libre de objetos que no lleguen a obstruir el flujo de salida de a) Ajuste las patas traseras inclinando un poco el producto aire.
- Page 11 GUÍA MÉCANICA DE INSTALACIÓN 10G.- Para su seguridad y correcto funcionamiento del 7G.- Conecte el escape externo usando el conducto de equipo centro lavado siguiendo metal de 4” de diámetro y sujetando con las 2 abrazaderas recomendaciones detalladas en el manual de usuario e para conducto de 4”...
-
Page 12: Datos Técnicos Generales
DATOS TÉCNICOS MOTOR SECADORA Tipo de Motor (HP) Voltaje / Frec Corriente (A) Potencia (W) 220-240V /50-60Hz 2.7 / 2.3 410 a 430 1425-1725 115V / 60Hz 1725 Manual de Servicio Ingenieria de Servicio... - Page 13 DATOS TÉCNICOS SEGURO TAPA Entre Pines Valor / Comentario 60 - 90 Ω 2 - 3 Al aplicar 127 V por 1.5 - 8 segundos entre estos pines 3 - 4, el contacto 3 - 4 eléctrico entre las terminales 4 - 5 debe estar cerrado. Debe abrirse después de 120 segundos mínimo de haber dejado de suministrar dicho voltaje CAMBIADOR (TERMOACTUADOR) Tensión (V)
-
Page 14: Controles Y Funciones
ACERCA DE LOS CONTROLES Y FUNCIONES LAVADORA Selección de programas Selección de funciones “toque personal” Gire la perilla para elegir entre los programas disponibles Presione repetidamente el botón de selección para elegir las funciones independientes del ciclo de lavado o la de acuerdo al tipo de ropa a lavar. - Page 15 ACERCA DE LOS CONTROLES Y FUNCIONES 1 Programas automáticos 3a Nivel de carga Apagado Automático Delicados Máximo Blanca Alto Color Medio Mínimo Sanitizado Voluminosa 4 Selección de etapas Centrifugar Lavar Lavado (extendido) Express Enjuagar Centrifugar 2 Temperatura Automático Frío Ambiente Fresca Tibia Caliente...
- Page 16 ACERCA DE LOS CONTROLES Y FUNCIONES Sanitizado Selección Nivel de Carga (algunos modelos) automático: Esta selección de carga permite que el sistema automáticamente calcule la cantidad que se está Es un ciclo especialmente diseñado para eliminar algunos lavando. virus respiratorios comunes que se encuentran en la ropa. máximo: Esta selección de carga es cuando se está...
- Page 17 ACERCA DE LOS CONTROLES Y FUNCIONES Solo Enjuaga Funciones Modo automático: Para iniciar en modo automático después de haber programado su lavadora, presione el botón inicio/pausa. Si desea cambiar de programa cuando la lavadora ya está funcionando, debe presionar el mismo botón para detener el funcionamiento, cambie al programa deseado y para iniciarla nuevamente presione el botón inicio/pausa, el ciclo iniciará...
- Page 18 ACERCA DE LOS CONTROLES Y FUNCIONES Solo Lava y Centrifuga Realizará el llenado y posteriormente la agitación del lavado. Al terminar hará el drenado del agua y el centrifugado de la ropa, terminando así esta función. Permaneciendo encendido el indicador de centrifuga. Solo Enjuaga y Centrifuga Realizará...
- Page 19 ACERCA DE LOS CONTROLES Y FUNCIONES SECADORA a) Ciclos de Secado Automáticos Tipo de Ropa (algunos modelos) Durante el ciclo de secado, la perilla no gira hasta que el Normal: Para prendas libres de arrugas, planchado sensor del termostato indica que la ropa está seca; es permanente y artículos que necesiten cuidado especial al entonces cuando la perilla rota automáticamente a la secar.
- Page 20 ACERCA DE LOS CONTROLES Y FUNCIONES b) Ciclos de Secado por tiempo (manuales) Secado por tiempo. El temporizador rota durante todo el ciclo. Desarrugar: Para eliminar arrugas de prendas que están limpias y que están apenas húmedas o secas. Refrescar: Para refrescar y quitar pelusas de prendas ya secas.
-
Page 21: Logica De Lavado
LÓGICA DE LAVADO Secuencia de Ciclos Estándar (BLANCOS, COLOR, CICLO SANITIZADO RÁPIDO, etc) TEMPERATURA DE AGUA • Automático 140°F (60°C) • Caliente 140°F (60°C) • Tibio 140°F (60°C) Llenado a nivel • Fresca 140°F (60°C) mínimo • Ambiente 140°F (60°C) •... - Page 22 LÓGICA DE LAVADO CICLO VOLUMINOSOS PROTECCION DE CENTRIFUGADO • NO realiza Sensado • El llena y agita lo realiza con 1 GPM para reducir la confusión del usuario Llenado Llenado y agitación a nivel 15.7inH2O Descripción de Protección de spin: Esta protección puede entrar cuando se presenta desbalanceo excesivo, sudsing, prendas atoradas entre Agitación...
-
Page 23: Cartas De Tiempos Ciclo
CARTAS DE TIEMPO CICLO CICLO / TIEMPO TIPO DE ROPA CARÁCTERÍSTICA CICLO (min) Lavado Extendido Ropa de uso diario algodón/blanca o colores claros Ciclo con intensidad de lavado alto que reduce el (55 min) 32 min de agitación incluido reposos y 12min de uso de agua caliente y hace remojos para aflojar la centrifugado manchas y facilitar la remoción de las manchas... -
Page 24: Desensamble Yrefaccionamiento
DESENSAMBLE Y REFACCIONAMIENTO Panel Frontal Queda liberada la Cubierta del Gabinete. Lid Lock Utilizando una espátula o un desarmador plano delgado, hacer presión en los 2 seguros superiores, entre la Cubierta y el Panel Frontal. Con un desarmador Philips, quitar los 2 tornillos que sujetan el Lid Lock a la Cubierta Una vez liberado el Panel Frontal, sujetarlo de ambos extremos, inclinarlo hacia el frente y hacia arriba para... - Page 25 DESENSAMBLE Y REFACCIONAMIENTO Cubierta Tina Utilice unas pinzas de punta para retirar 2 cinchos que sujetan al Arnés Lid Lock, presionar y retirar los cinchos Manualmente libere los snaps que sujetan la Cubierta sin cortarlos. Un cincho se puede retirar por debajo de la Tina a la Tina.
- Page 26 DESENSAMBLE Y REFACCIONAMIENTO Varillas Suspensión De igual forma, con unas pinzas de punta retirar la Manguera Presostato del pivote de la Tina, teniendo cuidado de no dañarla. SUBLAVADORA Manualmente retirar las Varillas de la Suspensión. Ensamble Tina Manualmente retirar el Ensamble Tina por el frente del Gabinete, por debajo del Refuerzo Frontal.
- Page 27 DESENSAMBLE Y REFACCIONAMIENTO Tapa Infusor Con un desarmador plano delgado retirar la Tapa Infusor, tener cuidado de no maltratarla. Tornillo Infusor Extractor para Infusor. Retirar el Tornillo Infusor utilizando un dado de 7/16”. Se recomienda reemplazar el Tornillo Infusor cada vez que se remueva para Servicio y debe colocarse a un torque o par de 100 +/- 5 lbs.pulgada.
- Page 28 DESENSAMBLE Y REFACCIONAMIENTO Tuerca Izquierda Los ganchos del extractor deben entrar hasta las costillas o ribs y engancharse de ahí. Utilizando una llave o dado de 1 5/16” y un mazo de goma o martillo, hacer girar la Tuerca Izquierda en sentido de las manecillas del reloj para retirarla.
- Page 29 DESENSAMBLE Y REFACCIONAMIENTO Rondana Tina Aro Balance Retirar la Rondana Tina Utilizar una punta torx 20 para retirar los 10 tornillos del Fondo Canasta (aluminio) Fondo Plástico. Arnés Termoactuador Utilizar una punta torx 25 para retirar los 8 tornillos del Fondo Canasta.
- Page 30 DESENSAMBLE Y REFACCIONAMIENTO Arnés Transmisión Polea y Ventilador Motor Utilizando un desarmador plano delgado o pinzas de punta retirar los cinchos que sujetan el Arnés al Ensamble Transmisión sin cortarlos. Banda Desensamblar la Polea Motor (aluminio) y el Ventilador- Magneto del Motor Sensor de Velocidad Manualmente desensamblar la Banda.
- Page 31 DESENSAMBLE Y REFACCIONAMIENTO Tuerca Polea Transmisión Clutch Con matraca y dado de 14 mm o 9/16" retirar la Tuerca de la Polea Transmisión. Cada vez que se reinstale la Polea Manualmente retirar el Clutch. se recomienda colocar una Tuerca de Seguridad nueva, colocarla con un torque o par de 110 +/- 5 lb.pulgada.
- Page 32 DESENSAMBLE Y REFACCIONAMIENTO Ensamble Transmisión Para instalar el Ensamble Transmisión a la Tina, se debe deslizar la Flecha a través del barreno de la Tina. Presionar el Sello Tina en el barreno de la Tina. Atornillar Con unas pinzas retirar la Abrazadera de la Manguera los 16 tornillos con un patrón cruzado o en zig zag, de tal Bomba.
- Page 33 DESENSAMBLE Y REFACCIONAMIENTO Arnés Principal-Gabinete Arnés Capacitor Cortar los cinchos que sujetan el Arnés Principal al Gabinete usando unas pinzas de corte. Panel de Acceso Manualmente desconectar el Arnés Gabinete. Tarjeta Control Utilizando desarmador Philips, retirar los 2 tornillos del Panel de Acceso, uno en cada extremo superior.
- Page 34 DESENSAMBLE Y REFACCIONAMIENTO Con unas pinzas de punta quitar la Abrazadera y los 2 cinchos de la Manguera Válvula. Utilizando un dado de ¼” quitar el tornillo que sujeta la tierra del Arnés Tarjeta, así como los 2 tornillos negros que sujetan el Soporte Tarjeta al Gabinete.
- Page 35 DESENSAMBLE Y REFACCIONAMIENTO Perillas Panel de Control Sujetar y girar cada Selector para desensamblarlos del Panel. Manualmente desensamblar las 4 Perillas (o las que se requieran). Panel de Control Con pinzas de punta retirar los 2 cinchos que sujetan el Arnés Selectores.
- Page 36 DESENSAMBLE Y REFACCIONAMIENTO Banda Tambor Arneses Secadora Manualmente se pueden desconectar los 3 Conectores: 9 Manualmente retirar la Banda Tambor. vías, Inicio, Potencia. Tambor Panel Frontal Secadora Con un desarmador de ¼” retirar 2 Tornillos inferiores y 3 superiores. El Panel se retira incluyendo la Puerta, sujetar Manualmente retirar el Tambor.
- Page 37 DESENSAMBLE Y REFACCIONAMIENTO Seguro Bracket Motor Resistencia Con un desarmador o dado de 1/4" retirar los 8 tornillos Con unas pinzas de punta retirar el Seguro del Bracket de la Resistencia. De forma manual retirar las 3 Zapatas. Motor. Brazo Polea Tensora Manualmente desensamblar el Brazo Polea.
-
Page 38: Herramientas Para Desensamble
HERRAMIENTA PARA DESENSAMBLE COMPONENTE HERRAMIENTA OBSERVACIONES Espátula o desarmado Hacer presión en los 2 seguros Panel Frontal (Lavadora) plano delgado superiores Cubierta Desarmador 1/4" 2 tornillos 2 cinchos que sujetan arnés Lid Cubierta Pinzas de punta Lock, presionar y retirar sin cortar Lid Lock Desarmador philips 2 tornillos... - Page 39 HERRAMIENTA PARA DESENSAMBLE COMPONENTE HERRAMIENTA OBSERVACIONES Polea Transmisión Extractor Cambiador Dado 3/8" 2 Tornillos Clutch Manual Resorte Clutch Manual Termoactuador Manual Transmisión Dado 3/8" 8 Tornillos Arnés Bomba Dren Pinzas Desensamblar 2 conectores Bomba Drenado Dado 1/4" 2 Tornillos Abrazadera Pinzas Manguera Dren Pinzas de...
- Page 40 HERRAMIENTA PARA DESENSAMBLE COMPONENTE HERRAMIENTA OBSERVACIONES Cinchos Arnés Pinzas de 2 cinchos Selectores Punta Tarjeta T (Leds) Manual Arneses Secadora Manual 3 Conectores: 9 vías, Inicio, Potencia Panel Frontal Desarmador 2 Tornillos inferiores, 3 superiores, el Panel se retira incluyendo la Secadora 1/4"...
-
Page 41: Tarjeta Electrónica
TARJETA ELECTRÓNICA CARGAS VOLTAJE A MEDIR CONECTOR CONECTOR J1 Alimentación 127 o 220 Volts CONECTOR J2 Motor, bomba 127 o 220 Volts Perillas 5 VDC CONECTOR J4 Lid lock 127 o 220 Volts CONECTOR J5 CONECTOR J6 Comunicación Sensor Hall 12 VDC CONECTOR J7 CONECTOR J8... - Page 42 Componentes Eléctricos Conectados a la Tarjeta Control: Componente Características Comentarios = 5 VDC Selector de 8 posiciones Selector de programas. alim = 5 VDC Selectores de 5 posiciones Selector de nivel de agua. alim 2 Botones: Inicio / Pausa • = 5 VDC Tarjeta T alim...
-
Page 43: Diagrama Eléctrico
DIAGRAMA ELÉCTRICO Modelos a Gas Propano y Natural Manual de Servicio Ingenieria de Servicio... - Page 44 DIAGRAMA ELÉCTRICO Modelos Eléctricos 127V Manual de Servicio Ingenieria de Servicio...
- Page 45 DIAGRAMA ELÉCTRICO Modelos Eléctricos 220V Manual de Servicio Ingenieria de Servicio...
-
Page 46: Solución De Problemas
SOLUCIÓN DE PROBLEMAS EN LAVADORA CAUSAS POSIBLES QUE HACER Demasiada espuma Demasiado detergente Mida la cantidad de detergente con cuidado. Use menos jabón si se trata de agua blanda, una carga menor de ropa o una carga de ropa con menos suciedad demasiado Use menos detergente. - Page 47 El suministro de agua está Abra totalmente los grifos de agua caliente y fría cerrado controles están Inspeccione los controles configurados correctamente La tapa está abierta – la Cierre la tapa y reinicie el ciclo, desde el comienzo si es función seguridad necesario...
- Page 48 El detergente no se disuelve Agregue detergente a medida que la canasta de lavado se llena de agua, antes de cargar la ropa Intente usar un detergente líquido Use una temperatura de agua más caliente Sobrecarga Cargue ropa de forma no excesiva de modo que no supere la línea superior de barrenos de la canasta de la lavadora incorrecto Controle las instrucciones del paquete del suavizante de telas...
- Page 49 ropa estaba A veces algunas manchas que no se pueden ver cuando la ropa completamente limpia está mojada aparecen luego secado. procedimientos de lavado adecuados antes de secar El filtro de pelusa está lleno Limpie la rejilla para pelusas antes de cada carga. Orden incorrecto Ordene los productores de pelusa (como la felpilla) de los Pelusa en la ropa...
- Page 50 La ropa se encoge Algunas telas encogen Para evitar que la ropa encoja, siga las instrucciones de las naturalmente cuando etiquetas de cuidado de las prendas en forma precisa. lavan. Otras pueden Algunas prendas se podrán presionar para que regresen a su lavadas con seguridad pero tamaño original luego del secado.
-
Page 51: Codigo Binario De Protecciones
CODIGO BINARIO DE PROTECCIONES Tabla de Equivalencias entre Número de Falla / Prueba en Display y Código Binario (LEDs) Código de Código de Código Falla / Prueba Número de Falla Prueba mostrado en Binario por Falla / mostrado en mostrado en medio de LEDs Prueba display... -
Page 52: Codigos De Falla Oprotecciones
CODIGOS DE FALLA O PROTECCIONES Nú Có Descripción de Acción Recomendada Reseteo Posible Causa Fallas técnicas *Cuando falla lát automátic se presenta la il / o de falla protección y se DETECTA CAUSA lát Velocidad > 60 rpm en Sensor de Velocidad y puerta lát desbloqueada... - Page 53 13005 Polea Transmisión Floja Corto en relevador * Resetear falla No Volátil. Cada A) Canasta en de seguridad * Esperar 10 segundos minuto se movimiento al 13126 Tarjeta control * Correr rutina en modo de lát hace una inicio del ciclo No funciona en lavado servicio (prueba 9), si presenta E6 rutina...
- Page 54 . fuera de este rango, cambio de F) Arnés de 13166 Manguera válvula válvulas presostato desconectas o restringida/Doblada En caso de que si entre agua, invertidas correr rutina en modo de servicio G) Tarjeta 13169 Válvula de agua (prueba 8), en caso de marcar electrónica no corta flujo error 9, verificar:...
- Page 55 * Verificar que la Manguera de CENTRIFUGADO Presostato no tenga agua (manual) acumulada o atrapada. Agregar agua nuevamente y Verificar en solo centrifuga, Verificando los puntos anteriores y viendo que si baja el nivel de agua y presenta la falla, cambio de tarjeta.
- Page 56 **Si la prueba indica tapa cerrada, verificar conexión del arnés. *Cambio de tarjeta Lid lock no se * Resetear falla Volátil. Cuando se A) Lid lock desbloquea en * Verificar que el Interruptor Lid lát detecta bloqueado 13319 Interruptor Tapa menos de 6 Lock no esté...
-
Page 57: Borrado De Fallas
BORRADO DE FALLAS O PROTECCIONES BORRADO DE FALLAS VOLATILES / NO VOLATILES Fallas Plataforma Panel de Control Fallas No Volátiles Volátiles Perilla en posición Perilla CICLOS en posición APAGADO DELICADO Presionar botón Perilla de posición de NIVEL INICIO/PAUSA CARGA en AUTO Centauro Estandarización Mientras el control se encuentre... -
Page 58: Modo De Servicio
MODO DE SERVICIO ENTRADA A MODO DE SERVICIO Método de Plataforma Panel de Control Funcionamiento entrada Perilla CICLOS en "CENTRIFUGA" es la prueba 1. posición APAGADO El cambio de prueba se realiza Perilla de NIVEL DE a través de la perilla de ciclo. CARGA en ALTO Mediante el botón INICIO / Durante los primeros... - Page 59 Descripción de Pruebas del Modo de Servicio Código Centro Número Prueba Prueba Modo de Descripción de Prueba Prueba Servicio mostrado en Lavado display Válvula de agua fría Enciende válvula durante la prueba (Auto-Apagado en 60s) (led “centrifuga”) Válvula de agua caliente Enciende válvula durante la prueba (Auto-Apagado en 60s) (led “enjuaga”)
- Page 60 Lid Lock Bloquea la tapa Sensor de presión Si la tarjeta detecta funcionamiento correcto del sensor activa las válvulas y llena hasta que llegue (led “remoja”) a 2 pulgadas de agua. La prueba termina satisfactoria cuando se alcanza este nivel. El display muestra el valor de columna de agua (Ej.
-
Page 61: Secadora
SECADORA FUNCIONAMIENTO BASICO FUNCIONAMIENTO BASICO SECADORA ELÉCTRICA SECADORA A GAS El flujo de aire pasa del exterior del gabinete y entra al El flujo de aire pasa del exterior del gabinete y entra al producto producto El Rear Panel cuenta con unas aperturas y rejillas para ... - Page 62 SECADORA FLUJO DE AIRE El flujo tiene un impacto considerable en el correcto funcionamiento de la secadora Manual de Servicio Ingenieria de Servicio...
- Page 63 SECADORA Secadora de Centauro MONOFASICA 220V/60Hz Control Secadora 220V/50Hz Estos modelos cuentan con 2 ciclos, 1 automático y 1 minutado. El tiempo del ciclo Automático, dependerá de la humedad y cantidad de la carga, además de la restricción de la unidad. ...
- Page 64 SECADORA Secadora de Centauro BIFASICA Control Secadora 220V/60Hz Estos modelos cuentan con 4 ciclos, 3 automático y 1 minutado. El tiempo del ciclo Automático, dependerá de la humedad y cantidad de la carga, además de la restricción de la unidad. ...
- Page 65 SECADORA NIVELES DE TEMPERATURA Los termostatos controlan el calor que la resistencia o la válvula suministran al sistema para secar FUNCIONAMIENTO DEL CONTROL Según la combinación de diferentes factores será el desempeño de la unidad Manual de Servicio Ingenieria de Servicio...
- Page 66 SECADORA POSIBLES CAUSAS DE UN MAL DESEMPEÑO La relación Flujo, tamaño y tipo de carga afecta el desempeño de la unidad Manual de Servicio Ingenieria de Servicio...
-
Page 67: Sistema Impulsor
SISTEMA IMPULSOR ENSAMBLE SISTEMA IMPULSOR (EXPLOSIONADO) Motores: 127/60 220/60 220/50 Sistema de cambio. - Termo actuador, para todos los voltajes Sensor de velocidad. - Un modelo para todos los voltajes Torque Tornillos sistema impulsor a tina: 16 x (75 +/-10 in lbf) ... - Page 68 SISTEMA IMPULSOR ENSAMBLE SOPORTES CAMBIOS PRINCIPALES VS PLATAFORMA CENTAURO LA Soporte principal KRAKEN 24” (espesor .053”) Transmisión KRAKEN 24” (4:1, grasa) Sello tina KRAKEN (interferencia vs soporte principal) Baleros C5 KRAKEN (Absorben mayor desalineamiento => menor torque libre Manual de Servicio Ingenieria de Servicio...
- Page 69 SISTEMA IMPULSOR TRANSMISIÓN 4:1 (grasa) Funciones: Reducir velocidad en lavado Transmitir torque y velocidad en spin Guía para el cambiador CTQ: Torque libre Que cuidar en fabricación: torque libre, ruido por rebaba y alineación. Fallas: Ruido, transmisión forzada Manual de Servicio Ingenieria de Servicio...
- Page 70 SISTEMA IMPULSOR SELLO TINA Funciones: Evitar paso de agua de tina a sistema impulsor a través de dos interfaces: Diámetro externo sello vs tina Diámetro interno sello vs tubo transmisión Soportar condiciones de operación (desbalanceo, aditivos en agua, etc) ...
-
Page 71: Garantía
GARANTIA Manual de Servicio Ingenieria de Servicio... - Page 72 Manual de Servicio Ingenieria de Servicio...
- Page 73 Manual de Servicio Modelos | Models Service Manual ICL2040…, CLME70204…, CLMG70204…, CLGG70214…, MCL2040…, MCLC2040…, Centro de Lavado Centauro | Centauro Laundry Center MKTG15… Centauro Estandarización Julio 2020 Pub. MSL-0120 July 2020 Ingeniería de Servicio Manual de Servicio Ingenieria de Servicio...
- Page 74 IMPORTANT SAFETY NOTICES, WARNINGS AND RECOMMENDATIONS Important Safety Notice • Denim apron. The information in this service document is intended • When working with the torch on always wear safety for individuals with adequate electrical, electronic, and glasses. You must protect your eyes not only from mechanical knowledge and experience.
- Page 75 CONTENT SAFETY WARNINGS INTRODUCTION NOMENCLATURE LABEL LOCATION CHARACTERISTICS AND MODELS INSTALLATION OR MECHANICAL GUIDE GENERAL TECHNICAL DATA CONTROLS AND FUNCTIONS WASH LOGIC CYCLE TIME CHARTS DISASSEMBLY AND REFACTION DISASSEMBLY TOOLS CONTROL BOARD ELECTRIC DIAGRAM PROBLEM SOLVING BINARY CODE OF PROTECTIONS FAULT CODES OR PROTECTIONS CLEARING FAULTS SERVICE MODE...
-
Page 76: Introduction
These new models of Washing Centers will also take the label with QR code from Kraken to direct the customer to the mabe video channel on you tube, in order to clarify doubts about the operation of the product Manual de Servicio... -
Page 77: Nomenclature 1
NOMENCLATURE 1 Brand: Fuel: M = Mabe E = Electric I = IO Mabe G = Natural gas P = Propane Color / Accents: Product: BB = White CL = Laundry Center DG = Diamond Gray Number of Knobs: Engineering Digit:... - Page 78 4 = 24” L M E 7 Generation Brand: Capacity: V / Hz: M = Mabe Inverted A = 120 / 60 02 = 20 Kg B = 220 / 60 C = 220 / 50 D = 110 / 50...
-
Page 79: Label Location
Service Centers of each location, model and serial number, as well as a QR code that directs the customer to the mabe explanatory videos page on you tube. These labels are found when you open the dryer door, on the upper frame. - Page 80 FEATURES AND MODELS DIFFERENCES BETWEEN MODELS WASHING COMMON CHARACTERISTICS BETWEEN WASHING CENTERS CENTER MODELS The differences between the Washing Centers are based on the following characteristics: ➢ CABINET WIDTH: 27” ➢ TYPE OF FUEL FOR THE DRYER: They are divided ➢...
- Page 81 MECHANICAL GUIDE TO INSTALLATION Installation requirements: General indications Location: It should be installed on a firm floor, not placed Quick connection guide for Laundry Centers on rugs or exposed to the elements or climatic factors. This product should be placed in a ventilated area with an outlet to To reduce the risk of serious injury, follow the outside, free from obstruction, away from heat sources not WARNING.
- Page 82 MECHANICAL GUIDE TO INSTALLATION 2G.- Prepare exhaust for appliance installation and Make sure the equipment is level and positioned solidly on all ensure duct is clean, free of objects that do not obstruct four legs with the following steps the air outlet flow. a) Adjust the rear feet by tilting the product forward slightly so that the rear feet are raised off the floor, gently re-support the Wall...
- Page 83 MECHANICAL GUIDE TO INSTALLATION 10G.- For your safety and correct operation of the 7G.- Connect external exhaust using the 4 ”diameter equipment, washing center following metal conduit and holding with the 2 4” diameter conduit recommendations detailed in the user and installation manual clamps, taking care that it “does not”...
- Page 84 TECHNICAL DATA Motor Type (HP) Voltage / Freq Ampers Watts 220-240V /50-60Hz 2.7 / 2.3 410 a 430 1425-1725 115V / 60Hz 1725 Manual de Servicio Ingenieria de Servicio...
- Page 85 TECHNICAL DATA LID LOCK SWITCH Pins Value/ Comments 60 - 90 Ω 2 - 3 PTC OF CONTACT CLOSING WITH 127 VOLTAGE ACROSS TERMINALS 3-4 MUST SUPPLIED FOR 1.5 / 8 SEC DURING THIS INTERVAL THE ELECTRICAL CONTACT BETWEEN TERMINAL 4-5 MUST BE CLOSED, AFTER THE CONTACT 4-5 CLOSING AND A FOLLOWING PTC 3 - 4 ENERGIZATION OF 900 SEC THE UNLOCK TIME IN CASE OF ABSENCE THE...
-
Page 86: Controls And Functions
ABOUT THE CONTROLS AND FUNCTIONS WASHER Selecting functions Selecting cycles Press the select button repeatedly to choose the Turn the knob to select from among the programs available depending on the type of clothes you are going independent functions of the wash cycle or the combination of stages you need to wash only, rinse only, to wash. - Page 87 ABOUT THE CONTROLS AND FUNCTIONS 1 Automatic programs 3a Load size Precise fill Sanitize Super Delicates Large Medium Whites Small Colors Bulky 4 Step cycle Spin Wash Extended wash Express Rinse Spin 2 Temperature Automatic Tap cold Cold Cool Warm Wash cycle description: Your washer has a knob with 8 main programs designed to better clean and care for your clothes.
- Page 88 ABOUT THE CONTROLS AND FUNCTIONS Sanitized Load Size (some models) Automatic: This load selection allows the system to For the correct operation of Sanitized you must use hot automatically calculate the amount being washed. water, ensure that there is hot water in your installation. It is a cycle to eliminate bacteria, viruses and germs found Maximum: This load selection is when you are washing in clothing.
- Page 89 ABOUT THE CONTROLS AND FUNCTIONS Functions Automatic mode: To start in automatic mode after having programmed your washer, press the start/pause button. If you want to change the program and the washing machine is already running, press the same button to stop the washer, change to the desired program and to resume, press the start/pause button the cycle will start from the beginning.
- Page 90 ABOUT THE CONTROLS AND FUNCTIONS Only wash and spin: This function will fill the washer and then provide wash agitation. At the end, it will drain the water and spin the clothes to complete the cycle. The spin light will stay on. Only rinse and spin: This function Will drain the water.
- Page 91 ABOUT THE CONTROLS AND FUNCTIONS DRYER a) Automatic more drying cycles During the drying cycle, the knob will not turn until the Load size (some models) thermostat sensor indicates the clothes are dry; then knob will automatically turn to the off position. Easy Care: For wrinkle-free garments, permanent ironing Temperatures (algunos modelos)
- Page 92 ABOUT THE CONTROLS AND FUNCTIONS b) Timed drying cycles (manual) Timed dry: The timer runs during the entire cycle. Dewrinkle: For removing wrinkles from items that are clean and dry very lightly damp. Fluff: For freshening or removing lint from already dry clothing.
- Page 93 WASHING LOGIC PERFORMANCE Standard Cycle Sequence (WHITE, COLOR, FAST, SANITIZED CYCLE etc) Agitation parameters, times, arc, gpm, depend on each cycle, platform, or voltage Manual de Servicio Ingenieria de Servicio...
- Page 94 WASHING LOGIC PERFORMANCE BULKY CYCLE SPIN PROTECTION Description of spin protection: This protection can come in when there is excessive imbalance, sudsing, garments stuck between the tub and the basket. For each ramp (motor activation) a maximum time is given to reach the speed, if that speed is not reached during the spin suspension, doing the following: During the rinse spin: Suspends and goes to the next stage (fill and rinse...
-
Page 95: Cycle Time Charts
CYCLE TIME CHARTS CYCLE / TYPE OF CLOTHING DESCRIPTION CYCLE TIME (min) Extended wash Daily wear cotton / white or light colors High wash cycle reduces hot water use and soaks (55 min) 32 min of agitation including rest and 12 min of to loosen stains and facilitate stain removal spinning Whites... - Page 96 DISASSEMBLY Front panel The Cabinet Cover is released. Lid Lock Switch Using a putty knife or a thin flat screwdriver, press down on the 2 upper locks, between the Cover and the Front Panel. Using a Phillips screwdriver, remove the 2 screws that hold the Lid Lock Switch to the Cover Once the Front Panel is released, hold it at both ends, tilt it forward and upward to disassemble.
- Page 97 DISASSEMBLY Tub Cover Use pointed pliers to remove 2 ties that hold the Lid Lock Harness, press and remove the ties without cutting them. Manually release the snaps holding the Tub Cover to the A plastic tie can be removed from under the Cover. Tub.
- Page 98 DISASSEMBLY Suspension Rods In the same way, with tip pliers remove the Pressure Switch Hose from the tub pivot, taking care not to damage SUBWASHER Manually remove the Suspension Rods. Assemble Tub Manually remove the Tub Assembly from the front of the Cabinet, below the Front Brace.
- Page 99 DISASSEMBLY Impeller Cap With a thin flat screwdriver remove the Impeller Cap, be careful not to mistreat it. Impeller Screw Impeller extractor. Remove the Impeller Screw using a 7/16” socket. It is recommended that the Infuser Screw be replaced each time it is removed for Service and should be torqued to 100 +/- 5 lbs.
- Page 100 DISASSEMBLY Left Nut The hooks on the extractor should go all the way to the ribs and hook from there. Using a 1 5/16” socket or wrench and a rubber mallet or hammer, turn the Left Nut clockwise to remove it. It is recommended to use a new Left Nut each time the Basket is disassembled - assembled.
- Page 101 DISASSEMBLY Tub Washer Balance Ring Remove the Tub Washer Use a 20 torx bit to remove the 10 screws from the Basket bottom (aluminum) Balance Ring. Thermoactuator Harness Use a torx 25 bit to remove the 8 screws from the Bottom Basket.
- Page 102 DISASSEMBLY Harness Transmission Pulley and Fan Motor Using a thin flat screwdriver or Thin Pliers remove the ties that hold the Harness to the Drive Assembly without cutting them. Band Disassemble the Motor Pulley (aluminum) and the Fan- Magneto from the Motor Speed Sensor Manually disassemble the Band.
- Page 103 DISASSEMBLY Transmission Pulley Nut Clutch With a ratchet and a 14 mm or 9/16 "socket remove the Transmission Pulley Nut. Each time the Pulley is Manually remove the clutch. reinstalled it is recommended to install a new Lock Nut, tighten it with a torque of 110 +/- 5 lb. inch. Clutch spring Transmission Pulley Manually remove the Clutch Spring.
- Page 104 DISASSEMBLY Drive or Transmission Assembly To install the Drive Assembly to the Tub, the Shaft must be slid through the hole in the Tub. Press the Tub Seal into the hole of the Tub. Screw in the 16 screws in a crisscross With pliers remove the Clamp from the Pump Hose.
- Page 105 DISASSEMBLY Main-Cabinet Harness Capacitor Harness Cut the ties that hold the Main Harness to the Cabinet using cutting pliers. Access Panel Manually disconnect the Cabinet Harness. Control Board Using a Phillips screwdriver, remove the 2 screws from the Access Panel, one at each top end. Manually disassemble the 7 connectors of the Control Capacitor Board.
- Page 106 DISASSEMBLY With Pliers remove the Clamp and the 2 straps from the Valve Hose. Using a ¼” socket remove the screw that holds the Control Board Harness ground, as well as the 2 black screws that hold the Control Board Support to the Cabinet. With a screwdriver or ¼”...
- Page 107 DISASSEMBLY Control Panel Knobs Grasp and twist each Selector to disassemble them from the Panel. Manually disassemble the 4 Knobs (or whatever are required). Control Panel With Snips remove the 2 plastic ties that hold the Selector Harness. “T” Board With a Phillips screwdriver remove 2 top and 4 side Screws (2 on each side).
- Page 108 DISASSEMBLY Drum Belt Dryer Harnesses Manually the 3 Connectors can be disconnected: 9-way, Start, Power. Manually remove the Drum Belt. Front Panel Dryer Drum With a ¼” screwdriver remove 2 lower and 3 upper Screws. The Panel is removed including the Door, hold with 2 hands when removing this assembly.
- Page 109 DISASSEMBLY Motor Bracket Lock MICA HEATER With a screwdriver or 1/4" socket remove the 8 screws With Pliers remove the Motor Bracket Lock. from the Mica Heater. Manually remove the 3 electric connectors. Idler Arm Manually disassemble the Idler Arm. Thermostats With a screwdriver or...
-
Page 110: Disassembly Tools
DISASSEMBLY TOOL COMPONENT TOOL COMMENTS Putty knife or Thin Flathead Press the 2 upper locks Front Panel (Washer) Screwdriver Cover 1/4" Socket Wrench 2 screws 2 plastic ties that hold Lid Lock Cover Pliers harness, press and remove without cutting Lid Lock Switch Phillips Screwdriver 2 screws... - Page 111 DISASSEMBLY TOOL COMPONENTE HERRAMIENTA OBSERVACIONES Transmission Pulley Pulley Extractor Shifter 3/8" Socket Wrench 2 screws Clutch Manually Clutch Spring Manually Thermoactuator Manually Transmission 3/8" Socket Wrench 8 screws Drain Pump Harness Pliers Disassemble 2 connectors Drained Pump 1/4" Socket Wrench 2 screws Drain Hose Clamp Pliers...
- Page 112 DISASSEMBLY TOOL COMPONENTE HERRAMIENTA OBSERVACIONES Selector Harness Pliers 2 plastic ties plastic ties T Board (LEDs) Manually Dryer Harnesses Manually 3 connectors: 9 way, Start, Power 2 low screws, 3 top screws, Panel is removed including Door, Dryer Front Panel 1/4"...
-
Page 113: Control Board
CONTROL BOARD Manual de Servicio Ingenieria de Servicio... - Page 114 Electrical Components Connected to the Control Board: Component Characteristic Comments 8-position selector V = 5 VDC Program selector. 5-position selector V = 5 VDC Water level selector. 2 Buttons: • Start / Pause T Board V = 5 VDC • Manual 5 LEDs 6-position selector...
-
Page 115: Electric Diagram
ELECTRIC DIAGRAM Electric Models 220V Manual de Servicio Ingenieria de Servicio... -
Page 116: Problem Solving
PROBLEM SOLVING IN WASHING POSSIBLE CAUSES WHAT TO DO MACHINE Too much foam Too much detergent Measure the amount of detergent carefully. Use less soap for soft water, a smaller load of laundry Using too much detergent Use less detergent. Use less soap for soft water, a smaller load, or a lightly soiled load Fill hoses or drain hose are Make sure hose connections are tight at taps and rubber... - Page 117 The switch / fuse is off / Check the household switches / fuses. Replace the fuses or blown reset the circuit breaker. The washing machine should have an individual outlet The electronic part must be Unplug washer, wait 2 minutes, reconnect, and press START reset START was not Press START...
- Page 118 Undiluted chlorine bleach Check bleach package directions to use proper amount Never add undiluted bleach to wash or allow items to come in contact with undiluted bleach Chemicals such hair Rinse items that may contain chemicals before washing bleach or dye, perm solution Wrong order Avoid mixing heavy garments (like work clothes) with light garments (like blouses).
- Page 119 Large loads of heavy fabrics Large, heavy fabrics hold more moisture and take longer to dry. (like beach towels) Separate large and heavy fabrics into smaller loads to speed up drying time Improper setting of controls Match the settings of the controls to the load you are drying The lint filter is full Clean lint screen before each load Review installation instructions for proper duct / vent.
- Page 120 DISPLAY TEST AND FAULT CHART The same Binary Code for Kraken Washing Machines is followed, only that in these it is read from right to left and in Laundry Centers it is read from bottom to top. See the image below the Table, it is an example of how it would be represented in the Control Panel of the Laundry Center, for illustrative purposes the image of the Selector LEDs was rotated.
- Page 121 DISPLAY TEST AND FAULT CHART Fault description Recommended Action Automatic fault Possible cause stat reset duri failu Speed > 60 rpm in Speed Sensor with Lid unlocked Motor turned off & speed does not slow down Motor turned on & * Reset Non-Volatile fault lock Every minute it...
- Page 122 Triacs short * Reset Non-Volatile fault Unlo Does not reset A) Overcurrent due to circuit * Check that the transmission is not cked clothes stuck between forced basket or agitator * Check that clothes are not stuck Running service mode routine (test 9), B) Transmission damaged if you have E7 again then replace Control Board...
- Page 123 * If the failure repeats, then you must change the Control Board Pressure Sensor * Reset Non-Volatile fault Lock Drains for 6 A) bad routing sensor hose / hose is * Check that the hose is connected to minutes and Disassembled disconnected the pressure sensor and the Tub.
- Page 124 Lid switch fails * Open the lid, if the fault is reset then Unlo When the lid is 1. Faulty switch (constantly it is assumed that three cycles were cked detected open closed) run without opening the lid. 2. 3 cycles are run without * Start any cycle and verify that it opening the lid starts its operation.
-
Page 125: Clearing Faults
CLEARING FAULTS OR PROTECTIONS CLEARING VOLATILE / NON-VOLATILE FAULTS Platform Control Panel Volatile Faults Non-volatile faults Knob in OFF CYCLES knob in DELICATE position position Laundry Press START / LOAD LEVEL knob in AUTO Centers PAUSE button “Centaur While the control is in a fault Standardization state, SELECTION + START / ”... -
Page 126: Service Mode
SERVICE MODE ENTRY TO SERVICE MODE Platform Control Panel Input method Operation CYCLES knob in OFF "SPIN" is test 1. position The test change is done LOAD LEVEL knob on through the cycle knob. HIGH Laundry Using the START / PAUSE Centers During the first 10 button it is possible to run or... - Page 127 Softener valve (Applies for Turn on valve during test (Auto-off in 60s) models with Dispenser) (led "spin" + "rinse") Chlorine valve Turn on valve during test (Auto-off in 60s) Drain pump / Turn on drain pump, switch to Spin mode and spin, Thermoactuator / Lid Lock lock the lid (led "...
- Page 128 K24 and CL "Rinse" LED on K27 LEDs: Soak30 + Soak60. Closed lid: "LC" on display K24 and CL "Spin" LED on K27 Leds: Pause + Spin. Recirculation pump Activates recirculation pump during test Control software review Shows the software review by a Led or Display code (led “eco”...
-
Page 129: Dryer
DRYER BASIC OPERATION FUNCIONAMIENTO BASICO ELECTRIC DRYER SECADORA A GAS ➢ Airflow passes from outside the cabinet and enters ➢ Airflow passes from outside the cabinet and enters the Dryer. the Dryer. ➢ The Rear Panel has openings and grilles for air intake. ➢... - Page 130 DRYER AIR FLOW Flow has a considerable impact on the correct operation of the dryer ➢ Manual de Servicio Ingenieria de Servicio...
- Page 131 DRYER Monophasic Centaur Dryer 220V/60Hz Dryer Control 220V/50Hz ➢ These models have 2 cycles, 1 automatic and 1 minute. ➢ The time of the Automatic cycle will depend on the humidity and quantity of the load, in addition to the restriction of the unit. ➢...
- Page 132 DRYER BIPHASIC Centaur Dryer Dryer Control 220V/60Hz These models have 4 cycles, 3 automatic and 1 minute. ➢ ➢ The time of the Automatic cycle will depend on the humidity and quantity of the load, in addition to the restriction of the unit. ➢...
- Page 133 DRYER TEMPERATURE LEVELS The thermostats control the heat that the resistance or the valve supplies to the system to dry ➢ CONTROL OPERATION ➢ Depending on the combination of different factors, the performance of the unit will be Manual de Servicio Ingenieria de Servicio...
- Page 134 DRYER POSSIBLE CAUSES OF POOR PERFORMANCE ➢ The relationship Flow, size and type of load affects the performance of the unit Manual de Servicio Ingenieria de Servicio...
-
Page 135: Drive System
DRIVE SYSTEM DRIVE SYSTEM ASSEMBLY (EXPLOSED) ➢ Motors: 127/60 220/60 220/50 ➢ Shift system. - Thermo actuator, for all voltages ➢ Speed Sensor.- One model for all voltajes ➢ Torque Screws drive system to tub: 16 x (75 +/-10 in lbf) Manual de Servicio Ingenieria de Servicio... - Page 136 DRIVE SYSTEM SUPPORTS ASSEMBLY MAIN CHANGES VS CENTAURO LA PLATFORM Main support KRAKEN 24” (thickness .053”) Transmission KRAKEN 24” (4:1, grease) Tub seal KRAKEN (interference vs main support) Bearings C5 KRAKEN (Absorb increased misalignment => lower free torque Manual de Servicio Ingenieria de Servicio...
- Page 137 DRIVE SYSTEM TRANSMISSION 4:1 (grease) Features: • Reduce speed when washing • Transmit torque and speed in spin • Guide for shift system • CTQ: Free torque • What to watch out for in manufacturing: free torque, burr noise and alignment. •...
- Page 138 DRIVE SYSTEM TUB SEAL Features: • Avoid the passage of water from the tub to the drive system through two interface: External diameter seal vs tub Internal diameter seal vs transmission tube • Withstand operating conditions (unbalance, additives in water, etc) •...
Need help?
Do you have a question about the Centauro ICL2040 Series and is the answer not in the manual?
Questions and answers