Advertisement
Quick Links
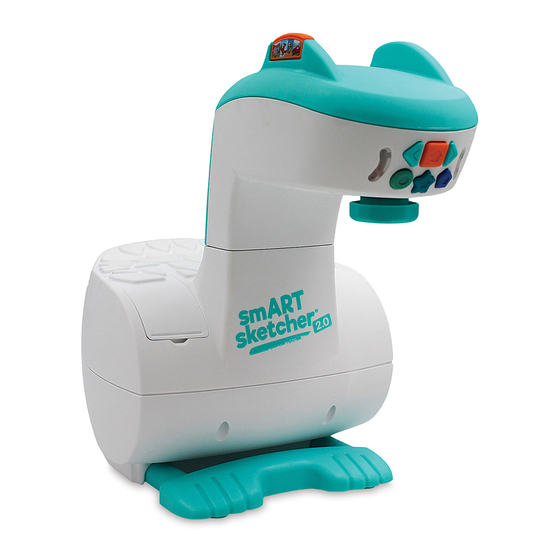
Activity Cartridge
Activity Cartridge
Storage Compartment
On/Off Switch (back)
USB Power Plug
connection
Stability Legs
*Battery Compartment (bottom)
SIMPLE SET UP
SIMPLE SET UP
1. Separate the projector head from the base unit.
2. Insert the head unit into the top of the base unit until you hear a click.
3. Plug the USB Power Cable (included) into the back of the unit and into a USB power
outlet (5V DC, minimum 1.2A). If you wish to use batteries instead, insert four D batteries
(not included) according to the directions provided. When using batteries, it is recommended
to enable "efficiency mode" by pressing the blue circle button for 2 seconds (see image).
4. Pull out the blue legs to stabilize the projector and create a paper holder.
5. Flip the Power Switch on the back to turn on the projector.
6. Insert the pre-loaded Activity Cartridge into the top of the projector.
7. After 10 minutes with no activity the projector light will
automatically turn off. Reactivate the light by using the buttons
in the app or on the projector.
For more fun, additional Activity Cartridges and accessories are available at:
https://www.flycatcher.toys/smart-sketcher-2
Slot
The toy should be periodically examined
for potential hazardous parts to be repaired or replaced.
Not recommended for children under 3 years of ages.
As with all electric products, precautions should be
observed during handling and use to prevent electric shock.
AC adapter: INPUT:100-240VAC, 0.3A MAX 50/60Hz;
2s
CAUTION-
ELECTRIC TOY:
OUTPUT: 5.9V 1.0A
Control Buttons
LED Indicators
Adjustable
Focus
Paper Holder
Please retain this user manual for future reference
Advertisement

Related Manuals for Flycatcher Smart Sketcher 2.0


Summary of Contents for Flycatcher Smart Sketcher 2.0
- Page 1 Reactivate the light by using the buttons in the app or on the projector. For more fun, additional Activity Cartridges and accessories are available at: https://www.flycatcher.toys/smart-sketcher-2 The toy should be periodically examined for potential hazardous parts to be repaired or replaced.
- Page 2 3. If you haven’t registered yet: Click the “I have a smART sketcher” button and follow the instructions to complete the one-time registration process. If you have already registered: Click the “Login with Flycatcher ID” link. 4. Once the device is connected to the projector, choose your mode...
Need help?
Do you have a question about the Smart Sketcher 2.0 and is the answer not in the manual?
Questions and answers
Can’t see image. Too bright?
The image may not be visible on the Flycatcher Smart Sketcher 2.0 for several reasons:
1. The projector may not be powered correctly—check for a green light near the power switch.
2. The activity content cartridge may not be inserted properly.
3. There may be a "Low Voltage Err" message indicating insufficient power.
4. The projector brightness setting may be too low.
It is not necessarily because it is too bright.
This answer is automatically generated