Table of Contents
Advertisement
Quick Links
High-Definition Demodulator Module
HDE-8C DIN Series
w/Opt 2
8xDIN (Component Video) Input
6371 Q
6371 QIP
EAS Compatible
ACTIVE
©2018 Blonder Tongue Laboratories, Inc. All rights reserved. Specifications are subject to change without notice. Trademarks are the property of their respective owner.
4xQAM Outputs
4xQAM + 8xIP Outputs
Status
Date
November 02, 2016
800-523-6049
www.blondertongue.com
Document No.
Issue No.
651243600A
1
Blonder Tongue is ISO 9001:2015 Certified
Stock No.
6371 Q 2,
6371 QIP 2
User Manual
Author
KK
Advertisement
Table of Contents

Related Manuals for Blonder tongue HDE-8C DIN Series


Summary of Contents for Blonder tongue HDE-8C DIN Series
- Page 1 Document No. Issue No. Author ACTIVE November 02, 2016 651243600A 800-523-6049 www.blondertongue.com Blonder Tongue is ISO 9001:2015 Certified ©2018 Blonder Tongue Laboratories, Inc. All rights reserved. Specifications are subject to change without notice. Trademarks are the property of their respective owner.
- Page 2 Returning Product for Repair (or Credit) A Return Material Authorization (RMA) Number is required on all products returned to Blonder Tongue, regardless if the product is being returned for repair or credit. Before returning product, please contact the Blonder Tongue Service www.blondertongue.com Department at 1-800-523-6049, Ext.
-
Page 3: Table Of Contents
HDE-8C DIN Series Instruction Manual Table of Contents SECTION 1 — GENERAL & SAFETY INSTRUCTIONS ..................... 4 SECTION 2 — PRODUCT SUMMARY ..........................5 2.1 REVISION HISTORY & REASON ..........................5 2.2 PRODUCT APPLICATION & DESCRIPTION ......................5 2.3 PRODUCT SPECIFICATION ............................8 SECTION 3 –... -
Page 4: Section 1 - General & Safety Instructions
å Do not use accessories or attachments not recommended by Blonder Tongue, å Do not overload wall outlets or extension cords, as this can result in a risk of fire as they may cause hazards, and will void the warranty. -
Page 5: Section 2 - Product Summary
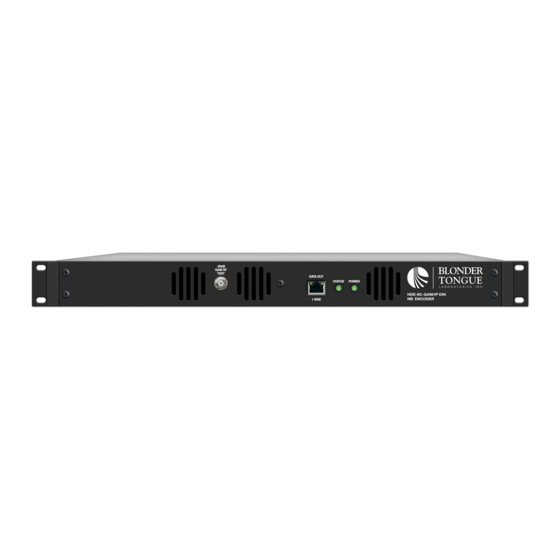
Application: The HDE-8C DIN Series of encoders offers the ability to deliver eight (8) HD programs in just 1RU to conserve valuable rack space. The encoder is designed to be seamlessly interconnected to eight (8) DIRECTV H25 satellite receivers using factory supplied DIN cables (Quantity 8;... - Page 6 LED is Green = AC power is detected. LED is Off = indicates (i) AC power is not connected, or (ii) AC power is connected but the power supply is defective. The unit must be sent to Blonder Tongue for repair for condition (ii). REAR PANEL:...
- Page 7 HDE-8C DIN Series Instruction Manual Description (continued): CONTROL 10/100: RJ45 connector for 10/100Base-T Ethernet interface for monitoring and configuring the unit. Only static IP address can be assigned to this interface. (Factory Default: “172.16.70.1”) EAS INPUTS: RCA connectors for EAS Analog Audio (marked L & R) and Composite Video (marked Video) inputs.
-
Page 8: Product Specification
8 HDE-8C DIN Series Instruction Manual 2.3 Product Specification Output Input QAM* Component Connectors: Connector: 1x “F” Female 8xDIN ; each DIN socket provides (rear panel; up to 4x RF QAM ch. combined) (13 pin) Modulation: QAM 16, 32, 64, 128, and 256... -
Page 9: Section 3 - Installation & Power-Up
• H258C DIN Cable (Stk# 3703) (QTY=8) 3.2 Installation The HDE-8C DIN Series encoder is designed to be installed in a standard 19-inch (483 mm) rack (EIA 310-D, IEC 60297, and DIN 41494 SC48D). To install the encoder, secure the unit’s front panel to the rack by inserting four (4) machine screws, with cup washers, through the four (4) mounting holes in the front panel. -
Page 10: Section 4 - Quick Start Guide
DC to RF Adapter Ethernet Port Step 2 - Login • Log in to the HDE-8C DIN Series encoder, using a standard web browser. This can be done through the Control 10/100 port located next to the Receiver Control port. Either go directly from a computer or through an Ethernet switch. - Page 11 - TS bitrate = QAM Modulator - Modulation Mode = QAM 256 - Out of band = disabled Note: ASI Output is not available on the HDE-8C DIN Series Verify the Output Mapping Section. - Input for each TS must be different.
- Page 12 12 HDE-8C DIN Series Instruction Manual Step 4 - TS Configuration (continued) Step 5 - Configure IP Output Go to the Main > Output > IP Tab Assign the Destination IP, Encapsulation protocol, Destination and Source Ports for each transport stream.
- Page 13 HDE-8C DIN Series Instruction Manual Step 6 - Configure QAM Output Setup the QAM output channels by going to the Main > Output > QAM tab Select the channel for the 1st QAM. The next 3 will be automatically assigned.
-
Page 14: Section 5 - Communicating With The Unit
14 HDE-8C DIN Series Instruction Manual Section 5 – Communicating with the Unit Local or remote communication with the unit is only possible through a GUI-based menu via any standard web browser. Before you can communicate with the unit, you must configure the unit's IP address to conform with your existing IP network or LAN. -
Page 15: Section 6 - Configuring The Unit
HDE-8C DIN Series Instruction Manual Section 6 - Configuring the Unit 6.1 Accessing the Unit Via the Web Browser You must complete the steps described in Section 5 before proceeding as follows: (1) Open a web browser on your computer (Internet Explorer 7 or higher is recommended) and enter the following URL address (http://172.16.70.1). -
Page 16: Main > Status" Screen
16 HDE-8C DIN Series Instruction Manual 6.2 “Main > Status” Screen The “Main > Status” screen (Figure 6.2) is a “read only” screen and displays Input, PID and Output information of each of the four (4) transport streams (TS). Each TS contains two (2) programs: Figure 6.2 - “Main >... -
Page 17: Main > Input Config" Screen
HDE-8C DIN Series Instruction Manual 6.3 “Main > Input Config” Screen The “Main > Input Config” screen (Figure 6.3) is a “user-configurable” screen where the following input source parameters can be configured: Figure 6.3 - “Main > Input Config” Screen Input #: indicates the physical input interface. -
Page 18: Main > Settop Control" Configuration
18 HDE-8C DIN Series Instruction Manual 6.4 “Main > Settop Control” Configuration The “Main > Settop Control” configuration section includes the following sub-tabs: Diagnostics, DHCP, Channel Config and Refresh. 6.4.1 “Main > Settop Control > Channel Config” Screen The Channel Config menu facilitates setting the channel line up for the unit. -
Page 19: Main > Settop Control> Diagnostics" Screen
HDE-8C DIN Series Instruction Manual 6.4.2 “Main > Settop Control> Diagnostics” Screen This page allows the user to remove receivers from the HDE-8C DIN unit's database. WARNING: Once Saved, changes cannot be undone. Figure 6.4.2 - “Main > Settop Control > Diagnostics” Screen Line #: Not to be confused with Input #. -
Page 20: Main > Settop Control> Dhcp" Screen
20 HDE-8C DIN Series Instruction Manual 6.4.2 “Main > Settop Control > Diagnostics” Screen (continued) This table is used for network diagnostic of the receivers. The row of a unit previously detected but currently not able to communicate is shown in red. -
Page 21: Main > Encoder" Configuration
HDE-8C DIN Series Instruction Manual 6.5 “Main > Encoder” Configuration The “Main > Encoder” section includes the following sub-tabs: “Video”, “Audio”, and “Refresh”. 6.5.1 “Main > Encoder > Video” Screen The “Main > Encoder > Video” screen (Figure 6.5.1) is a “user-configurable” screen to select the video encoder parameters for each input program: Figure 6.5.1 - “Main >... -
Page 22: Main > Encoder > Audio" Screen
22 HDE-8C DIN Series Instruction Manual 6.5.1 “Main > Encoder > Video” Screen (continued) GOP Size: The length between I-frames is known as the group of pictures (GOP) size. The range is 1 to 120. (Factory default: “15” - i.e. 1 I-frame for every 14 non-I-frames) Test Pattern: is the video pattern that the encoder will display upon loss of input video. -
Page 23: Main> Encoder > Refresh" Tab
HDE-8C DIN Series Instruction Manual 6.5.2 “Main > Encoder > Audio” Screen (continued) Data Rate: allows the user to select the audio encoding bitrate in Kbps (kilobits per second). The range is 96 to 448 kbps. (Factory Default: 192 kbps which supports Audio Coding Mode: 2/0:L,R) Delay: allows the user to adjust the audio delay (-300 to 300 ms) to correct for input video/audio sync mismatch. -
Page 24: Main > Output" Screen
24 HDE-8C DIN Series Instruction Manual 6.6 “Main > Output” Screen The “Main > Output” section includes the following sub- tabs: TS Config, QAM, IP (QAM/IP Model Only) and Refresh. 6.6.1 “Main > Output > TS Config” Screen The “Main > Output > TS Config” screen (Figure 6.6.1) is a “user-configurable”... - Page 25 ASI Output: this option is not available on the HDE-8C DIN Series encoders. In the section entitled “Output Mapping”, the user can select and configure the following parameters for each output TS indicated by “TS#”, under the gray header:...
-
Page 26: Main > Output > Qam" Screen
26 HDE-8C DIN Series Instruction Manual 6.6.2 “Main > Output > QAM” Screen The “Main > Output > QAM” screen (Figure 6.6.2) is a “user-configurable” screen to assign QAM parameters to the TS: Figure 6.6.2 - “Main > Output > QAM” Screen Output Channel/Frequency: user must assign a RF channel number to the RF QAM output of the Quad-QAM module (i.e. -
Page 27: Main > Output > Ip" Screen (Qam/Ip Model Only)
HDE-8C DIN Series Instruction Manual 6.6.3 “Main > Output > IP” Screen (QAM/IP Model Only) The “Main > Output > IP” screen (Figure 6.6.3) is a “user-configurable” screen to assign IP parameters to the TS: Figure 6.6.3 - “Main > Output > IP” Screen Destination IP: allows user to assign the IP address of the equipment to which the GigE output is streamed to. -
Page 28: Main > Output > Refresh" Tab
28 HDE-8C DIN Series Instruction Manual 6.6.4 “Main > Output > Refresh” Tab The “Refresh” tab can be clicked while you are on any of the following sub-tabs screens: “TS Config”, “QAM”, and “IP” (QAM/IP Model Only). When clicked, the Refresh tab will update all relevant fields/parameters of the active screen as that information is retrieved from the unit in a real-time basis. -
Page 29: Time" Screen
HDE-8C DIN Series Instruction Manual 6.7 “Network” Screen (continued) Hardware Version: indicates the unit’s hardware version. Serial Number: indicates the unit’s serial number. Headend Name: a user-defined field to make identification easier. User can enter up to 49 alphanumeric characters. -
Page 30: Event Log" Screen
30 HDE-8C DIN Series Instruction Manual 6.8 “Time” Screen (continued) In the section entitled “Time Adjustments”, the local time zone on Coordinated Universal Time (UTC) can be set. In the section entitled “Daylight Saving Time”, the user can apply the Daylight Savings settings either manually or automatically using the DST Adjustment option. -
Page 31: Update" Screen
HDE-8C DIN Series Instruction Manual 6.10 “Update” Screen The “Update” screen (Figure 6.10) allows user to browse, select, and download/update the Config file. Figure 6.10 - “Update” Screen Choose File: allows the user to select a desired configuration file to be uploaded to the unit from any location on the computer. - Page 32 32 HDE-8C DIN Series Instruction Manual 6.11 “Admin” Screen (continued) QAM/IP Model Only Figure 6.11a – “Admin” Screen...
- Page 33 Receivers will be tuned to the channels listed in the Settop Config file. Within a 20 minute period, Automatic Setting: the HDE-8C DIN Series Encoder will update the receivers to channel numbers contained in the Settop Config file, as well as maintaining the encoders intended QAM RF channels. This feature is used to prevent accidental channel changing on the receivers front panel (if not locked) and on the encoder.
- Page 34 34 HDE-8C DIN Series Instruction Manual 6.11 “Admin” Screen (continued) Control Port IP Address: is the static IP address that is assigned to the Control 10/100 Port. It allows the user to access the unit via the web interface. (Factory Default: “172.16.70.1”) Control Port Subnet Mask: is the Subnet Mask assigned to the Control Port of the unit.
-
Page 35: Appendix A: Updating The Software Remotely
HDE-8C DIN Series Instruction Manual Appendix A: Updating the Software Remotely General background: There are two different PROMs that need to be programmed in the Unit. They are called PROM1 and PROM2. Please note not every software update requires both PROMs to be programmed. However, program both PROMs unless you get a written notice with Release notes to do otherwise. - Page 36 36 HDE-8C DIN Series Instruction Manual Telnet to the Unit: There are two ways to telnet to the unit: (1) Use Command line and type in “ telnet IP address ” for example “telnet 172.16.70.1” (2) Use the Terminal program such as Putty to telnet.
- Page 37 HDE-8C DIN Series Instruction Manual...
- Page 38 38 HDE-8C DIN Series Instruction Manual NOTES...
- Page 39 10. The cost of the extended warranty is 8% of the purchase price for a 1 or 2 year extension beyond the Blonder Tongue standard warranty. e.g. A product price of $1000 will be $80 for the 1 year (12 mos) and additional $80 for 2 year (24 mos) extension for a total of $160.
- Page 40 BT may determine) any product manufactured by BT which proves to be defective in materials or workmanship or fails to Blonder Tongue Laboratories, Inc. (BT) will at its sole option, either repair or replace (with a new or factory reconditioned product, as BT may the case of software, licensed) by Seller which is defective in materials or workmanship or fails to meet the applicable specifications that are in effect on the date of meet the specifications which are in effect on the date of shipment or such other specifications as may have been expressly...
Need help?
Do you have a question about the HDE-8C DIN Series and is the answer not in the manual?
Questions and answers