
Subscribe to Our Youtube Channel
Related Manuals for Makita XAU02


Summary of Contents for Makita XAU02
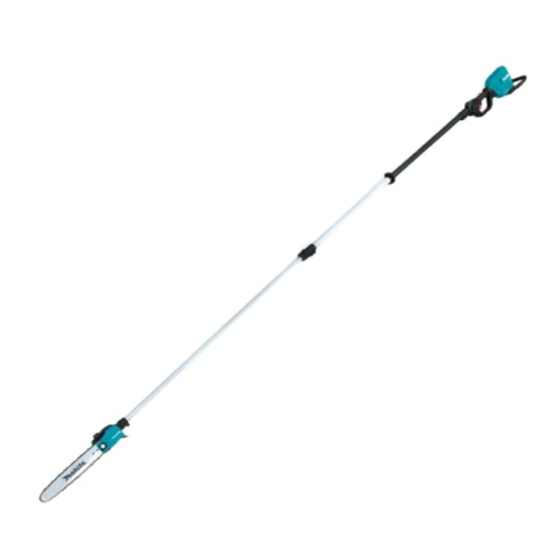
- Page 1 INSTRUCTION MANUAL MANUAL DE INSTRUCCIONES Cordless Telescopic Pole Saw Sierra de Extensión Telescópica Inalámbrica XAU02 IMPORTANT: Read Before Using. IMPORTANTE: Lea antes de usar.
-
Page 2: Specifications
ENGLISH (Original instructions) SPECIFICATIONS Model: XAU02 Overall length (without guide bar) 2,530 - 3,760 mm (99-1/2″ - 148″) Rated voltage D.C. 36 V Net weight 7.8 - 8.4 kg (17.2 - 18.5 lbs) Standard guide bar length 250 mm (10″) -
Page 3: Safety Warnings
Saw chain, guide bar, and sprocket combination Saw chain type 90PX Number of drive links Guide bar Guide bar length 250 mm (10″) Cutting length 240 mm (9-1/2″) Pitch 3/8″ Gauge 1.1 mm (0.043″) Type Sprocket nose bar Sprocket Number of teeth Pitch 3/8″... - Page 4 14. Check Damaged Parts - Before further use of the 27. Remove adjusting keys or wrenches before appliance, a guard or other part that is damaged turning the appliance on. A wrench or a key that should be carefully checked to determine that is left attached to a rotating part of the appliance it will operate properly and perform its intended may result in personal injury.
- Page 5 Before assembling or adjusting the tool, condition before continuing work. If there is switch off the tool and remove the battery any damage or doubt, ask Makita authorized cartridge. service center for the inspection and repair. Before handling the saw chain or adjusting the Do not touch the head of the tool.
- Page 6 Makita authorized service center to sharpen it or replace it with new one. 18. Accelerating the tool with the saw chain...
- Page 7 Direction of chain travel 12. Use the batteries only with the products specified by Makita. Installing the batteries to Chain oil tank non-compliant products may result in a fire, exces- sive heat, explosion, or leak of electrolyte.
-
Page 8: Parts Description
10 °C - 40 °C (50 °F - 104 °F). Let causing fires, personal injury and damage. It will a hot battery cartridge cool down before also void the Makita warranty for the Makita tool and charging it. charger. -
Page 9: Functional Description
Indicating the remaining battery capacity FUNCTIONAL DESCRIPTION Only for battery cartridges with the indicator CAUTION: Always be sure that the tool is switched off and the battery cartridge is removed before adjusting or checking function on the tool. Installing or removing battery cartridge CAUTION: Always switch off the tool before... -
Page 10: Overheat Protection
Overheat protection NOTE: You can use the tool in the Torque Boost mode up to 60 seconds. Depending on the usage When the tool or battery is overheated, the tool stops conditions, this mode shifts to the normal mode in automatically and the main power lamp lights up in red. -
Page 11: Electronic Function
Electric brake This tool is equipped with an electric brake. If the tool consistently fails to quickly stop after the switch trigger is released, have the tool serviced at a Makita service center. ASSEMBLY CAUTION: Always be sure that the tool is switched off and the battery cartridge is removed before carrying out any work on the tool. - Page 12 Tighten 3 bolts using the hex wrench. Insert the pipe into the head of the tool all the way, and then align the hole on the pipe with the hole on the head of the tool. ► 1. Bolt Loosen 2 bolts, and then remove 1 bolt. ►...
-
Page 13: Adjusting Saw Chain Tension
To remove the saw chain, perform the following steps: Tighten the retaining nut to secure the sprocket cover, then loosen it a bit for tension adjustment. Loosen the chain adjusting screw, then the retaining nut. ► 1. Retaining nut ► 1. Chain adjusting screw 2. Retaining nut Adjusting saw chain tension Remove the sprocket cover, and then remove the saw chain and guide bar from the tool body. -
Page 14: Operation
The oil delivery may otherwise be impaired. NOTICE: Use the saw chain oil exclusively for Makita chain saws or equivalent oil available in the market. NOTICE: Never use oil including dust and parti- cles or volatile oil. - Page 15 Makita. If you put on the shoulder harness included in the tool package and the shoulder harness of the back-...
-
Page 16: Working With The Tool
Working with the tool NOTE: When removing the shoulder harness, unlock the buckle and remove the shoulder harness. CAUTION: Keep all parts of the body away Adjust the shoulder harness to a comfortable from the saw chain when the motor is operating. working position. - Page 17 When cutting thick branches, first make a shallow Using the tool with battery adapter undercut and then make the finish cut from the top. Optional accessory Use the hanging band when you use the tool with bat- tery adapter. Attaching the hanging band Attach the hooks of the hanging band to the rings of the shoulder harness or waist belt as shown in the figure.
-
Page 18: Maintenance
Never use gasoline, benzine, thinner, alcohol or the like. Discoloration, deformation or cracks may result. To maintain product SAFETY and RELIABILITY, repairs, any other maintenance or adjustment should be performed by Makita Authorized or Factory Service Centers, always using Makita replacement parts. 18 ENGLISH... -
Page 19: Sharpening The Saw Chain
— The sharpening angle of 30° must be the same on Sharpening the saw chain all cutters. Different cutter angles cause the chain to run roughly and unevenly, accelerate wear, and Sharpen the saw chain when: lead to chain breaks. •... -
Page 20: Cleaning The Guide Bar
Before fitting a new saw chain, check the condition of Cleaning the sprocket cover the sprocket. If the sprocket is worn or damaged, ask Makita Authorized Service Centers for replacement. Chips and saw dust will accumulate inside of the sprocket cover. Remove the sprocket cover and saw chain from the tool then clean the chips and saw dust. -
Page 21: Storing The Tool
Storing the tool Clean the tool before storing. Remove any chips and sawdust from the tool after removing the sprocket cover. After cleaning the tool, run it under no load to lubri- cate the saw chain and guide bar. Cover the guide bar with the guide bar cover, and then shorten the pipe. -
Page 22: Troubleshooting
Before asking for repairs, conduct your own inspection first. If you find a problem that is not explained in the manual, do not attempt to dismantle the tool. Instead, ask Makita Authorized Service Centers, always using Makita replace- ment parts for repairs. -
Page 23: Especificaciones
ESPAÑOL (Instrucciones originales) ESPECIFICACIONES Modelo: XAU02 Longitud total (sin la barra de guía) 2 530 mm - 3 760 mm (99-1/2″ - 148″) Tensión nominal 36 V c.c. Peso neto 7,8 kg - 8,4 kg (17,2 lbs - 18,5 lbs) Longitud de la barra de guía estándar... -
Page 24: Advertencias De Seguridad
Combinación de cadena de la sierra, barra de guía y pieza dentada Tipo de cadena de la sierra 90PX Número de eslabones motorices Barra de guía Longitud de la barra de guía 250 mm (10″) Longitud de corte 240 mm (9-1/2″) Paso 3/8″... - Page 25 10. No utilice el aparato donde no alcance - Mantenga los 21. Utilice siempre protección para la cabeza pies sobre suelo firme y el equilibrio en todo momento. cuando opere la podadora de extensión por encima de su cabeza. Los restos que caigan Manténgase alerta - Preste atención a lo que pueden ocasionar graves lesiones personales.
- Page 26 33. Este aparato no está diseñado para ser utili- Opere la herramienta únicamente en condi- zada por personas (incluidos niños) con dis- ciones de buena visibilidad y a la luz del día. capacidades físicas, sensoriales o mentales, o No opere la herramienta en la oscuridad o la que carezcan de experiencia y conocimientos.
- Page 27 En caso de haber daños o dudas, sierra. solicite la inspección y reparación al centro de servicio autorizado de Makita. 26. Evite el retroceso brusco (la fuerza de reac- ción giratoria hacia el operador). Para evitar No toque el cabezal de la herramienta. El...
- Page 28 Siempre utilice piezas de repuesto y acceso- que en las instrucciones para el uso y cuidado. rios originales de Makita solamente. El uso de Seguridad eléctrica y de la batería piezas o accesorios suministrados por un tercero podría provocar fallas en la herramienta, daños...
- Page 29 12. Utilice las baterías únicamente con los pro- batería ductos especificados por Makita. Instalar las baterías en productos que no cumplan con los Antes de utilizar el cartucho de batería, lea requisitos podría ocasionar un incendio, un calen- todas las instrucciones e indicaciones de tamiento excesivo, una explosión o una fuga de...
-
Page 30: Descripción De Las Piezas
Pare siempre la ope- lesiones personales y daños. Asimismo, esto inva- ración y cargue el cartucho de batería cuando lidará la garantía de Makita para la herramienta y el note menos potencia en la herramienta. cargador Makita. No cargue nunca un cartucho de batería que esté... -
Page 31: Descripción Del Funcionamiento
Indicación de la capacidad restante DESCRIPCIÓN DEL de la batería FUNCIONAMIENTO Únicamente para cartuchos de batería con el indicador PRECAUCIÓN: Asegúrese siempre de que la herramienta esté apagada y el cartucho de batería haya sido extraído antes de realizar cualquier ajuste o comprobación en la herramienta. -
Page 32: Protección Contra Sobrecarga
Protección contra sobrecarga NOTA: Esta herramienta emplea la función de apagado automático. A fin de evitar un arranque no Cuando la batería sea utilizada de una manera que intencional, el interruptor de alimentación principal se cause que consuma una cantidad anormalmente alta apagará... -
Page 33: Montaje
• Freno eléctrico La herramienta está equipada con un freno eléc- trico. Si la herramienta falla constantemente en detenerse tras soltar el gatillo interruptor, lleve la herramienta a mantenimiento a un centro de servicio Makita. 33 ESPAÑOL... - Page 34 Inserte el tubo en el cuerpo de la herramienta por Afloje el anillo de bloqueo girando el anillo de blo- completo, y luego alinee el orificio del tubo con el orifi- queo en sentido inverso al de las manecillas del reloj, cio del cuerpo de la herramienta.
- Page 35 Inserte la protuberancia de la cubierta de la pieza Extracción o instalación de la dentada al cuerpo de la herramienta, y luego cierre cadena de la sierra la cubierta de manera que el perno y el pasador del cuerpo de la herramienta encajen con sus contrapartes de la cubierta.
-
Page 36: Operación
De lo contrario, el suministro de aceite podría ser deficiente. AVISO: Utilice el aceite para la cadena de la sie- rra exclusivamente para sierras eléctricas Makita o un aceite equivalente disponible en el mercado. AVISO: Nunca use aceite que tenga polvo y partí- culas, ni aceite volátil. - Page 37 La cadena de la sierra se lubrica automáticamente NOTA: Si se dificulta quitar la tapa del tanque de cuando la herramienta está en funcionamiento. aceite, inserte la llave de ojo en la hendidura de la Verifique periódicamente la cantidad de aceite restante tapa del tanque de aceite, y luego quite la tapa del en el tanque de aceite.
- Page 38 Para la banda para colgado recomendada, pregunte a los Abroche el gancho en el arnés para hombro en el centros de servicio autorizados de Makita. colgador de la herramienta. PRECAUCIÓN: Siempre lleve puesto el arnés para hombro colocado en la herramienta.
- Page 39 Arranque la herramienta, luego presione la cadena de Operación con la herramienta la sierra contra la rama ligeramente. Al cortar ramas largas, para controlar la posición de PRECAUCIÓN: Mantenga todas las partes caída de las ramas cortadas, divida la rama en seccio- del cuerpo alejadas de la cadena de la sierra nes y corte la rama desde la punta.
- Page 40 Transporte de la herramienta Antes de transportar la herramienta, extraiga siempre los cartuchos de batería de la herramienta, luego colo- que la cubierta de la barra de guía, y posteriormente acorte el tubo. Asimismo, cubra el cartucho de batería con la cubierta de la batería. ►...
-
Page 41: Mantenimiento
Makita, empleando Si necesita soltar la herramienta rápidamente, siga los siempre repuestos Makita. pasos a continuación. - Page 42 — Los mejores resultados de corte se obtienen con — La lima puede guiarse más fácilmente si se emplea la distancia siguiente entre el borde de corte y el un sujetador de limas (accesorio opcional). El suje- calibrador de profundidad. tador de limas cuenta con marcas para el ángulo de afilado correcto de 30°...
- Page 43 Si la pieza den- tada se daña o se desgasta, solicite el reemplazo a los centros de servicio autorizado de Makita. Limpieza del orificio de descarga de aceite ►...
- Page 44 Instrucciones para el mantenimiento periódico Para asegurar una vida útil prolongada, prevenga el daño y asegure un funcionamiento total de las funciones de seguridad, efectuando el siguiente programa de mantenimiento de forma periódica. Las reclamaciones de garantía podrán ser reconocidas solamente si este programa de mantenimiento es realizado periódicamente y como corres- ponde.
-
Page 45: Resolución De Problemas
Antes de solicitar alguna reparación, primero realice una inspección por su cuenta. Si detecta algún problema que no esté explicado en el manual, no intente desensamblar la herramienta. En vez de esto, solicite la reparación a un centro de servicio autorizado de Makita, usando siempre piezas de repuesto Makita. Estado de la avería Causa Solución... - Page 48 Para reducir la exposición a estos productos químicos: trabaje en un área bien ventilada y póngase el equipo de seguridad indicado, tal como las máscaras contra polvo que están especialmente diseñadas para filtrar partículas microscópicas. Makita Corporation 3-11-8, Sumiyoshi-cho, Anjo, Aichi 446-8502 Japan 885798-894...
Need help?
Do you have a question about the XAU02 and is the answer not in the manual?
Questions and answers