
Subscribe to Our Youtube Channel
Related Manuals for Dell OptiPlex 5060 Tower


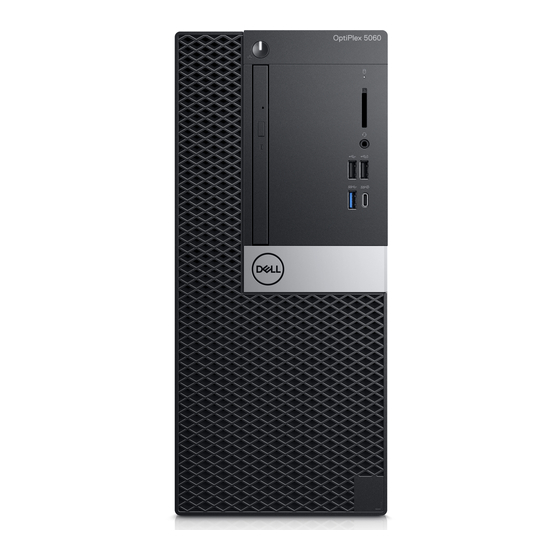
Summary of Contents for Dell OptiPlex 5060 Tower
- Page 1 Dell OptiPlex 5060 Tower Service Manual Regulatory Model: D18M Regulatory Type: D18M005 September 2021 Rev. A01...
- Page 2 A WARNING indicates a potential for property damage, personal injury, or death. © 2018 - 2019 Dell Inc. or its subsidiaries. All rights reserved. Dell, EMC, and other trademarks are trademarks of Dell Inc. or its subsidiaries. Other trademarks may be trademarks of their respective owners.
-
Page 3: Table Of Contents
Contents Chapter 1: Working on your computer................... 6 Safety instructions................................6 Turning off your computer — Windows 10........................6 Before working inside your computer..........................7 After working inside your computer..........................7 Chapter 2: Technology and components..................8 Processors.....................................8 DDR4.......................................8 USB features..................................9 USB Type-C.................................. - Page 4 Installing SD card reader............................35 Memory module................................. 36 Removing memory module............................36 Installing memory module............................37 Expansion card...................................38 Removing PCIe expansion card..........................38 Installing PCIe expansion card..........................39 Optional VGA module............................... 40 Removing optional VGA module..........................40 Installing optional VGA module..........................41 Power supply unit................................42 Removing power supply unit or PSU........................
- Page 5 Backup media and recovery options..........................78 WiFi power cycle................................78 Chapter 5: Getting help.......................80 Contacting Dell.................................. 80 Contents...
-
Page 6: Chapter 1: Working On Your Computer
Damage due to servicing that is not authorized by Dell is not covered by your warranty. Read and follow the safety instructions that came with the product. -
Page 7: Before Working Inside Your Computer
NOTE: Ensure that the computer and all attached devices are turned off. If your computer and attached devices did not automatically turn off when you shut down your operating system, press and hold the power button for about 6 seconds to turn them off. -
Page 8: Chapter 2: Technology And Components
Technology and components This chapter details the technology and components available in the system. Topics: • Processors • DDR4 • USB features • USB Type-C • HDMI 2.0 • Advantages of DisplayPort over USB Type-C Processors OptiPlex 5060 systems are shipped with Intel 8th generation-Coffee Lake chipset and core processor technology. NOTE: The clock speed and performance varies depending on the workload and other variables. -
Page 9: Usb Features
Figure 1. Notch difference Increased thickness DDR4 modules are slightly thicker than DDR3, to accommodate more signal layers. Figure 2. Thickness difference Curved edge DDR4 modules feature a curved edge to help with insertion and alleviate stress on the PCB during memory installation. Figure 3. - Page 10 Table 1. USB evolution (continued) Type Data Transfer Rate Category Introduction Year USB 2.0 480 Mbps High Speed 2000 USB 3.1 Gen 2 10 Gbps Super Speed 2013 USB 3.0/USB 3.1 Gen 1 (SuperSpeed USB) For years, the USB 2.0 has been firmly entrenched as the de facto interface standard in the PC world with about 6 billion devices sold, and yet the need for more speed grows by ever faster computing hardware and ever greater bandwidth demands.
-
Page 11: Usb Type-C
come close to the 480Mbps theoretical maximum throughput, making data transfer at around 320Mbps (40MB/s) — the actual real-world maximum. Similarly, USB 3.0/USB 3.1 Gen 1 connections will never achieve 4.8Gbps. We will likely see a real-world maximum rate of 400MB/s with overheads. At this speed, USB 3.0/USB 3.1 Gen 1 is a 10x improvement over USB 2.0. Applications USB 3.0/USB 3.1 Gen 1 opens up the laneways and provides more headroom for devices to deliver a better overall experience. - Page 12 phone, but that's about it. A laptop might require up to 60 watts, for example. The USB Power Delivery specification ups this power delivery to 100 watts. It's bi-directional, so a device can either send or receive power. And this power can be transferred at the same time the device is transmitting data across the connection.
-
Page 13: Hdmi 2.0
5. Up to 40 Gbps NOTE: Data transfer speed may vary between different devices. Thunderbolt Icons Figure 5. Thunderbolt Iconography Variations HDMI 2.0 This topic explains the HDMI 2.0 and its features along with the advantages. HDMI (High-Definition Multimedia Interface) is an industry-supported, uncompressed, all-digital audio/video interface. HDMI provides an interface between any compatible digital audio/video source, such as a DVD player, or A/V receiver and a compatible digital audio and/or video monitor, such as a digital TV (DTV). -
Page 14: Advantages Of Displayport Over Usb Type-C
Advantages of DisplayPort over USB Type-C ● Full DisplayPort audio/video (A/V) performance (up to 4K at 60Hz) ● Reversible plug orientation and cable direction ● Backwards compatibility to VGA, DVI with adaptors ● SuperSpeed USB (USB 3.1) data ● Supports HDMI 2.0a and is backwards compatible with previous versions Technology and components... -
Page 15: Chapter 3: Removing And Installing Components
Removing and installing components Topics: • Recommended tools • Screw size list • Tower motherboard layout • Side cover • Bezel • Front panel door • Hard drive assembly—3.5-inch and 2.5-inch • Optical drive • M.2 PCIe SSD • SD card reader •... -
Page 16: Tower Motherboard Layout
Table 2. OptiPlex MT (continued) Component Secured to Screw type Quantity Image M3X3 Type-C with DP/HDMI/VGA Cable System Module System Internal Antenna System chassis #6.32X1.4 System board System chassis Power supply unit (PSU) Tower motherboard layout Tower board components 1. PCI-eX16(wire x4) Connector (Slot4) 2. -
Page 17: Side Cover
13. Memory slots 14. SD card reader connector 15. Power switch connector 16. M.2 SSD connector 17. SATA 0 connector (blue color) 18. SATA 2 connector (white color) 19. Internal speaker connector 20. SATA 3 connector (black color) 21. SATA 1 connector (black color) 22. -
Page 18: Installing Side Cover
Installing side cover 1. To install the side cover: a. Place the cover on the system and slide the cover forward until it clicks into place. 2. Follow the procedure in After working inside your computer. Bezel Removing front bezel 1. -
Page 19: Installing Front Bezel
Installing front bezel 1. To install the front bezel: a. Position the bezel to align the tab holders with the slots on the system chassis. b. Press the bezel until the tabs click into place. Removing and installing components... -
Page 20: Front Panel Door
2. Install the Side cover. 3. Follow the procedure in After working inside your computer. Front panel door Opening front panel door 1. Follow the procedure in Before working inside your computer. 2. Remove the: Side cover Front bezel CAUTION: The front panel door opens only to a limited extent. -
Page 21: Closing Front Panel Door
Closing front panel door 1. Turn the front panel door to close it. Removing and installing components... -
Page 22: Hard Drive Assembly-3.5-Inch And 2.5-Inch
2. Install the: Front bezel Side cover 3. Follow the procedure in After working inside your computer. Hard drive assembly—3.5-inch and 2.5-inch Removing 3.5–inch hard drive assembly 1. Follow the procedure in Before working inside your computer. 2. Remove the: Side cover Front bezel 3. -
Page 23: Removing 3.5-Inch Hard Drive From The Hard Drive Bracket
b. Remove the HDD filler bracket from the system [1]. c. Press the blue tab [2] and pull the hard drive assembly out of the system [3]. Removing 3.5–inch hard drive from the hard drive bracket 1. Follow the procedure in Before working inside your computer. -
Page 24: Installing The 3.5-Inch Hard Drive Into The Hard Drive Bracket
Side cover Front bezel 3.5-inch HDD assembly 3. To remove the hard drive : a. Pull one side of the hard drive bracket to disengage the pins on the bracket from the slots on the hard drive [1]. b. Lift the hard drive out of the hard drive bracket [2]. Installing the 3.5–inch hard drive into the hard drive bracket 1. - Page 25 3. Connect the SATA cable and the power cable to the connectors on the hard drive. 4. Install the: Front bezel Side cover 5. Follow the procedure in After working inside your computer. Removing and installing components...
-
Page 26: Removing The 2.5-Inch Hard Drive Assembly
Removing the 2.5–inch hard drive assembly 1. Follow the procedure in Before working inside your computer. 2. Remove the: Side cover Front bezel 3. Open the front panel door. 4. To remove the hard drive assembly: a. Disconnect the hard drive data and power cables from the connectors on the 2.5-inch hard drive [1]. b. -
Page 27: Installing The 2.5-Inch Hard Drive Into The Hard Drive Bracket
c. Remove the drive from the bracket [3]. Installing the 2.5–inch hard drive into the hard drive bracket 1. To install the hard drive: a. Align the hard drive to the side of the hard drive bracket, and pull the other end tabs to insert the pins on the bracket into the hard drive. -
Page 28: Optical Drive
2. Close the front panel door. 3. Install the: Front bezel Side cover 4. Follow the procedure in After Working Inside Your Computer. Optical drive Removing optical drive 1. Follow the procedure in Before working inside your computer. 2. Remove the: Side cover Front bezel 3. - Page 29 c. Press the blue release tab [1] and slide the optical drive out of the system [2]. Removing and installing components...
-
Page 30: Installing Optical Drive
Installing optical drive 1. To install the optical drive: a. Close the front panel door. b. Insert the optical drive into the optical drive bay until it clicks into place. Removing and installing components... - Page 31 c. Open the front panel door [1]. d. Route the cables under the drive cage. e. Connect the optical drive data cable and power cable to the connectors on the optical drive [2]. Removing and installing components...
-
Page 32: M.2 Pcie Ssd
2. Install the: Front bezel Side cover 3. Follow the procedure in After working inside your computer. M.2 PCIe SSD Removing M.2 SSD 1. Follow the procedure in Before working inside your computer. 2. Remove the: Side cover Front bezel 3. -
Page 33: Installing M.2 Ssd
Installing M.2 SSD 1. Insert the M.2 SSD to the connector on the system board [1]. 2. Replace the single screw to secure the SSD to the system board [2]. Removing and installing components... -
Page 34: Sd Card Reader
3. Close the front panel door. 4. Install the: Front bezel Side cover 5. Follow the procedure in After working inside your computer. SD card reader Removing SD card reader 1. Follow the procedure in Before working inside your computer. 2. -
Page 35: Installing Sd Card Reader
Installing SD card reader 1. To install the SD card reader: a. Insert the SD card reader into the slot on the front panel door [1]. b. Replace the screw to secure the SD card reader to the front panel door [2]. c. -
Page 36: Memory Module
2. Close the front panel door. 3. Install the: Front bezel Side cover 4. Follow the procedure in After working inside your computer. Memory module Removing memory module 1. Follow the procedure in Before working inside your computer. 2. Remove the: Side cover Front bezel 3. -
Page 37: Installing Memory Module
Installing memory module 1. To install the memory module: a. Align the notch on the memory module with the tab on the memory module connector. b. Insert the memory module into the memory module socket [1]. c. Press the memory module until the memory module retention tabs click into place [2]. Removing and installing components... -
Page 38: Expansion Card
2. Close the front panel door. 3. Install the: Front bezel Side cover 4. Follow the procedure in After working inside your computer. Expansion card Removing PCIe expansion card 1. Follow the procedure in Before working inside your computer. 2. Remove the: Side cover Front bezel 3. -
Page 39: Installing Pcie Expansion Card
5. Repeat the steps to remove any additional PCIe expansion card. Installing PCIe expansion card 1. To install the PCIe expansion card: a. Insert the PCIe expansion card to the connector on the system board [1]. b. Secure the PCIe expansion card by pushing the card retention latch until it clicks into place . NOTE: This step is applicable only for the connector with card retention latch, otherwise, skip this step. -
Page 40: Optional Vga Module
c. Pull the release latch forward to close [2]. d. Repeat the steps to install any additional PCIe expansion card. 2. Close the front panel door. 3. Install the: Front bezel Side cover 4. Follow the procedure in After working inside your computer. -
Page 41: Installing Optional Vga Module
b. Disconnect the VGA cable from the connector on the system board [1]. c. Remove the VGA module from the system [2]. Installing optional VGA module 1. To remove the metal bracket as shown below, insert a flathead screwdriver in the hole of the bracket [1], push the bracket to release the bracket [2], and then lift the bracket out from the system. -
Page 42: Power Supply Unit
3. Replace the two (M3X3) screws to secure the optional VGA module to the system. 4. Install the system fan 5. Close the front panel door. 6. Install the: Front bezel Side cover 7. Follow the procedure in After working inside your computer. - Page 43 5. To remove the PSU: a. Remove the 3 screws that secure the PSU to the system [1]. b. Press the release tab [2]. c. Slide and lift the PSU away from the computer [3]. Removing and installing components...
-
Page 44: Installing Power Supply Unit Or Psu
Installing power supply unit or PSU 1. To install the PSU: a. Insert the PSU into the PSU slot and slide it towards the back of the system until it clicks into place [1]. b. Replace the three screws to secure the PSU to the computer [2] . Removing and installing components... - Page 45 c. Connect the PSU cables to the connectors on the system board [1]. d. Route the PSU cables through the retention clips [2, 3, 4, 5]. e. Connect the PSU cable to the connector on the system board [6]. Removing and installing components...
-
Page 46: Intrusion Switch
2. Close the front panel door. 3. Install the: Front bezel Side cover 4. Follow the procedure in After working inside your computer. Intrusion switch Removing intrusion switch 1. Follow the procedure in Before working inside your computer. 2. Remove the: Side cover Front bezel 3. -
Page 47: Installing Intrusion Switch
Installing intrusion switch 1. Insert the intrusion switch into the slot on the system [1]. 2. Route the intrusion switch cable through the fan grommet [2]. 3. Connect the intrusion switch cable to the connector on the system board [3]. Removing and installing components... -
Page 48: Power Button
4. Close the front panel door. 5. Install the: Front bezel Side cover 6. Follow the procedure in After working inside your computer. Power button Removing power button 1. Follow the procedure in Before working inside your computer. 2. Remove the: Side cover Front bezel 3. - Page 49 5. Pull the power button out from the computer. Removing and installing components...
-
Page 50: Installing Power Button
Installing power button 1. Insert the power switch into the slot from the front of the computer and press it until it clicks into place. Removing and installing components... - Page 51 2. Open the front panel door [1] 3. Route the power switch cable from the power button through the retention clip [2, 3]. 4. Align the cable with the pins on the connector and connect the power button cable [4]. Removing and installing components...
-
Page 52: Speaker
5. Close the front panel door. 6. Install the: Front bezel Side cover 7. Follow the procedure in After working inside your computer. Speaker Removing speaker 1. Follow the procedure in Before working inside your computer. 2. Remove the: Side cover Front bezel 3. -
Page 53: Installing Speaker
Installing speaker 1. Insert the speaker into the slot and press it until it clicks into place [1]. 2. Connect the speaker cable to the connector on the system board [2]. Removing and installing components... -
Page 54: Coin Cell Battery
3. Close the front panel door. 4. Install the: Front bezel Side cover 5. Follow the procedure in After working inside your computer. Coin cell battery Removing coin cell battery 1. Follow the procedure in Before working inside your computer. 2. -
Page 55: Installing The Coin Cell Battery
NOTE: Removing the coin cell battery may reset the system board BIOS/Settings Installing the coin cell battery 1. Hold the coin cell battery with the "+" sign facing up and slide it under the securing tabs at the positive side of the connector [1]. -
Page 56: Heat Sink Fan
3. Close the front panel door. 4. Install the: Front bezel Side cover 5. Follow the procedure in After working inside your computer. Heat sink fan Removing heat sink fan 1. Follow the procedure in Before working inside your computer. 2. -
Page 57: Installing Heat Sink Fan
Installing heat sink fan 1. Place the fan on the heat sink [1]. 2. Tighten the screws (4) to secure the fan to the heat sink [2]. 3. Connect the heat sink assembly cable to the connector on the system board [3]. Removing and installing components... -
Page 58: Heat Sink
4. Close the front panel door. 5. Install the: Front bezel Side cover 6. Follow the procedure in After working inside your computer. Heat sink Removing heat sink 1. Follow the procedure in Before working inside your computer. 2. Remove the: Side cover Front bezel 3. -
Page 59: Installing Heat Sink
b. Lift the heat sink away from the computer [2]. Installing heat sink 1. Align the screws of the heat sink with the holders on the system board and place the heat sink on the processor [1]. 2. Tighten the captive screws to secure the heat sink to the system board [2]. NOTE: Tighten the screws in a sequential order (1,2,3,4) as printed on the system board. -
Page 60: Processor
3. Replace the heat sink fan. 4. Close the front panel door. 5. Install the: Front bezel Side cover 6. Follow the procedure in After working inside your computer. Processor Removing processor 1. Follow the procedure in Before working inside your computer. -
Page 61: Installing Processor
Installing processor 1. Place the processor on the socket such that the slots on the processor align with the socket keys [1]. CAUTION: Do not use force to seat the processor. When the processor is positioned correctly, it engages easily into the socket. 2. -
Page 62: System Fan
4. Install the heatsink. 5. Install the heatsink fan. 6. Close the front panel door. 7. Install the: Front bezel Side cover 8. Follow the procedure in After working inside your computer. System fan Removing system fan 1. Follow the procedure in Before working inside your computer. - Page 63 c. Disconnect the system fan cable from the connector on the system board [1]. d. Stretch the grommets securing the fan to the computer to ease the removal of the fan [2]. e. Slide the system fan out of the computer [3]. Removing and installing components...
-
Page 64: Installing System Fan
Installing system fan 1. Insert the grommets into the slots on the back of the computer. 2. Hold the system fan with the cable facing the bottom of the computer. 3. Align the grooves of the system fan with the grommets on the chassis wall. 4. - Page 65 7. Route the intrusion switch cable through the fan grommet [2]. 8. Insert the intrusion switch cable into the system board [1]. Removing and installing components...
-
Page 66: System Board
9. Close the front panel door. 10. Install the: Front bezel Side cover 11. Follow the procedure in After working inside your computer. System board Removing system board 1. Follow the procedure in Before working inside your computer. 2. Remove the: Side cover Front bezel 3. - Page 67 b. Hard drive data and optical drive data [2] c. Speaker [3] d. System power [4] e. SATA [5] 6. To remove the system board: a. Remove the screws that secure the system board to the computer [1]. Removing and installing components...
- Page 68 b. Slide and lift the system board away from the computer [1, 2]. Removing and installing components...
-
Page 69: Installing The System Board
Installing the system board 1. Hold the system board by its edges and align it towards the back of the computer. 2. Lower the system board into the computer until the connectors at the back of the system board align with the slots on the chassis, and the screw holes on the system board align with the standoffs on the computer [1, 2]. - Page 70 4. Route all the cables through the routing clips. 5. Align the cables with the pins on connectors on the system board and connect the following cables to the system board: a. SATA [1] b. System power [2] c. Speaker [3] d.
- Page 71 6. Install the: Memory module PCIe SSD Expansion cards SD card reader Processor Heatsink Heatsink fan 7. Close the front panel door 8. Install the: Front bezel Side cover 9. Follow the procedure in After working inside your computer. Removing and installing components...
-
Page 72: Chapter 4: Troubleshooting
Invoke diagnostics boot by either of the methods that are suggested below: 1. Power on the computer. 2. As the computer boots, press the F12 key when the Dell logo is displayed. 3. In the boot menu screen, use Up/Down arrow key to select the Diagnostics option and then press Enter. -
Page 73: Power-Supply Unit Built-In Self-Test
Built-in Self-Test (BIST) helps determine if the power-supply unit is working. To run self-test diagnostics on the power-supply unit of a desktop or all-in-one computer, see the knowledge base article 000125179 at www.dell.com/support. Diagnostics The computer POST (Power On Self Test) ensures that it meets the basic computer requirements and the hardware is working appropriately before the boot process begins. -
Page 74: Diagnostic Error Messages
Table 5. States Under Host BIOS Control Amber LED state White LED state System state Notes BIOS state 1 BIOS Post code (Old LED pattern 0001) Corrupt BIOS. BIOS state 2 BIOS Post code (Old LED pattern 0010) CPU config or CPU failure. - Page 75 If the problem persists, try another drive. Run the Hard Disk Drive tests in Dell Diagnostics. HARD-DISK DRIVE FAILURE The hard drive does not respond to commands from the computer.
- Page 76 Table 6. Diagnostic error messages (continued) Error messages Description try another drive. Run the Hard Disk Drive tests in Dell Diagnostics. INSERT BOOTABLE MEDIA The operating system is trying to boot to non-bootable media, such as an optical drive. Insert bootable media.
-
Page 77: System Error Messages
The operating system cannot find a specific track on the hard drive. SHUTDOWN FAILURE A chip on the system board may be malfunctioning. Run the System Set tests in Dell Diagnostics. If the message reappears, Contact Dell. TIME-OF-DAY CLOCK LOST POWER System configuration settings are corrupted. Connect your computer to an electrical outlet to charge the battery. -
Page 78: Recovering The Operating System
It enables you to diagnose hardware issues, repair your computer, back up your files, or restore your computer to its factory state. You can also download it from the Dell Support website to troubleshoot and fix your computer when it fails to boot into their primary operating system due to software or hardware failures. - Page 79 4. Wait for 30 seconds. 5. Turn on the wireless router. 6. Turn on the modem. 7. Turn on your computer. Troubleshooting...
- Page 80 Dell provides several online and telephone-based support and service options. Availability varies by country and product, and some services may not be available in your area. To contact Dell for sales, technical support, or customer service issues: 1. Go to Dell.com/support.
Need help?
Do you have a question about the OptiPlex 5060 Tower and is the answer not in the manual?
Questions and answers