Table of Contents
Advertisement
Quick Links
Advertisement
Table of Contents

Related Manuals for Ouster OS0


Summary of Contents for Ouster OS0
- Page 1 OS0 Hardware User Manual For Rev C OS0 Sensors Ouster Dec 01, 2020...
-
Page 2: Table Of Contents
1.2 Proper Assembly, Maintenance and Safe Use ......2 OS0 Overview 3 OS0 Product Models 4 Mechanical Interface 4.1 Included Components . -
Page 3: Safety And Safe Use
1 Safety and Safe Use 1.1 Safety & Legal Notices The OS0-128, OS0-64, and OS0-32 have been evaluated to be Class 1 laser products per 60825-1: 2014 (Ed. 3) and operate in the 865nm band. L’OS0-128, l’OS0-64, et l’OS0-32 répondent aux critères des produits laser de classe 1, selon la norme IEC 60825-1: 2014 (3ème édition) et émettent dans le domaine de l’infrarouge, à... - Page 4 Your use of the OS0 is subject to the Terms of Sale that you signed with Ouster or your distribu- tor/integrator. Included in these terms is the prohibition on: Removing or otherwise opening the sensor housing Inspecting the internals of the sensor...
-
Page 5: Proper Assembly, Maintenance And Safe Use
If you have any questions about the above points, contact us at legal@ouster.io. 1.2 Proper Assembly, Maintenance and Safe Use The OS0 may be easily setup by mounting to the base to a mounting with the correct mounting hole pattern, and following the interconnection instructions delineated in Mounting Guidelines. - Page 6 Assemblage correct et utilisation sûre L’OS0 s’installe facilement en fixant la base sur un support percé de trous concordants, et en suivant les instructions d’interconnexion décrites dans la section «Mounting Guidelines». Toute orientation de montage est acceptable. Chaque capteur est expédié équipé d’un dissipateur de chaleur, utilisable en phase de test et en conditions normales.
-
Page 7: Os0 Overview
It is designed for indoor/outdoor all-weather environ- ments and long lifetime. As the smallest high performance lidar on the market, the OS0 can be easily integrated into autonomous vehicles, heavy machinery, robots, drones, and mapping solutions. -
Page 8: Os0 Product Models
3 OS0 Product Models The OS0 is available with 128, 64, or 32 beams of vertical resolution and with Uniform, Gradient, Above Horizon, or Below Horizon beam spacing options. Product specs and more information on these con- figurations can be found on the OS0 product page. -
Page 9: Mechanical Interface
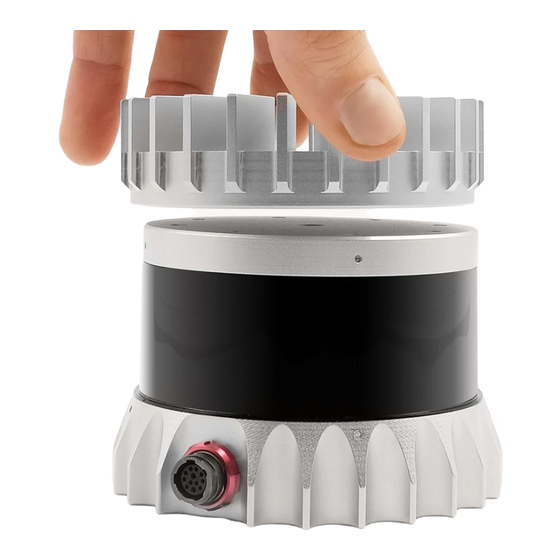
Interface Box and 24V AC/DC power supply (2 meters) RJ45 cable (1 meter) Optional: Heat sink Downloadable CAD files for the OS0 can be found online at www.ouster.com/lidar-product-details Warning: Water ingress protection: The sensor ingress protection rating is only valid if the I/O cable is plugged into the panel mount connector on the base of the sensor, and the locking collet rotated past the detent click to the properly locked condition i.e past the détente position. -
Page 10: Mounting Guidelines
The shape of any heatsink should maximize the surface area for free and forced convection while being thick enough to allow the heat to conduct through the material If you have questions about your specific mounting situation please contact the Ouster at sup-... -
Page 11: Thermal Requirements
4.3 Thermal Requirements Thermal requirements for Rev C OS0 are listed below. Please contact support@ouster.io or with your sensor serial number if you do not know what revision your sensor is. Table 4.1: Thermal requirements for OS0 with modular cap... -
Page 12: Electrical Interface
5 Electrical Interface 5.1 Interface Box The Interface Box that accompanies the OS0 is designed to allow the sensor to be operated for test and evaluation purposes. It terminates the interface cable from the sensor, allows it to be powered up and provides access to the sensor gigabit Ethernet Interface via a standard RJ45 connector. -
Page 13: Direct Cable Connection And Pinout
The OS0 can be operated without the use of an Interface Box. Warning: Ouster is not responsible for any errors in wiring as a result of bypassing the Interface Box and this activity may result in a voiding of your warranty if it results in damage to the sensor. -
Page 14: Digital Io
6 Digital IO 6.1 SYNC_PULSE_IN is a dedicated input channel that is accessible within the Interface Box Jumper J4. This SYNC_PULSE_IN channel expects an input pulse sequence which can be used for time synchronization. See the Soft- ware User Manual for more information on configuring this input. Any references to pulse polarity in this document references the signal polarity on the pin of the sensor. -
Page 15: Multipurpose_Io (M_Io)
6.2 MULTIPURPOSE_IO (M_IO) ) is a configurable input or output channel accessible within the Interface Box MULTIPURPOSE_IO M_IO Jumper J4 connected to the MULTIPURPOSE_IO pin of the Interface Box. Detailed information on how to configure this channel using the sensor TCP interface can be found in the API Guide. By default this channel is disabled. - Page 16 Table6.2: MULTIPURPOSE_IO - OUTPUT Interface Requirements Parameter Pull Up Voltage 15 V Sinking Current 25 mA When this channel is configured as an INPUT, the can accept a standard NMEA $GPRMC UART M_IO message. These messages are a common way for GPS systems to share timestamp information in UTC time format.
-
Page 17: Os0 Cad Files
7 OS0 CAD files All the most up-to-date CAD files of our products can be found on our Lidar Product Details page.
Need help?
Do you have a question about the OS0 and is the answer not in the manual?
Questions and answers