
Related Manuals for LA VAGUE LV-HD320


Summary of Contents for LA VAGUE LV-HD320
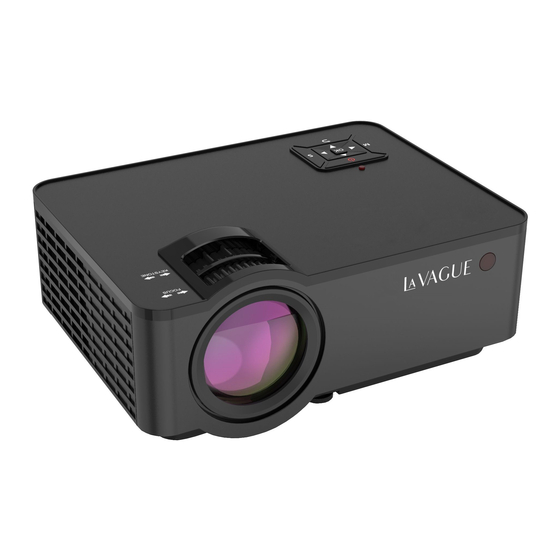
- Page 1 LED Projector LV-HD320 Benutzerhandbuch Instruction Manual Mode d‘emploi Manuale di istruzioni Manual de uso...
-
Page 3: Table Of Contents
TABLE OF CONTENTS DEUTSCH .................... 4 ENGLISH .................... 15 FRANÇAIS .................... 26 ITALIANO .................... 37 ESPAÑOL .................... 48... -
Page 4: Deutsch
DEUTSCH BITTE BEACHTEN: 1. Bitte lesen Sie das gesamte Benutzerhandbuch sorgfältig durch, bevor Sie den Projektor verwenden. 2. Um die Stabilität der Stromversorgung zu gewährleisten, verwenden Sie bitte eine Standard-Stromversorgung und geerdete Steckdosen. 3. Verwenden Sie nur die auf dem Projektor angegebene Stromquelle. 4. - Page 5 PRODUKTÜBERSICHT 1 Status-LED 5 Im Menü zurück 2 An-/Aus-Taste 6 Menü aufrufen 3 Navigation 7 Objektiv-Fokus 4 Eingang auswählen 8 Keystone-Korrektur...
- Page 6 ANSCHLÜSSE PC-RGB HDMI 1 HDMI 2 1 3,5mm Audio-Ausgang 5 SD-Karten-Eingang 2 3,5mm Audio-/Video-Eingang 6 Infrarot-Eingang 3 HDMI-Eingang 7 HDMI-Eingang 4 VGA-Eingang 8 USB-Eingang...
- Page 7 FERNBEDIENUNG Ein- und Ausschalten Menü aufrufen Quelle auswählen Bestätigen Menü-Navigation Ton an/aus Lautstärke verringern Lautstärke erhöhen Ohne Funktion Zurück Wiedergabe / Pause...
- Page 8 INBETRIEBNAHME 1. Netzkabel anschließen Schließen Sie das Netzkabel an der Seite des Projektors und einer Steckdose an. Leuchtet die Kontrollleuchte am oberen Ende des Projektors konstant rot, so befindet sich der Projektor im Standby- Modus. 2. Einschalten Drücken Sie die „Power“-Taste auf der Oberseite des Projektors oder die „Power“-Taste auf der Fernbedienung.
- Page 9 3. Keystone-Korrektur/Bildfokussierung Verwenden Sie das hintere Einstellrad für die Trapezkorrektur, das sich oben am Projektor befindet, um den Winkel des Projektors zu justieren. Benutzen Sie das vordere Einstellrad, das sich ebenfalls oben am Projektor befindet, um den Bildfokus einzustellen. 4. Auswählen der Signalquelle Durch Drücken der „S“...
- Page 10 Über die Pfeiltasten auf der Fernbedienung oder auf dem Projektor wählen Sie die entsprechende Signalquelle aus und bestätigen diese mit „OK“. Für die Quellen „USB“ und „TF Card“ werden folgende Formate unterstützt: Datei Format Datei Codec JPEG .jpg Bild .bmp .png .wma Musik...
- Page 11 5. Weitere Einstellungen im Menü Durch Drücken der „Menü“ Taste auf der Fernbedienung oder der Taste „M“ auf dem Projektor öffnen Sie das Menü des Projektors. Hierbei können Sie mit den Pfeiltasten die jeweiligen Einstellungen vornehmen und diese mittels „OK“ bestätigen.
- Page 13 TECHNISCHE DATEN Anzeigeverfahren Kontrast 1000:1 Physikalische Auflösung 1280 x 720 (unterstützt 1920 x 1080) Lichtquelle Projektionsentfernung 1,5 - 4m Bildformat 16:9 / 4:3 Helligkeit 2500 Lumen Keystone-Korrektur ±15° manuell Netzanschluss 110 - 240V ~ 50/60Hz Leistung Eingangsschnittstellen USB / SD / HDMI / AV / VGA Ausgangsschnittstelle 3,5mm Klinke Abmessungen...
- Page 14 Hersteller: VEHNS GROUP GmbH Theatinerstraße 40-42 80333 München Deutschland www.vehnsgroup.com service@vehnsgroup.com www.lavague.de MADE IN CHINA Änderungen und Irrtümer vorbehalten Der Hersteller übernimmt keine Haftung für Schäden, die durch fehlerhafte, unsachgemäße oder unvereinbare Verwendung des Produkts entstehen. © VEHNS GROUP GmbH Version 1.0 –...
-
Page 15: English
ENGLISH PLEASE NOTE 1. Please read the entire user manual carefully before using the projector. 2. To ensure the stability of the power supply, use standard grounded power sockets. 3. Only use a power source as indicated on the projector. 4. - Page 16 PRODUCT OVERVIEW 1 Status LED 5 Back in the menu 2 On / Off button 6 Call up the menu 3 Navigation 7 Objective Focus 4 Select input 8 Keystone correction...
- Page 17 INTERFACES PC-RGB HDMI 1 HDMI 2 1 3,5mm audio output 5 SD card input 2 3.5mm audio/video input 6 Infrared input 3 HDMI input 7 HDMI input 4 VGA input 8 USB input...
- Page 18 REMOTE CONTROL Power on / off Menu Select source Confirm Menu-Navigation Turn sound on or off Volume down Volume up No function Back Play / Pause...
- Page 19 INITIAL STEPS 1. Connecting the power cable Connect the power cable to the side of the projector and to a power outlet. If the indicator light at the top of the projector turns red, the projector is in standby mode 2.
- Page 20 3. Keystone correction/image focusing Use the rear keystone adjustment dial located at the top of the projector to adjust the angle of the projector. Use the front keystone adjustment dial, also located on the top of the projector, to adjust the image focus. 4. Selecting the signal source Press the „S“...
- Page 21 Use the arrow buttons on the remote control or on the projector to select the appropriate signal source and confirm with „OK“. The following formats are supported for „USB“ and „TF Card“ sources: File Format File extension Codec JPEG .jpg Picture .bmp .png...
- Page 24 SPECIFICATIONS Display method Contrast 1000:1 Physical resolution 1280 x 720 (supports 1920 x 1080) Light source Projection distance 1,5 - 4m Picture format 16:9 / 4:3 Brightness 2500 lumens Keystone correction ±15° manual Network connection 110 - 240V ~ 50/60Hz Power consumption Input interfaces USB / SD / HDMI / AV / VGA...
- Page 25 Manufacturer: VEHNS GROUP GmbH Theatinerstraße 40-42 80333 Munich Germany www.vehnsgroup.com service@vehnsgroup.com www.lavague.de MADE IN CHINA Changes and errors excepted. The manufacturer accepts no liability for damage resulting from incorrect, improper or incompatible use of the product. © VEHNS GROUP GmbH Version 1.0 –...
-
Page 26: Français
FRANÇAIS ATTENTION 1. Veuillez lire attentivement l‘intégralité du manuel d‘utilisation avant d‘utiliser le vidéoprojecteur. 2. Pour assurer la stabilité de l‘alimentation électrique, utilisez une alimentation électrique standard et des prises de terre. 3. Utilisez uniquement la source d‘alimentation indiquée sur le vidéoprojecteur. - Page 27 APERÇU DU PRODUIT 1 Lumière indiquant le 5 Retour dans le menu status 2 Bouton marche/arrêt 6 Accès au menu 3 Navigation 7 Molette de mise au point 4 Selection de la source 8 Molette de réglage tra- pèzes...
- Page 28 CONNEXIONS PC-RGB HDMI 1 HDMI 2 1 Sortie audio 3,5 mm 5 Entrée de la carte SD 2 Entrée audio/vidéo 3,5 mm 6 Entrée infrarouge 3 Entrée HDMI 7 Entrée HDMI 4 Entrée VGA 8 Entrée USB...
- Page 29 TÉLÉCOMMANDE Marche/Arrêt Menu Sélection de la source Menu OK Menu-Navigation Activer ou désactiver le son Baisser le volume Augmenter le volume Sans fonction Quitter le menu Lecture / Pause...
- Page 30 DÉMARRAGE 1. Raccordement du câble d‘alimentation Branchez le câble d‘alimentation sur le côté du projecteur et sur une prise de courant. Si le témoin lumineux en haut du projecteur est rouge en continu, le projecteur est en mode veille 2. Mise en marche Appuyez sur le bouton „Marche/Arrêt“...
- Page 31 3. Correction des trapèzes / mise au point de l‘image Utilisez la molette de réglage du trapèze arrière située en haut du projecteur pour ajuster l‘angle du projecteur. Utilisez la molette de réglage du trapèze avant, également située sur le dessus du projecteur, pour régler la mise au point de l‘image.
- Page 32 Utilisez les touches fléchées de la télécommande ou du projecteur pour sélectionner la source de signal appropriée et confirmez par „OK“. Les formats suivants sont pris en charge pour les sources „USB“ et „TF Card“ : Fichier Format Extension Codec JPEG .jpg Photo...
- Page 35 CARACTÉRISTIQUES TECHNIQUES Technologie Contraste 1000:1 Résolution physique 1280 x 720 (supporte 1920 x 1080) Source de lumière Distance de projection 1,5 - 4m Format de l'image 16:9 / 4:3 Luminosité 2500 lumens Correction de la clé de voûte Manuel ±15°. Connexion au réseau 110 - 240V ~ 50/60Hz Performance...
- Page 36 Fabricant: VEHNS GROUP GmbH Theatinerstraße 40-42 80333 Munich Allemagne www.vehnsgroup.com service@vehnsgroup.com www.lavague.de MADE IN CHINA Sous réserve de modifications et d‘erreurs. Le fabricant décline toute responsabilité pour les dommages résultant d‘une utilisation incorrecte, inappropriée ou incompatible de l‘appareil. © VEHNS GROUP GmbH Version 1.0 –...
-
Page 37: Italiano
ITALIANO SI PREGA DI NOTARE: 1. Si prega di leggere attentamente l‘intero manuale utente prima di utilizzare il proiettore. 2. Per garantire la stabilità dell‘alimentazione elettrica, utilizzare un alimentatore standard e prese con messa a terra. 3. Utilizzare solo la fonte di alimentazione indicata sul proiettore. 4. - Page 38 DESCRIZIONE DEL PRODOTTO 1 LED di stato 5 Torna nel menu 2 Pulsante On / Off 6 Richiama il menu 3 Navigazione 7 Obiettivo Focus 4 Selezionare l'ingresso 8 Correzione trapezoidale...
- Page 39 COLLEGAMENTI PC-RGB HDMI 1 HDMI 2 1 Uscita audio 3,5mm 5 Ingresso scheda SD 2 Ingresso audio/video da 3,5 6 Ingresso infrarossi 3 Ingresso HDMI 7 Ingresso HDMI 4 Ingresso VGA 8 Ingresso USB...
- Page 40 CONTROLLO DI REMOTO Accensione e spegnimento Richiamare il menu Selezionare la fonte Conferma Menu Navigation Attivare o disattivare il suono Diminuire il volume Aumentare il volume Senza funzione Uscire dal menu Riproduci / Pausa...
- Page 41 INIZIO-UP 1. Collegamento del cavo di alimentazione Collegare il cavo di alimentazione al lato del proiettore e ad una presa di corrente. Se la spia luminosa nella parte superiore del proiettore è di colore rosso fisso, il proiettore è nel modo di attesa 2.
- Page 42 3. Correzione trapezoidale / messa a fuoco dell‘immagine Usare la manopola di regolazione trapezoidale posteriore situata nella parte superiore del proiettore per regolare l‘angolo del proiettore. Utilizzare la manopola di regolazione trapezoidale anteriore, anch‘essa situata sulla parte superiore del proiettore, per regolare la messa a fuoco dell‘immagine.
- Page 43 Usare i tasti freccia sul telecomando o sul proiettore per selezionare la sorgente di segnale appropriata e confermare con „OK“. Per le sorgenti „USB“ e „TF Card“ sono supportati i seguenti formati: File Formato File Codec JPEG .jpg Immagine .bmp .png .wma Musica...
- Page 46 DATI TECNICI Tecnologia Contrasto 1000:1 Risoluzione fisica 1280 x 720 (supporta 1920 x 1080) Sorgente di luce Distanza di proiezione 1,5 - 4m Formato immagine 16:9 / 4:3 Luminosità 2500 lumen Correzione trapezoidale ±15° manuale Collegamento alla rete 110 - 240V ~ 50/60Hz Prestazioni Interfacce di ingresso USB / SD / HDMI / AV / VGA...
- Page 47 Produttore: VEHNS GROUP GmbH Theatinerstraße 40-42 80333 Monaco Germania www.vehnsgroup.com service@vehnsgroup.com www.lavague.de MADE IN CHINA Salvo modificaciones y errores. El fabricante no se hace responsable de los daños derivados de un uso incorrecto, inadecuado o incompatible del producto. © VEHNS GROUP GmbH Version 1.0 –...
-
Page 48: Español
ESPAÑOL TENGA EN CUENTA: 1. Lea atentamente todo el manual del usuario antes de utilizar el proyector. 2. Para garantizar la estabilidad de la fuente de alimentación, utilice una fuente de alimentación estándar y tomas de corriente con conexión a tierra. 3. - Page 49 RESUMEN DEL PRODUCTO 1 LED de estado 5 De vuelta en el menú 2 Botón de encendido/ 6 Llama al menú apagado 3 Navegación 7 Enfoque objetivo 4 Seleccione la entrada 8 Corrección de la clave de bóveda...
- Page 50 CONEXIONES PC-RGB HDMI 1 HDMI 2 1 Salida de audio de 3,5 mm. 5 Entrada de la tarjeta SD 2 Entrada de audio/video de 6 Entrada de infrarrojos 3.5mm 3 Entrada HDMI 7 Entrada HDMI 4 Entrada VGA 8 La entrada USB...
- Page 51 CONTROL REMOTO Encendido y apagado Llamar el menú Seleccionar origen Confirmar Menú-Navigation Activar o desactivar el sonido Disminuir el volumen Aumentar el volu- Sin funciónacro Salir del menú Reproducir / Pausa...
- Page 52 COMISIÓN 1. Conectar el cable de alimentación Conecte el cable de alimentación al lateral del proyector y a una toma de corriente. Si la luz indicadora de la parte superior del proyector es roja fija, el proyector está en modo de espera. 2.
- Page 53 3. Corrección trapezoidal/enfoque de imagen Utilice el dial de ajuste de la distorsión trapezoidal trasero, situado en la parte superior del proyector, para ajustar el ángulo del proyector. Utilice el dial de ajuste de la distorsión trapezoidal frontal, también situado en la parte superior del proyector, para ajustar el enfoque de la imagen.
- Page 54 Utilice los botones de flecha del mando a distancia o del proyector para seleccionar la fuente de señal apropiada y confirme con „OK“. Los siguientes formatos son compatibles con las fuentes „USB“ y „TF Card“: Ficha Formato Ficha Codec JPEG .jpg Imagen .bmp...
- Page 57 DATOS TÉCNICOS Tecnología Contraste 1000:1 Resolución física 1280 x 720 (soportes 1920 x 1080) Fuente de luz Distancia de proyección 1,5 - 4m Formato de la imagen 16:9 / 4:3 Brillo 2500 lúmenes Corrección de la clave de bóveda ±15° manual Conexión a la red 110 - 240V ~ 50/60Hz Actuación...
- Page 58 Fabricante: VEHNS GROUP GmbH Theatinerstraße 40-42 80333 München Deutschland www.vehnsgroup.com service@vehnsgroup.com www.lavague.de MADE IN CHINA Salvo modificaciones y errores. El fabricante no se hace responsable de los daños derivados de un uso incorrecto, inadecuado o incompatible del producto. © VEHNS GROUP GmbH Version 1.0 –...
Need help?
Do you have a question about the LV-HD320 and is the answer not in the manual?
Questions and answers