
Related Manuals for LA VAGUE LV-HD400


Summary of Contents for LA VAGUE LV-HD400
- Page 1 LED Projector LV-HD400 Benutzerhandbuch Instruction Manual Mode d‘emploi Manuale di istruzioni Manual de uso...
-
Page 2: Table Of Contents
TABLE OF CONTENTS DEUTSCH .................... 3 ENGLISH .................... 14 FRANÇAIS .................... 25 ITALIANO .................... 36 ESPAÑOL .................... 47... -
Page 3: Deutsch
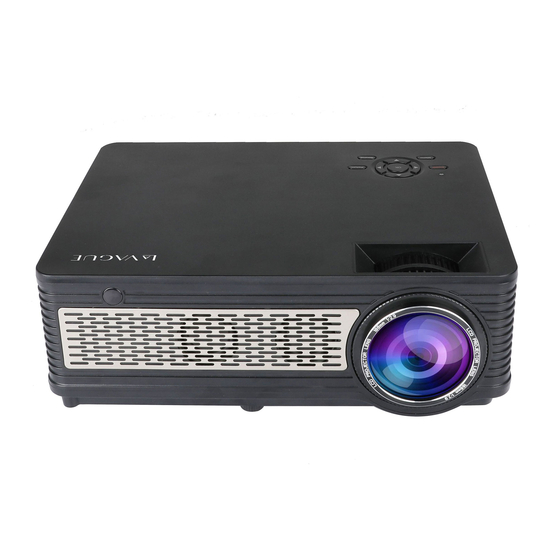
DEUTSCH BITTE BEACHTEN: 1. Bitte lesen Sie das gesamte Benutzerhandbuch sorgfältig durch, bevor Sie den Projektor verwenden. 2. Um die Stabilität der Stromversorgung zu gewährleisten, verwenden Sie bitte eine Standard-Stromversorgung und geerdete Steckdosen. 3. Verwenden Sie nur die auf dem Projektor angegebene Stromquelle. 4. - Page 4 PRODUKTÜBERSICHT Front 1 Infrarotempfänger 2 Lautsprecher 3 Stellschraube für Neigungswinkel Oben Power Return Menu Source 1 Objektiv Fokus 2 Keystone-Korrektur 3 Bedienfeld...
- Page 5 Rückseite H DM I1 Audio-in HD MI 2 Video PC RG B 1 Netzschalter 2 Anschlussfeld 3 Infrarotempfänger Unterseite 1 Stellschraube für Neigungswinkel 2 Gewinde (M4x8mm) für Projektorhalterungen befinden sich unter den Pads 3 Staubfilter Dieser sollte bei regelmäßiger Verwendung des Projektors alle 8 Wochen gereinigt werden...
- Page 6 Bedienfeld Power Return Menu Source 1 LED Rot: Projektor befindet sich im Standby-Modus Grün: Der Projektor befindet sich in Betrieb 2 Ein- und Ausschalten des Projektors 3 Menü aufrufen 4 Tasten zur Navigation im Menü 5 Zurück 6 Auswahl der Videoquelle Anschlussfeld HDMI1 HDMI Eingang 1...
- Page 7 Den jeweiligen Eingang können Sie auf dem Bedienfeld über die Taste „Source“ und den Pfeiltasten auswählen. Bitte bestätigen Sie die Auswahl über die „OK“ Taste. Alternativ kann die Auswahl des Eingangsignals auch über die Fernbedienung erfolgen. FERNBEDIENUNG Ein- / Ausschalten Ein- / Ausschalten Bild spiegeln Steuerungstasten wenn...
- Page 8 MENÜ Durch drücken der Taste „Menu“ auf dem Bedienfeld oder durch Drücken der Taste „M“ auf der Fernbedienung wird das Menü eingeblendet. Über die „Return“ oder „Menu“ Taste auf dem Bedienfeld oder über die Tasten „M“ und „zurück“ auf der Fernbedienung wird das Menü verlassen. Über die Tasten zur Navigation auf dem Bedienfeld und der Fernbedienung können die entsprechenden Einstellungen im Menü...
- Page 9 Clock-- -- -- -- Off Time On Time TIME Sleep Timer Auto Sleep OSD Language English Restore Factory Default Blending OPTION HDMI CEC Osd Duration Software Update Über die Einstellung „OSD Language“ wird die Sprache der Menüführung ausgewählt.
- Page 10 BESONDERHEITEN BEI DER EINGANGSQUELLE „USB“ Es können USB-Sticks als auch externe Festplatten direkt an die USB Ports angeschlossen werden. Bei Auswahl des Eingangsignals „USB1“ oder „USB2“ erscheint folgender Bildschirm: USB DRIVE PHOTO Die Bilder auf der USB Quelle werden als Slideshow angezeigt.
- Page 11 Die Navigation hierbei erfolgt durch die Tasten auf dem Bedienfeld, als auch über die Tasten auf der Fernbedienung TECHNISCHE DATEN Abmessungen 305 x 225 x 115 mm Schnittstellen 2x HDMI 2x USB 1x AV 1x VGA Native Auflösung 1920 x 1080 Helligkeit 3.200 Lumen Farbtemperatur...
- Page 12 ENTSORGUNG Diese Kennzeichnung besagt, dass für dieses Produkt die Europäische Richtlinie gilt und er Artikel nicht zusammen mit anderen Haushaltsabfällen entsorgt werden darf. Informieren Sie sich über die örtlichen Bestimmungen zur getrennten Sammlung elektrischer und elektronischer Geräte und befolgen Sie diese. Eine ordnungsgemäße Entsorgung von alten Produkten hilft negative Auswirkungen auf Umwelt und Gesundheit zu vermeiden.
- Page 13 Hersteller: VEHNS GROUP GmbH Theatinerstraße 40-42 80333 München Deutschland www.vehnsgroup.com service@vehnsgroup.com www.lavague.de MADE IN CHINA Änderungen und Irrtümer vorbehalten Der Hersteller übernimmt keine Haftung für Schäden, die durch fehlerhafte, unsachgemäße oder unvereinbare Verwendung des Produkts entstehen. © VEHNS GROUP GmbH Version 1.0 –...
-
Page 14: English
ENGLISH PLEASE NOTE 1. Please read the entire user manual carefully before using the projector. 2. To ensure the stability of the power supply, use standard grounded power sockets. 3. Only use a power source as indicated on the projector. 4. - Page 15 PRODUCT OVERVIEW Front 1 Infrared receiver 2 Loudspeakers 3 Adjusting screw for angle of inclination Power Return Menu Source 1 Lens Focus 2 Keystone correction 3 Keypad...
- Page 16 Back H DM I1 Audio-in HD MI 2 Video PC RG B 1 Main power switch 2 Connector panel 3 Infrared receiver Bottom 1 Adjusting screw for angle of inclination 2 Threads (M4x8mm) for projector mounts are located under the pads 3 Dust filter Should be cleaned every 8 weeks if the projector is used...
- Page 17 Control panel Power Return Menu Source 1 LED Red: Projector is in standby mode. Green: The projector is in operation. 2 Turn the Projector On and Off 3 Menu 4 Keys for navigation in the menu 5 Back 6 Select the video source Anschlussfeld HDMI1 HDMI Eingang 1...
- Page 18 You can select the respective input on the control panel using the „Source“ key and the arrow keys. Please confirm the selection by pressing the „OK“ key. Alternatively, the input signal can also be selected via the remote control. REMOTE CONTROL Switching on / off Switching on / off Mirror image...
- Page 19 MENU Pressing the „Menu“ button on the control panel or pressing the „M“ button on the remote control will display the menu. The „Return“ or „Menu“ button on the control panel or the „M“ and „Back“ buttons on the remote control exit the menu. The navigation buttons on the control panel and the remote control can be used to make the corresponding settings in the menu.
- Page 20 Clock-- -- -- -- Off Time On Time TIME Sleep Timer Auto Sleep OSD Language English Restore Factory Default Blending OPTION HDMI CEC Osd Duration Software Update The „OSD Language“ setting is used to select the language of the menu navigation.
- Page 21 SPECIAL FEATURES OF THE „USB“ INPUT SOURCE USB sticks as well as external hard disks can be connected directly to the USB ports. When the input signal „USB1“ or „USB2“ is selected, the following screen appears: USB DRIVE PHOTO The images on the USB source are displayed as slideshows.
- Page 22 Navigation is done using the buttons on the control panel as well as the buttons on the remote control. TECHNICAL DATA Dimensions (mm) 305 x 225 x 115 mm Interfaces 2x HDMI 2x USB 1x AV 1x VGA Native resolution 1920 x 1080 Brightness 3,200 Lumen...
- Page 23 DISPOSAL This symbol indicates that this product is subject to the European Directive and must not be disposed of together with other household waste. Refer to and follow local regulations for separate collection of electrical and electronic equipment. Proper disposal of old products helps to avoid negative effects on the environment and health.
- Page 24 Manufacturer: VEHNS GROUP GmbH Theatinerstraße 40-42 80333 Munich Germany www.vehnsgroup.com service@vehnsgroup.com www.lavague.de MADE IN CHINA Changes and errors excepted. The manufacturer accepts no liability for damage resulting from incorrect, improper or incompatible use of the product. © VEHNS GROUP GmbH Version 1.0 –...
-
Page 25: Français
FRANÇAIS ATTENTION 1. Veuillez lire attentivement l‘intégralité du manuel d‘utilisation avant d‘utiliser le projecteur. 2. Pour assurer la stabilité de l‘alimentation électrique, utilisez une alimentation électrique standard et des prises de terre. 3. Utilisez uniquement la source d‘alimentation indiquée sur le projecteur. 4. - Page 26 APERÇU DU PRODUIT Devant 1 Récepteur infrarouge 2 Haut-parleurs 3 Vis de réglage de l'angle d'inclinaison Dessus Power Return Menu Source 1 Mise au point de l'objectif 2 Correction de trapèze 3 Tableau de commande...
- Page 27 Côté H DM I1 Audio-in HD MI 2 Video PC RG B 1 Interrupteur secteur 2 Panneau du connecteur 3 Récepteur infrarouge Dessous 1 Vis de réglage de l'angle d'inclinaison 2 Les filetages (M4x8mm) pour les supports de projecteur sont situés sous les patins.
- Page 28 Tableau de commande Power Return Menu Source 1 LED Rouge : Le projecteur est en mode veille. Vert : Le projecteur est en marche. 2 Allumer et éteindre le projecteur 3 Touche menu 4 Touches de navigation dans le menu 5 Retour 6 Sélection de la source vidéo Panneau du connecteur...
- Page 29 La touche „Source“ et les touches fléchées permettent de sélectionner l‘entrée correspondante sur le panneau de commande. Confirmez la sélection en appuyant sur la touche „OK“. Le signal d‘entrée peut également être sélectionné à l‘aide de la télécommande. TÉLÉCOMMANDE Mise en marche / arrêt Activer/Désactiver le son Image miroir Touches de contrôle...
- Page 30 MENU Appuyez sur la touche „Menu“ du panneau de commande ou sur la touche „M“ de la télécommande pour afficher le menu. La touche „Return“ ou „Menu“ du panneau de commande ou les touches „M“ et „Retour“ de la télécommande permettent de quitter le menu. Les touches de navigation du panneau de commande et de la télécommande permettent d‘effectuer les réglages correspondants dans le menu.
- Page 31 Clock-- -- -- -- Off Time On Time TIME Sleep Timer Auto Sleep OSD Language English Restore Factory Default Blending OPTION HDMI CEC Osd Duration Software Update Le réglage „OSD Language“ permet de sélectionner la langue de navigation du menu.
- Page 32 PARTICULARITÉS DE LA SOURCE D‘ENTRÉE „USB“ Les clés USB ainsi que les disques durs externes peuvent être connectés directement aux ports USB. Lorsque le signal d‘entrée „USB1“ ou „USB2“ est sélectionné, l‘écran suivant apparaît: USB DRIVE PHOTO Les images de la source USB sont affichées sous forme de diaporamas.
- Page 33 La navigation se fait à l‘aide des touches du panneau de commande ainsi que des touches de la télécommande. DONNÉES TECHNIQUES Dimensions (mm) 305 x 225 x 115 mm Interfaces 2x HDMI 2x USB 1x AV 1x VGA Résolution native 1920 x 1080 Luminosité...
- Page 34 TRAITEMENT DES APPAREILS USAGÉS Ce pictogramme indique que ce produit est soumis à la directive européenne et ne doit pas être jeté avec les autres déchets ménagers. Respectez les réglementations locales pour la collecte séparée des équipements électriques et électroniques. Le traitement approprié des appareils usagés permet d‘éviter les effets négatifs sur l‘environnement et la santé.
- Page 35 Fabricant: VEHNS GROUP GmbH Theatinerstraße 40-42 80333 Munich Allemagne www.vehnsgroup.com service@vehnsgroup.com www.lavague.de MADE IN CHINA Sous réserve de modifications et d‘erreurs. Le fabricant décline toute responsabilité pour les dommages résultant d‘une utilisation incorrecte, inappropriée ou incompatible de l‘appareil. © VEHNS GROUP GmbH Version 1.0 –...
-
Page 36: Italiano
ITALIANO SI PREGA DI NOTARE: 1. Si prega di leggere attentamente l‘intero manuale utente prima di utilizzare il proiettore. 2. Per garantire la stabilità dell‘alimentazione elettrica, utilizzare un alimentatore standard e prese con messa a terra. 3. Utilizzare solo la fonte di alimentazione indicata sul proiettore. 4. - Page 37 DESCRIZIONE DEL PRODOTTO Parte anteriore 1 Ricevitore a infrarossi 2 Casse 3 Vite di regolazione dell'angolo di inclinazione Power Return Menu Source 1 Messa a fuoco della lente 2 Correzione della chiave di volta 3 Pannello di controllo...
- Page 38 Dorso H DM I1 Audio-in HD MI 2 Video PC RG B 1 Interruttore di rete 2 Pannello connettori 3 Ricevitore a infrarossi Lato basso 1 Vite di regolazione dell'angolo di inclinazione 2 Le filettature (M4x8mm) per i supporti del proiettore si trovano sotto le pastiglie.
- Page 39 Pannello di controllo Power Return Menu Source 1 LED Rosso: Il proiettore è in modalità standby. Verde: Il proiettore è in funzione. 2 Accensione e spegnimento del proiettore 3 Richiamare il menu 4 Tasti per la navigazione nel menu 5 Indietro 6 Selezione della sorgente video Pannello connettori HDMI1...
- Page 40 Den jeweilgen Eingang können Sie auf dem Bedienfeld über die Taste È possibile selezionare l‘ingresso corrispondente sul pannello di controllo utilizzando il tasto „Source“ e i tasti freccia. Confermare la selezione premendo il tasto „OK“. In alternativa, il segnale di ingresso può essere selezionato anche tramite il telecomando.
- Page 41 MENÜ Premendo il tasto „Menu“ sul pannello di controllo o premendo il tasto „M“ sul telecomando viene visualizzato il menu. Il tasto „Return“ o „Menu“ sul pannello di controllo o i tasti „M“ e „Back“ sul telecomando escono dal menu. Con i tasti di navigazione del pannello di controllo e del telecomando è...
- Page 42 OSD Language English Restore Factory Default Blending OPTION HDMI CEC Osd Duration Software Update Clock-- -- -- -- Off Time On Time TIME Sleep Timer Auto Sleep L‘impostazione „Lingua OSD“ viene utilizzata per selezionare la lingua del menu di navigazione.
- Page 43 CARATTERISTICHE SPECIALI DELLA SORGENTE DI INPUT „USB Le chiavi USB e i dischi rigidi esterni possono essere collegati direttamente alle porte USB. Quando si seleziona il segnale di ingresso „USB1“ o „USB2“, appare la seguente schermata: USB DRIVE PHOTO Le immagini sulla sorgente USB vengono visualizzate come slideshow.
- Page 44 La navigazione viene effettuata utilizzando i tasti del pannello di controllo e i tasti del telecomando. DATI TECNICI Dimensioni (mm) 305 x 225 x 115 mm interfacce 2x HDMI 2x USB 1x AV 1x VGA Risoluzione nativa 1920 x 1080 brillantezza 3.200 Lumen temperatura di...
- Page 45 ESPOSIZIONE Questo marchio indica che questo prodotto è soggetto alla Direttiva Europea e non deve essere smaltito insieme ad altri rifiuti domestici. Per la raccolta differenziata delle apparecchiature elettriche ed elettroniche, fare riferimento e seguire le normative locali. Un corretto smaltimento dei vecchi prodotti aiuta ad evitare effetti negativi sull‘ambiente e sulla salute.
- Page 46 Produttore: VEHNS GROUP GmbH Theatinerstraße 40-42 80333 Monaco Germania www.vehnsgroup.com service@vehnsgroup.com www.lavague.de MADE IN CHINA Salvo modificaciones y errores. El fabricante no se hace responsable de los daños derivados de un uso incorrecto, inadecuado o incompatible del producto. © VEHNS GROUP GmbH Versión 1.0 - Nov 2019...
-
Page 47: Español
ESPAÑOL TENGA EN CUENTA: 1. Lea atentamente todo el manual del usuario antes de utilizar el proyector. 2. Para garantizar la estabilidad de la fuente de alimentación, utilice una fuente de alimentación estándar y tomas de corriente con conexión a tierra. - Page 48 DESCRIPCIÓN DEL PRODUCTO Fachada 1 Receptor de infrarrojos 2 Altoparlantes 3 Tornillo de ajuste del ángulo de inclinación Arriba Power Return Menu Source 1 Enfoque del lente 2 Corrección trapezoidal 3 Tablero de mando...
- Page 49 Reverso H DM I1 Audio-in HD MI 2 Video PC RG B 1 Interruptor de red 2 Panel de conexión 3 Receptor de infrarrojos Base 1 Tornillo de ajuste del ángulo de inclinación 2 Las roscas (M4x8mm) para los soportes del proyector se encuentran debajo de las almohadillas.
- Page 50 Tablero de mando Power Return Menu Source 1 LED Rojo: El proyector está en modo de espera. Verde: El proyector está en funcionamiento. 2 Encendido y apagado del proyector 3 Llamar el menú 4 Teclas de navegación en el menú 5 Espalda 6 Selección de la fuente de vídeo Panel de conexión...
- Page 51 Con la tecla „Source“ y las teclas de flecha se puede seleccionar la entrada correspondiente en el panel de control. Confirme la selección con la tecla „OK“. Alternativamente, la señal de entrada también puede seleccionarse a través del mando a distancia. FERNBEDIENE Encendido y apagado Encendido y apagado...
- Page 52 MENÚ Al pulsar el botón „Menú“ en el panel de control o al pulsar el botón „M“ en el mando a distancia se mostrará el menú. Los botones „Return“ o „Menu“ del panel de control o los botones „M“ y „Back“...
- Page 53 Clock-- -- -- -- Off Time On Time TIME Sleep Timer Auto Sleep OSD Language English Restore Factory Default Blending OPTION HDMI CEC Osd Duration Software Update El ajuste „Idioma OSD“ se utiliza para seleccionar el idioma de la navegación por los menús.
- Page 54 CARACTERÍSTICAS ESPECIALES DE LA FUENTE DE ENTRADA „USB“ Los lápices USB y los discos duros externos se pueden conectar directamente a los puertos USB. Cuando se selecciona la señal de entrada „USB1“ o „USB2“, aparece la siguiente pantalla: USB DRIVE PHOTO Las imágenes de la fuente USB se muestran como presentaciones de diapositivas.
- Page 55 La navegación se realiza mediante los botones del panel de control y los del mando a distancia. DATOS TÉCNICOS Dimensiones (mm) 305 x 225 x 115 mm interrelaciones 2x HDMI 2x USB 1x AV 1x VGA Resolución nativa 1920 x 1080 Resplandor 3.200 Lumen Temperatura del...
- Page 56 DESECHOS Esta marca indica que este producto está sujeto a la Directiva Europea y no debe desecharse junto con otros residuos domésticos. Consulte y siga las regulaciones locales para la recolección separada de equipos eléctricos y electrónicos. La eliminación adecuada de los productos viejos ayuda a evitar los efectos negativos sobre el medio ambiente y la salud.
- Page 57 Fabricante: VEHNS GROUP GmbH Theatinerstraße 40-42 80333 München Deutschland www.vehnsgroup.com service@vehnsgroup.com www.lavague.de MADE IN CHINA Salvo modificaciones y errores. El fabricante no se hace responsable de los daños derivados de un uso incorrecto, inadecuado o incompatible del producto. © VEHNS GROUP GmbH Version 1.0 –...
Need help?
Do you have a question about the LV-HD400 and is the answer not in the manual?
Questions and answers