Table of Contents
Advertisement
Quick Links
Advertisement
Table of Contents

Related Manuals for GLP Fusion EXO Spot 30

Summary of Contents for GLP Fusion EXO Spot 30
- Page 1 Fusion EXO Spot 30 Software version V1.0.00...
- Page 2 This document covers fixture software version V1.0.00 © 2020 German Light Products GmbH. All rights reserved. The marks ‘GLP’ and ‘German Light Products’ are trademarks registered as the property of German Light Products GmbH in Germany, in the United States of America and in other countries.
-
Page 3: Table Of Contents
Avoiding damage from water and humidity ........11 Avoiding damage from dust and airborne particles ..... 12 Transportation and storage ............... 12 GLP Service and Support ..............12 EXO Spot 30 overview ................13 Installation ....................15 Permitted mounting options ............. 15 Securing fixtures with a safety cable .......... - Page 4 12. DMX control channel layout tables ............33 DMX Mode 1: Standard ..............33 13. Service ...................... 38 Cleaning ....................38 GLP Service and Support ..............38 14. Technical specifications ................. 39 Optics ....................39 Control ....................39 Installation ................... 39 Electrical ....................
-
Page 5: Safety
German Light Products® Safety 1. Safety Key to symbols The following symbols are used in the Fusion EXO Spot 30 lighting fixture’s user documentation: Warning! Safety hazard. Warning! Hazardous voltage. Risk of severe injury or Risk of lethal or severe death. -
Page 6: Electrical Safety
● Check the GLP website at www.glp.de and make sure that you have the latest version of this manual. Check the fixture software version indicated on page 2 of this manual and then use the fixture’s control panel to check the version installed in the... -
Page 7: Fire Safety And Protection From Burns
- US power cable: 16 A, 14 AWG, UL-listed, E304117, SJT, 4.9 ft. - EU power cable: 16 A, 1.5 mm², H07RN-F, 1.5 m. Do not connect more than six (6) Fusion EXO Spot 30 fixtures to power in a chain at 100-120 V, 60 Hz. -
Page 8: Eye Safety
Safety ignite objects that are in contact with the surface. Ensure that the front surface Is clean and unobstructed at all times in order to prevent a fire hazard and damage to the fixture. ● The fixture’s optical components can focus the sun’s rays, creating a risk of fire and damage. -
Page 9: Installation Safety And Protection From Personal Injury
Do not attempt to use a fixture that is obviously damaged. ● Do not modify the fixture in any way not described in its user documentation. ● Install genuine GLP parts only. EXO Spot 30 User Manual Rev. A... -
Page 10: Avoiding Damage To The Fixture
Avoiding damage to the fixture 2. Avoiding damage to the fixture Important! Follow the directions in this section carefully, or the fixture may suffer damage that is not covered by the product warranty. General precautions Do not drop the fixture or expose it to mechanical stress. -
Page 11: Ip Rating
German Light Products® Avoiding damage to the fixture IP rating EXO Spot 30 fixtures are IP65-rated: ● IP stands for Ingress (entry into the fixture) Protection. ● The first figure 6 in the rating means that fixtures are protected against the entry of dust and airborne particles. -
Page 12: Avoiding Damage From Dust And Airborne Particles
● Store the fixture in a dry location when not in use. GLP Service and Support Contact information for the nearest GLP Service and Support is available online at www.glp.de/en/service, by email at info@glp.de, or by telephone at the following numbers: ●... -
Page 13: Exo Spot 30 Overview
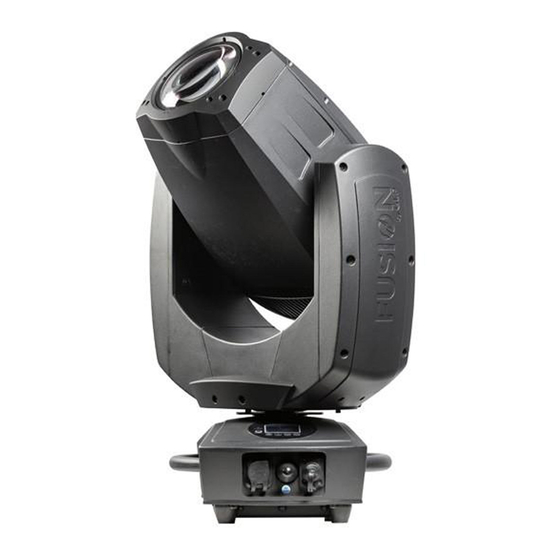
EXO Spot 30 overview 3. EXO Spot 30 overview The Fusion EXO Spot 30 from GLP is a powerful LED-based profile spot fixture with fast pan and tilt, CMY color mixing, six fixed colors on three separate wheels, and six rotating / eight fixed gobos on two wheels. - Page 14 EXO Spot 30 overview Figure 2. EXO Spot 30 overview 1 – Output lens 8 – Wireless indicator 2 – Head 9 – Battery button 3 – Tilt lock 10 – PowerCON TRUE1 input 4 – Yoke 11 – Mode / Esc button 5 –...
-
Page 15: Installation
German Light Products® Installation 4. Installation Warning! Read ‘Safety’ starting on page 5 for important safety information that you must understand before you install or operate the fixture. Install EXO Spot 30 fixtures only as described in this chapter, or you may create an installation that is unsafe. -
Page 16: Installing On A Rigging Truss Or Similar Structure
Installation To secure an EXO Spot 30 fixture with a safety cable: Figure 3. Safety cable attachment Loop a safety cable around a secure anchoring point such as a truss beam or fixed structure so that it will catch the fixture if a rigging clamp fails. -
Page 17: Standing On A Horizontal Surface
German Light Products® Installation Figure 4. Omega bracket fasteners Attach suitable clamps to the Omega brackets. Line up the fasteners of the Omega bracket with the holes “A” in the base of the EXO Spot 30 as shown in Figure 4. The brackets may be installed either way round so the cabling is in line with the bar or at right angles to it. -
Page 18: Ac Mains Power
AC mains power 5. AC mains power Warning! Read ‘Safety’ starting on page 5 for important safety information that you must understand before you install or operate the fixture. Check that all cables and connectors are suitable for the installation environment and application (see recommendations in ‘Avoiding damage... -
Page 19: Installing Power Connectors
German Light Products® AC mains power Installing power connectors If you intend to draw power from convenience receptacles / consumer mains power sockets, it is possible to install a suitable cord cap / power plug on the supplied power cord / input cable. If you do this, check that the cord cap / plug is rated minimum 250 V, 16 A, that it has a connection to ground / earth and that it has an integral cable grip. -
Page 20: Connecting To Dmx Data
DMX input and DMX link out connectors. If you need to split the DMX cable, use a powered DMX splitter. If you would like advice with planning and installing a DMX link, your GLP supplier will be happy to provide assistance. -
Page 21: Starting And Stopping Operation
German Light Products® Starting and stopping operation 7. Starting and stopping operation Warning! Before you apply power to the fixture or operate it after a blackout, make sure that nobody is looking directly into the front of the fixture. The EXO Spot 30’s TRUE1 mains power input connector supports hot-plugging, and connecting and disconnecting a live power cable is an option, especially if you need to shut down power urgently, but it is still good practice to shut down power to the AC mains power circuit before connecting and disconnecting power cables. -
Page 22: Features
Features 8. Features The EXO Spot 30 unit has the following features: Position Pan rotation 540°, Tilt rotation 258° with 16 bit resolution. The fixture will automatically reposition if knocked – this option can be disabled from the menu. The Pan and Tilt movements can be inverted using the menu. -
Page 23: Gobo Wheels
German Light Products® Features Gobo wheels The EXO Spot 30 has two gobo wheels. Wheel 1 has 9 positions including open and the gobos are fixed (non-rotating). Figure 6. Gobo Wheel 1 Wheel 2 has seven positions including open and these gobos are rotatable and indexable. -
Page 24: Dimming
Features Dimming 16-bit dimming control is provided. You can select from two dimming curves using the control panel or the Control / Settings DMX channel, see Figure 8: Figure 8. Dimming curves ● Linear sets dimming so that it appears to increase and decrease evenly throughout the dimming range. -
Page 25: Behavior When The Fixture Is Not Receiving A Dmx Signal
German Light Products® Features Behavior when the fixture is not receiving a DMX signal You can set the fixture to react in three different ways if no DMX signal is present (if the fixture is being controlled by DMX but the DMX signal stops, or if you apply power to the fixture when no DMX signal is present): ●... -
Page 26: Control Menus And Onboard Display
Control menus and onboard display Control menus and onboard display Warning! DMX control is disabled when the control menus are active. Be prepared for the fixture to emit strong light as soon as you exit the control menus. The control panel and onboard LCD display provide access to user settings, readouts and utilities. -
Page 27: Display Options
German Light Products® Control menus and onboard display DMX control is disabled when the control menus are active. Display options The illuminated LCD display lets you change fixture settings. The display has a battery backup so that you can change the settings before mains is connected to the fixture. See Chapter 9 for more details. -
Page 28: Pan Disable / Tilt Disable
Control menus and onboard display Pan disable / Tilt disable These options allow you to disable the startup reset movements or disable the drive of the pan and/or tilt motors. The options are - Off: Normal motor control - Reset Disabled: The fixture will not do its power on reset sequence on this motor but the motor is still controlled. -
Page 29: Control Menu Layout
German Light Products® Control menu layout 10. Control menu layout Menus Notes 1 - 512 Enter DMX address ADDRESS CONTROL Select DMX control mode Standard – 24 channels MODE Wired DMX control CONTROL Wireless DMX control PROTOCOL WIRELESS (optional module) Pan Invert Off / On Invert Pan movement... - Page 30 Control menu layout Yellow 0-255 Gobo Wheel 1 0-255 Gobo Wheel 2 0-255 Gobo 2 rotation coarse 0- Gobo 2 rotation fine 0-255 Shutter 0-255 Dimmer Coarse 0-255 Dimmer Fine 0-255 Frost 0-255 Prism 0-255 Prism rotation 0-255 Focus coarse 0-255...
-
Page 31: Service Advanced Menu
German Light Products® Control menu layout Service Advanced menu Hold down Enter for 6 seconds to access this menu. Menus Notes Pan Disable Off/On Tilt Disable Off/On Units °C / °F Tilt Offsets Zoom Power Hours Power Cycles Reset LED Hours Counter Max Temperature Temperature Unit... -
Page 32: Dmx Control Mode Overview
DMX control mode overview 11. DMX control mode overview The EXO Spot 30 has only one DMX control mode which uses the following DMX channels Mode 1 Compact Pan fine Tilt DMX Mode 1: Standard Tilt fine Color wheel 1 Cyan The EXO Spot 30 uses 23 DMX channels. -
Page 33: Dmx Control Channel Layout Tables
German Light Products® DMX control channel layout tables 12. DMX control channel layout tables DMX Mode 1: Standard 24 DMX Channels Default Channel Command range Percent Fade Pan left–right 65535 32767 Fade Pan fine Tilt Tilt up–down 65535 32767 Fade Tilt fine Position 1 (Open) Position 1 + 2 (Split Color) - Page 34 DMX control channel layout tables to Yellow (full) Color Bounce from Open over fixed Colors to Yellow (full) and back, Fast- Slow 66.7 83.9 Color Bounce Stop 84.3 84.3 Invert Color Bounce from Yellow (Full) over fixed Colors to Open and back, Slow-Fast 84.7...
- Page 35 German Light Products® DMX control channel layout tables Gobo wheel spin stop 72.5 72.5 Snap Gobo wheel spin clockwise fast > Fade slow 72.9 85.9 Gobo wheel spin stop 86.3 86.3 Snap Gobo wheel spin counterclockwise Fade slow > fast 86.7 EXO Beam 10 User Manual Rev.
- Page 36 DMX control channel layout tables when ch. 12 = “indexed”: Fade Gobo index 0-360° when ch. 12= “rotate”: Gobo 2 Gobo rotation stop Index/Rotate Gobo rotation clockwise fast > slow 49.8 Fade Gobo rotation stop 50.2 50.2 Gobo rotation counterclockwise 50.6...
- Page 37 German Light Products® DMX control channel layout tables Pan inversion: Off (3s hold) 51.0 52.9 Pan inversion: On (3s hold) 53.3 55.3 Zoom inversion: Off (3s hold) 55.7 57.6 Zoom inversion: On (3s hold) 58.0 60.0 Defog: Off 60.4 62.4 Defog: On 62.7 64.7...
-
Page 38: Service
Use the tilt lock mechanism to hold the head in a vertical position for easier cleaning. GLP Service and Support Contact information for the nearest GLP Service and Support is available online at www.glp.de/en/service, by email at info@glp.de, or by telephone at the following numbers: ●... -
Page 39: Technical Specifications
German Light Products® Technical specifications 14. Technical specifications Optics Light source: Advanced 90W White LED Lifetime: 20 000 hrs. approx. to > 70% luminous output Luminous flux @ 7° zoom: 107100 lux @ 3 m, 38556 lux @ 5 m Beam angle (half peak): 7°... -
Page 40: Included Items
Technical specifications Included items Power cable with Neutrik powerCON TRUE1 mains input plug Dimensions and weight Length: 368mm / 14.5 ins. Width: 380 mm / 15.0 ins. Height: 605 mm / 23.8 ins. Weight: 25.9 kg (57 lbs.) EXO Spot 30 User Manual Rev. A... -
Page 41: Dimensions
German Light Products® Dimensions 15. Dimensions All dimensions are in millimeters EXO Beam 10 User Manual Rev. A...
Need help?
Do you have a question about the Fusion EXO Spot 30 and is the answer not in the manual?
Questions and answers