Advertisement
Quick Links
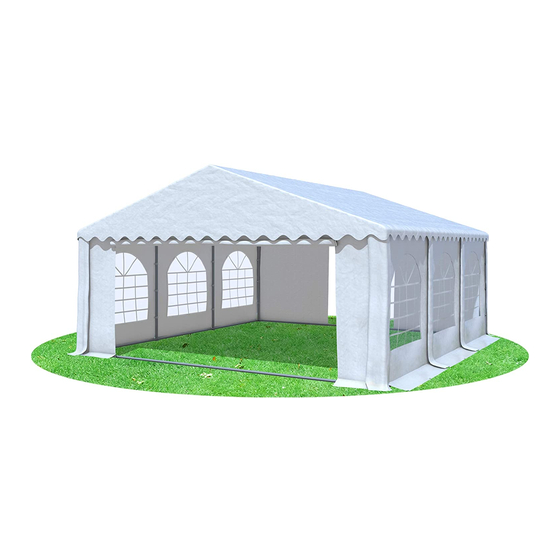
Giant Pro
5m Series PVC
5x6m/5x8m/5x10m/5x12m
Aufbauanleitung
Bitte lesen Sie sich die Warn- und
Bitte beachten Sie die Pflegehinweise
damit Sie lange Freude an Ihrem Zelt
Please read the assembly instructions
and warnings carefully before setting
Please follow the care instructions so
you enjoy your tent for a long time.
Veuillez lire attentivement toutes les
avertissements avant de monter la
d'entretien pour pouvoir vous servir
de votre tente pendant longtemps
A
UFBAUANLEITUNG UND
Assembly instruction
Notice de montage
Aufbauhinweise vor Aufbau des
Zeltes sorgfältig durch
haben
up the tent.
consignes de montage et les
tente
Veuillez respecter les consignes
W
ARNHINWEISE
1
Deutsch
1
English
10
France
18
Hergestellt für:
Stabilepartyzelte
Andy Kaiser
Wandersmannstr. 60a
665205 Wiesbaden
Advertisement

Subscribe to Our Youtube Channel
Related Manuals for Stabilezelte Giant Pro PVC 5m Series


Summary of Contents for Stabilezelte Giant Pro PVC 5m Series
- Page 1 Giant Pro 5m Series PVC 5x6m/5x8m/5x10m/5x12m Aufbauanleitung Assembly instruction Notice de montage Bitte lesen Sie sich die Warn- und Deutsch Aufbauhinweise vor Aufbau des Zeltes sorgfältig durch Bitte beachten Sie die Pflegehinweise English damit Sie lange Freude an Ihrem Zelt haben Please read the assembly instructions France...
- Page 2 !!!!! Bitte lesen Sie sich dieses Beiblatt aufmerksam durch !!!! Wichtig, für spätere Bezugnahme aufbewahren Sehr geehrte Kundin, sehr geehrter Kunde, vielen Dank, dass Sie sich für eines unserer Produkte entschieden haben und für das von Ihnen uns entgegen gebrachte Vertrauen. Damit Sie sich an Ihrem Pavillon lange Zeit erfreuen können, empfehlen wir Ihnen, nachstehende Hinweise sorgfältig zu beachten.
- Page 3 FLEGEHINWEISE !!!!! Bitte lesen Sie sich dieses Beiblatt aufmerksam durch !!!! Wichtig, für spätere Bezugnahme aufbewahren Beachten Sie bitte, dass an den Nähten des Pavillons eine Perforation entsteht – bedingt durch das Vernähen der Dachteile. Dieses führt dazu, dass Wassertropfen an den Nahtstellen durchdringen können.
- Page 4 Menge Menge Menge Menge Bezeichnung Teileliste 5x6m 5x8m 5x10m 5x12m Φ 50x1170mm Stange Φ 38x1925mm Stange Φ 25x1225mm Stange Φ 25x440mm Stütze Φ 50x1888mm (2488mm)Stange Φ 38x1580mm Stange (7) 110°3 Wege Verbinder (8) 140°3 Verbinder (9) 140°4 Verbinder (10) 110°4 Verbinder (11)Kreuz 4 Verbinder (12)“T”...
- Page 5 (17) Seitenteile (18) Giebelteile (19) Abspannseil (20) Spiral Erdhaken (21) Stangen Erdhaken (22) Planen Erdhaken (23) Spanngummis kurz (24) Spanngummis lang (25) M6x10mm Schraube (26) M6x30mm Schraube (27)Flügelmutter (28)Imbus (29)Haken OR DEM UFBAU Halten Sie Kinder während des Aufbaus fern. Diese können sich an Kleinteilen verschlucken oder es droht durch die Plastikverpackungen Erstickungsgefahr.
- Page 6 CHRITT Legen Sie sämtliche Stangen und Verbindungselemente gemäß Zeichnung auf dem Boden aus...
- Page 7 CHRITT Stecken Sie die Dachkonstruktion des Zeltes wie abgebildet zusammen. Fixieren Sie alles mit den beigelegten Schrauben. Stellen Sie sich das alle Verbinder eingerastet und fixiert sind. CHRITT Heben Sie nun die Dachkonstruktion an einer Seite an und befestigen Sie die Standfußstangen No 5. Je Standfußstange sollte eine Person anheben.
- Page 8 CHRITT Nun befestigen Sie an den Standfußstangen den Grundrahmen. Nutzen Sie hierfür die Füße (13,14,15,) sowie die Stangen (2,6). Mit den Stangenerdhaken können Sie nun das Gestänge am Boden befestigen. Die Haken nutzen Sie um die Seiten der Dachplane am unteren Teil der Standfußstangen zu sichern. CHRITT...
- Page 9 Befestigen Sie abschließen die Seitenteile mit den langen Spanngummis und Planenerdhaken. Für die. Giebelteil nutzen Sie die kurzen Spanngummis. Fixieren nun ebenfalls das Zeltgestänge mit den Abspannseilen.Abschließend spannen Sie die Seiten- und Giebelwände mit den Planen Erdhaken am Boden ab. SSEMBLY INSTRUCTIONS AND WARNINGS !!!!! Please read this leaflet carefully!! Important to keep for future reference...
- Page 10 Dear Customer, Thank you for choosing our product, as well as for the confidence you have placed in us. We recommend observing these instructions carefully so that you may enjoy your pavilion for a long time. Your pavilion must be erected in accordance with the assembly instructions. In particular, make sure that the corners of the roof are carefully pulled over the corner joints.
-
Page 11: Care Instructions
ARE INSTRUCTIONS !!!!! Please read this leaflet carefully!! Important to keep for future reference Dear Customer, Thank you for choosing our product, as well as for the confidence you have placed in us. We recommend observing these instructions carefully so that you may enjoy your pavilion for a long time. - Page 12 Quantity Quantity Quantity Quantity Parts Drawing 5x6m 5x8m 5x10m 5x12m (1) Φ50x1170mm Pipe (2) Φ38x1925mm Pipe (3) Φ25x1225mm Brace (4) Φ25x440mm Brace (5) Φ50x1888mm (2488mm) Pipe (6) Φ38x1580mm Pipe (7) 110° 3 Way Connector (8) 140° 3 Way Connector (9) 140° 4 Way Connector (10) 110°...
-
Page 13: Prior To Assembly
(16) Roof (17) Sidewall (18) End wall (19)Guy Rope (20) Spiral peg (21)Thick peg ø6X180mm (22) Thin peg ø4X180mm (23) Bungee short (24) Bungee long (25)M6x10mm Screw (26) M6x30mm Screw (27) Wing nut (28) Imbus (29)Hook RIOR TO ASSEMBLY Keep children away during assembly. They can choke on plastic parts and there is the risk of suffocation by the plastic packaging. - Page 14 Select a flat surface for the tent. Unpack the boxes and check it all listed parts are included.Place all joints (7,8, 9, 10, 11 and 12), related pipes (1, 2 ) on the ground as shown.
- Page 15 Assemble the roof frame. Use the screws (25) to firmly attach the parts. Make sure that all parts are fixed well and secured. Attach the reinforcement braces (3,4) using the screws (25,26) and wing nut (27). Lift up the roof construction on one side. Assemble the poles (5) to the connectors. Put the roof cover (16) onto the frame and use the long bungees (24) to fasten it.
- Page 16 Now lift up the other side of the frame and assemble the remaining poles (5). Fix all set of ground bars (2,6) and the connectors (13;14;15) to finish the tent framework as below drawing. Use the thick ground pegs (21) to fasten all feet to the ground. Attach the side covers to the pipes (5) using hooks (29).
- Page 17 STEP Spread the sidewalls and end walls , and attach the side walls to the frame using the long bungees(24). Attach the end walls directly to the roof by using the short bungees (23).Use the thin ground pegs (22) to fasten the end walls and side walls to the ground.
- Page 18 ANUEL DE MONTAGE ET AVERTISSEMENTS !!!!! S'il vous plaît lisez attentivement cette notice ! Important : gardez-la pour une utilisation future ! Chère cliente, cher client, Merci d'avoir choisi un de nos produits et merci pour la confiance que vous avez placée en nous. Afin que vous puissiez profiter de votre pavillon pendant une longue période, nous vous recommandons d'observer les indications suivantes.
-
Page 19: Conseils D'entretien
ONSEILS D ENTRETIEN !!!!! S'il vous plaît lisez attentivement cette notice ! Important : gardez-la pour une utilisation future ! Chère cliente, cher client, Merci d'avoir choisi un de nos produits et merci pour la confiance que vous avez placée en nous. Afin que vous puissiez profiter de votre pavillon pendant une longue période, nous vous recommandons d'observer les indications suivantes. - Page 20 EITERE RTIKEL BEI UNS ERH LTLICH...
Need help?
Do you have a question about the Giant Pro PVC 5m Series and is the answer not in the manual?
Questions and answers