Advertisement
Quick Links
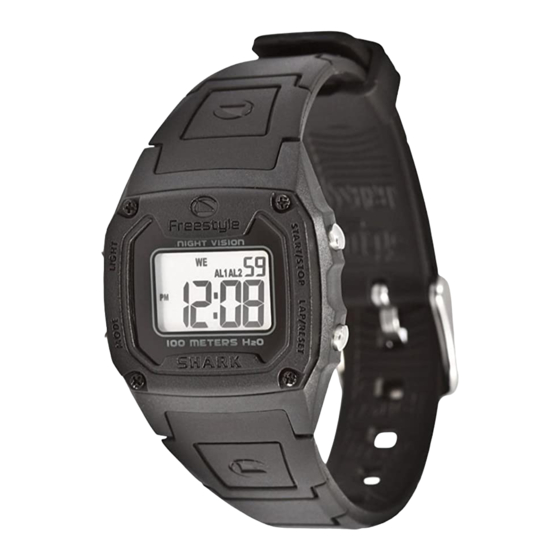
SHARK CLASSIC
FEATURES:
•
CURRENT TIME
•
DAY/MONTH/DATE
•
TWO DAILY ALARM
•
HOURLY CHIME
•
STOPWATCH
•
OPTIONAL 24-HR. TIME
•
WATER RESISTANT TO
300FT/100M
•
NIGHT VISION™
BACK LIGHT
KEY TO SYMBOLS
INTRODUCTION
Congratulations on your purchasing
the Easy-Set Watch II. Designed for
easy operation, the watch
automatically tells you which button
to use in a setting procedure. The
watch has the following functions:
• Real-time calendar clock for home
time
• Second calendar clock for foreign time
• Dual daily alarms and hourly chimes
• Stopwatch with split function
• 10 preset countdown timers
The watch is also equipped with an EL
back light to facilitate time reading at
night or in dim light.
HOW TO USE THE BACK LIGHT
Press the LIGHT button once to turn
on the back light for three seconds.
DISPLAY MODES
The watch has four display modes:
home time (TIME), home time alarm
TRIM
(ALM1), stopwatch (STW) and
watch will also do so automatically
countdown timer (TMR).
after six seconds.
To change from one display mode to
HOW TO SET THE DAILY ALARMS
another, press the S3 button once. The
mode description will appear for two
1
Select alarm function using the S3
seconds before activating the selected
button.
mode.
2
Select home and foreign time alarm
using the S2 button.
HOME AND FOREIGN DISPLAY
3
Hold the S2 button for two seconds.
To display the foreign time, press S2
The SET message will appear. The
when the home time is displayed. The
minute digits will blink.
mode description (TM-2) will appear
4
Use the S1 button to set the
shortly before the foreign time is
minutes.
displayed. To change back to the home
time, press S2.
5
Press the S3 button. The hour digits
will blink.
To display the daily alarm for foreign
6
Use the S1 button to set the hours.
time, press S2 when the daily alarm
7
Press the S2 button to confirm and
for home time is displayed. The mode
exit.
description (ALM 2) will appear shortly
before the foreign time alarm is
HOW TO USE THE DAILY
displayed.
ALARMS AND HOURLY CHIMES
To display the alarm time, select ALM
HOW TO SET THE TIME AND DATE
1 or ALM 2 mode using the S2 button
1
Select time display using the S3
in alarm mode.
button.
2
Select home time or foreign time
Use the S1 button to set the status of
using the S2 button.
the alarm and chime functions of the
3
Hold the S2 button for two seconds.
chosen alarm. Press the button once
The SET message will appear
to activate the daily alarm. Press the
momentarily. The second digits will
button again to activate the hourly
blink.
chime. Press the button a third time to
4
Press the S1 button to reset the
activate both functions. To deactivate
both, press the S1 button a fourth time.
second digits to 00.
5
Press the S3 button. The minute
The chime and alarm indicators will
digits will blink.
appear when their respective functions
6
Use the S1 button to set the
are active.
minutes. Press the button once to
increase the digits by one unit or
WHEN AN ALARM OR HOURLY
speed up the
process by holding
CHIME GOES OFF
down the button.
A tune will go off by the hour if the hourly
7
Press the S3 button. The hour digits
chime function is activated and a 20-
will blink.
second alarm tune will be emitted at the
8
Use the S1 button to set the hours.
designated time when the alarm is active.
To stop either tune, press any button.
9
Follow the same pattern to set the
day-of-the-month,month, day-of-
the-week, hour format and date
To disable the functions, select ALM 1
format.For the hour format, you
or ALM 2 and use S1 button to turn off
can choose 12-hour display with P
the indicator of the function as desired.
indicator or 24-hour display. As for
the date format, you can choose M-
HOW TO USE THE STOPWATCH
D (month-day) or D-M (day-month).
For a straight forward count-up,
The chosen formats will apply to
both home and foreign settings.
1
Select stopwatch mode using the
S3 button. The last recorded time
10 Press the S2 button to confirm the
of the stopwatch will be
settings and return to current time
displayed.Press the S2 button to
display.
clear the old record.
HOW TO DISPLAY THE DATE
2
Press the S1 button once to start
To display the date, press S1 when the
the stopwatch. The watch will start
counting from 00'00''00 if the watch
time is displayed. Press the button
is cleared. Otherwise, it will pick
again to go back to time display. The
up from where it last left off. The
watch will count up to 59 minutes
FOLLOW THESE 8 TIPS TO GET THE
and 59.99 seconds before starting
MOST OUT OF YOUR NEW WATCH!
from zero again.
3
To stop counting, press the S1
button once. Press the button
again to resume from where it
1. Never Pull out the crown or operate
left off. To clear the stopwatch,
the pushers/buttons under water.
press the S1 button to stop
2. Make sure your crown is returned
counting and then press the S2
to the original position before you
button.
expose your watch to water.
3. If your watch is exposed to
The stopwatch is equipped with a
saltwater it is very important to
split function for you to keep track
of individual lap time. To use the
wash it thoroughly under tap
function,
water and wipe dry with a soft
cloth. Keep it clean!
1
While the stopwatch is running,
press the S2 button once
4. Sever impacts or drops may affect
whenever you want to register a
your watches water resistance and
lap. The stopwatch is still running
performance.
in the background. To display the
5. Avoid exposing your Freestyle
currently accumulated time,
watch to extreme temperatures
press the S2 button.
such as in a hot shower, Jacuzzi,
2
Repeat the last step until you
sauna or hot tub. The combination
have registered all the laps.
of extreme heat and water may
3
Press S1 to stop counting. Press
cause your watch to lose some of
the button again to resume or
its water resistance.
press the S2 button to clear.
6. Avoid exposing your watch to
chemicals, soaps or solvents as
Note: You can leave the stopwatch
they deteriorate the water resist
running while switching over to other
seals in your watch.
operating modes. The STW indicator
will light up as a reminder.
7. Never try to remove the caseback,
leave this to a certified watch
HOW TO USE THE TIMER
repair technician or Freestyle
service center. This will help in
To set the count down time,
preventing water leakage from
1
Select timer mode using the S3
improper battery replacement.
button. The last selected timer
setting will be displayed.
8. It is advisable to have your watch
2
Use the S2 button to alter the
pressure tested annually and to
setting. You can select among 1,
re-furbish your watch every 2-3
3, 5, 10, 15, 20, 25, 30, 45 and 60
years to extend the life of the watch.
minutes.
To start a countdown, press the S1
button. Press the button again to stop
the countdown or a third time to
resume from where it left off.
After reaching zero on a countdown,
a 20-second beep will go off. To stop
the beeping, press any button. The
timer will reload automatically.
BATTERY INFORMATION
The watch uses a 3.0V lithium button
cell battery, which in normal
circumstances will be good for 1-2
years. However, the battery life will
vary due to shelf time and the
manner the watch is used.
TWO YEAR LIMITED WARRANTY
Your Freestyle watch is warranted to
be free of defects in materials or
workmanship, under normal use, for
a period of two years from the date of
purchase. This limited warranty
excludes damage resulting from
improper care or handling, accidents,
modification, unauthorized repairs,
normal wear, or other causes which
are not defects in materials and
workmanship. If your watch is
defective, please send your watch to
the address below and include the
following:
1. A copy of your original receipt
2. The completed and signed Repair
Form
3. A money order payable to
Odyssey Time Inc. in the amount
of $8.50 for processing and
handling. If using a credit card;
be sure to include the name on
the card, the card number and
the expiration date
Odyssey Time Inc
30 East Pearce Street
Richmond Hill, Ontario
Canada, L4B 1B7
service@seikocan.com
Tel: 1-800-668-6571
905-763-1066
Please do not include any items of
personal value in your shipment.
If there is a covered defect, we will at
our option repair the defective part(s),
or replace the watch with the same
product (if available) or a similar
product of equal price. We reserve
the right to refuse either repair or
replacement (but not both) if the cost
of doing so would be disproportionate
to the defect. This limited warranty is
in place of all other express and
implied warranties of any kind, which
are hereby excluded. In no event shall
Freestyle be liable for direct, indirect,
incidental or consequential damages
arising out of the use of the watch,
and any recovery limited to the
purchase price. No other person or
company is authorized to change this
limited warranty, and your dealer is
solely responsible for any other
warranties. For non-warranty service,
contact the address below.
The Freestyle warranty extends only
to product purchased from an
authorized Freestyle retailer.
Advertisement

Related Manuals for Freestyle FS81329


Summary of Contents for Freestyle FS81329
- Page 1 TWO YEAR LIMITED WARRANTY FOLLOW THESE 8 TIPS TO GET THE Your Freestyle watch is warranted to MOST OUT OF YOUR NEW WATCH! be free of defects in materials or workmanship, under normal use, for a period of two years from the date of purchase.
- Page 2 REPAIR FORM 30 East Pearce Street Richmond Hill, Ontario Canada, L4B 1B7 Money Order Master Card Visa Name: _______________________ Address: ______________________ ______________________________ ______________________________ ______________________________ ______________________________ Telephone: _____________________ Credit Card Number: ______________________________ Name on Credit Card: ______________________________ Expiration Date: ______________________________ Signature: ______________________________ visit our site www.freestyleusa.com...