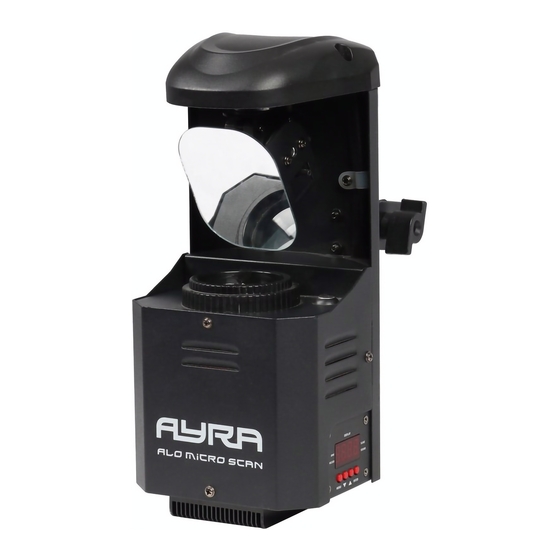
Summary of Contents for Ayra ALO Micro Scan
- Page 1 ALO Micro Scan LED scanner User manual The information in this user manual is subject to change at any time without notice. Version: 1.0 Date of creation and author's initials:18-02-2017 RV Revision date and author's initials: -...
- Page 2 Introduction Thank you for purchasing the ALO Micro Scan. This versatile device is compact in size, but full of technology that will make a statement at your party or event. This user manual offers you all the information you need to get started.
-
Page 3: Safety Instructions
Safety instructions WARNING! Keep this device away from moisture, water and rain to avoid the chance of electric shocks. WARNING! Only connect this device to a suitable power socket. This device functions on a specific power voltage. If it is plugged into a power socket with a different voltage, it could result in permanent damage and even dangerous situations such as fire or electric shocks. - Page 4 - Should the device not be used in the manner described in this user manual, damages or even injuries could occur. Ayra cannot be held responsible for any injuries or damages that occur as a result of improper use of this product.
- Page 5 Only suitable for indoor use: this product was only designed for indoor use. The maximum environmental temperature must not exceed 40 degrees Celsius (104 degrees Fahrenheit). Contact: Ayra professional lighting products Verrijn Stuartweg 18 4462 GE Goes The Netherlands Please do not send any products to this correspondence address.
- Page 6 Guidelines and operation of this device 1. moving mirror 2. projection output and adjustable focus 3. ventilation slot 4. cooling fins 5. mounting bracket with tightening knobs 6. DMX output via 3-pin XLR 7. DMX input via 3-pin XLR 8. eyelet for optional safety cable 9.
- Page 7 During calibration, ‘AYRA’ will be shown on the display, which means the device is not ready to be operated. Once the device has fully started up, it will jump to the last-used mode. Operation modes and other settings shown on the display can now be adjusted or changed by means of the menu buttons.
- Page 8 You'll find an explanation of the various functions below: ADDR: With this function, you can determine the DMX start address of the device. Set it channel 001, and the device will respond from DMX channel 1. Set it to channel 003, then the device will respond from DMX channel 3, etc.
- Page 9 This is true of DMX lighting of all brands and types. The ERO Micro Spot can function in conjunction with the ALO Micro Scan because they share exactly the same operating programs. Moving heads and scanners of this type can work together seamlessly.
- Page 10 perfectly with your DMX circle layout, as well as with the functions you will be using. 1CH mode: Function Value Sound-controlled show modes 000-007 No function (Blackout) 008-037 Show 1 038-067 Show 2 068-097 Show 3 098-127 Show 4 128-157 Show 5 158-187 Show 6 188-217 Show 7 218-247 Show 8...
- Page 11 240-255 sound activated mode Power supply The ALO Micro Scan is equipped with a power input to supply the device with power, but also an output to supply power to other devices, which means you won't need power strips or other power distributors.
- Page 12 This is more than enough to supply power to multiple devices of the same type via a single power line. Bear in mind that the installed fuse in the ALO Micro Scan is designed to only protect the device itself. The power output is not protected.
- Page 13 Installation and connection requirements Now that you know how the ALO Micro Scan works, it's important to know how to use it correctly and safely, according to the installation and connection requirements. Make sure the device and connection cables are out of reach of children, and that if children are present, they are under adult supervision at all times.
- Page 14 Manually-adjustable focus Depending on the application and distance, the projected beams may not be in focus. For that reason, the ALO Micro Scan is equipped with a manually adjustable focus that's positioned under the reflective moving mirror. Preferably, the focus should be adjusted when the device is turned off, or carefully while the device is projecting a fixed beam of light and not moving.
- Page 15 DMX lighting troubleshooting If you have a problem with your DMX light effect, please consult the troubleshooting section for possible solutions. If after consulting this section, the problem remains unresolved, please contact your dealer for more information and/or help. This troubleshooting section contains information on how to solve the most common DMX light effect problems, but it does not and cannot cover every eventuality.
- Page 16 DMX circle terminator or connect a booster after maximum 32 fixtures. The operation mode can not be The device is in Slave mode If the device is in Slave mode, it changed will wait for a master signal unless there is a DMX signal present. Set the device to Master to activate the sound-controlled or automated operation modes.
-
Page 17: Technical Specifications
Technical specifications Specifications: - compact LED scanner - metal housing with plastic cover - light source: 10W LED - LED display with menu buttons - various operation modes - automatic mode with 4 programs that are adjustable in speed in 9 steps - Sound-controlled mode with adjustable sensitivity - Master/Slave mode - Pan/Tilt inverse option...


Need help?
Do you have a question about the ALO Micro Scan and is the answer not in the manual?
Questions and answers