
Related Manuals for NetPay Spire SPc50


Summary of Contents for NetPay Spire SPc50
- Page 1 A NetPay Guide to... Using your Spire Terminal Models: SPc50 / SPw60 / SPw70 / SPp10 / SPc5 / SPg7 intelligent www.netpay.co.uk payments www.netpay.ie...
- Page 2 A guide to using your Spire terminal This booklet will explain how to setup and use your NetPay Terminal. Page 4 Welcome Page 5 PIN-Pad – SPp10 Page 6 Corded Terminal - SPc5 Page7 GPRS Terminal - SPg7 Page 8...
-
Page 3: Important Numbers
Welcome Welcome to the NetPay terminal guide, this document will take you through setting up your new NetPay terminal step by step, processing your first transactions and troubleshooting your device. Before setting up your terminal it is important to identify the model number and follow the correct set up instructions. - Page 4 Turn the terminal over and, if required, switch the electrical outlet on. Turn on the terminal by pressing on the power key located on the left hand side of the terminal. Please proceed to page 12 – Using your terminal. www.netpay.co.uk www.netpay.ie PIN-Pad - SPp10 5...
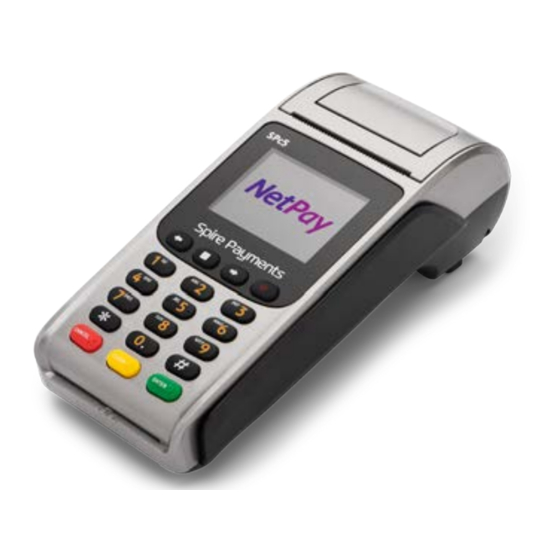
- Page 5 Corded Terminal - Spire SPc5 What’s in the box? The SPc5 terminal Paper Roll The Power Supply Unit (PSU) Telephone (PSTN) Cable Ethernet Cable QUICK SETUP GUIDE Install the paper roll by opening the printer door using the lever located in the middle of the printer door and removing any packaging from the printer compartment.
- Page 6 Turn on the terminal by pressing on the power key which is on the front right of the terminal, signified by the power symbol. Please proceed to page 12 – Using your terminal. Your terminal will require charging for at least 4 hours prior to ‘Performing First Time Setup’ (p12) www.netpay.co.uk www.netpay.ie GPRS Terminal - SPg7...
- Page 7 Installing your Spire Wi-Fi Access Point What’s in the box? Wi-Fi Access Point An Ethernet Cable The Power Supply Unit (PSU) QUICK SETUP GUIDE fig.1 Plug the network cable into the blue socket located at the rear of the access point. Connect the other end of the network cable to your broadband router or a network wallsocket.
- Page 8 Wi-Fi symbol displayed in the top right hand corner of the screen. If you see a red cross that means the access point cannot be found – please call the NetPay Customer Services team. Wi-Fi Access Point Placement The design of the Wi-Fi access point allows it to be placed on a counter or shelf. Please...
- Page 9 Using Your Spire Terminal Turn the terminal on by pressing the power button until the screen lights up. You will need to enter your full merchant ID on first installation and you will also need to create a 5 digit security code.
- Page 10 The action of the red CANCEL key will be displayed in a red box at the bottom of the display. The action of the yellow CLEAR key will be displayed in a yellow box at the bottom of the display. The green ENTER key will select YES. The yellow CLEAR key will select NO. www.netpay.co.uk www.netpay.ie...
- Page 11 Configuring your Wi-Fi Connection Ensure the terminal is displaying the Welcome screen. Press the MAIN MENU key to display the Reports and Terminal Menu. Press the RIGHT ARROW key to show the additional menu items. Press 3 for FUNCTION (or 4 if Mobile Top-Up installed). Enter function 3 and press the ENTER key.
- Page 12 This password is used to protect supervisory functions including changing some options and, most commonly, authorising refunds. You will need to call our technical support team to obtain this password (see page 3). www.netpay.co.uk www.netpay.ie Configuring Basic Terminal Security 13...
- Page 13 CHIP & PIN Transaction To process a standard CHIP & PIN transaction on an Spire Terminal Option 1 Enter the sale amount and press and press the green ENTER key PLEASE NOTE: If a mistake is made entering data, the last digit can be deleted by pressing the yellow CLEAR key.
- Page 14 Take the terminal back from the customer and follow the onscreen prompts. If receipts are printed (this is optional for contactless transactions) retain the MERCHANT copy for yourself and pass the customer version to the customer. Terminal will return to the idle screen. www.netpay.co.uk www.netpay.ie Contactless Transaction 15...
- Page 15 Referrals Occasionally when performing transactions, you will be required to perform a referral. These are rare, but a key part of preventing card fraud. The cardholder will attempt to pay for their purchase. The terminal will display a warning message (the exact text depends on the terminal model) informing you that a referral is needed.
- Page 16 The cardholder inserts the card used on the transaction into the reader. A receipt will print detailing whether or not the Reversal was successful. It is always possible to perform a Refund if the Reversal did not go through in time. www.netpay.co.uk www.netpay.ie Refunds and Reversals 17...
- Page 17 Totalling and End of Day Banking At the end of a business day, the settlement procedure must be performed on the terminal unless set to automatically settle at a particular time of day (if you are unsure whether your terminal settles automatically, please contact your helpdesk). Automatic Settlement is not usually permitted.
- Page 18 Re-Initialising your Battery (Wireless Models) Ensure the terminal is displaying the Welcome screen. Press the MAIN MENU key to display the Reports and Terminal Menu. Press the RIGHT ARROW key to show the additional menu items. Press 3 for FUNCTION (Assuming Mobile Top-Up is not installed). Enter function 63 and press the green ENTER key.
- Page 19 Changing GPRS Network Provider Ensure the terminal is displaying the welcome screen. Press the MAIN MENU key to display the Reports and Terminal Menu. Press the RIGHT ARROW key to show the additional menu items. Press 3 for FUNCTION (Assuming Mobile Top-Up is not installed). Enter function;...
- Page 20 - Trend analysis incorporating, average transaction values, comparisons against earlier trading periods etc. - Geo-mapping of service orders showing the location of merchants - Geo-mapping providing a live insight into online payment sales as they happen www.netpay.co.uk www.netpay.ie NetPay Shop / Reporting 21...
-
Page 21: Connectivity Troubleshooting
Connectivity Troubleshooting The errors that are most likely to occur are communication errors where the terminal cannot contact the acquiring bank. For Bluetooth handsets, this can be caused by moving out of range of the assigned base; this can be resolved by either moving back in range or assigning the handset to a nearer base. - Page 22 Screen If the screen appears frozen and doesn’t react to key presses or inserting a card: appears frozen or Terminal Switch off the power by unplugging at the wall electrical socket. does not react to inserting Leave the terminal off for ten seconds. a card Restore the electrical supply and wait for the terminal to complete rebooting and return to the idle screen.
- Page 23 Inserting your SIM Remove battery as per instructions on page 12. Slide the SIM with the chip facing down and the cut corner bottom left underneath the metal bar in the slot marked SIM2 or SIM. Replace the battery. Notes 24 Inserting Your SIM / Notes intelligent payments...
-
Page 24: Terminal Model
Ireland Merchant Services Support - +44 (0) 345 761 6263 If you have any accounts or billing queries call our accounts team between 9:00am and 5.30pm Monday to Friday NetPay Accounts Team - +44 (0) 333 311 0200 (option 4) www.netpay.co.uk www.netpay.ie... - Page 25 Ireland +353 (0)1 447 5299 getintouch@netpay.ie www.netpay.ie NetPay are the first payment processor in the UK and Ireland to offer ‘green payments’ and offset the carbon emissions of our payments network. My MID: My Terminal Model: My Terminal ID: intelligent...
Need help?
Do you have a question about the Spire SPc50 and is the answer not in the manual?
Questions and answers