
Related Manuals for NetPay Pax S900


Summary of Contents for NetPay Pax S900
- Page 1 A NetPay Guide to... Using your S900 Pax Terminal S900 Mobile Payment Terminal intelligent www.netpay.co.uk payments www.netpay.ie...
-
Page 2: Table Of Contents
CONTENTS Initial Setup ........................... 4 Terminal Overview ......................5 Screen Overview ......................... 6 Screen Icons Overview ...................... 7 Inserting Battery and Paper Roll ..................8 Inserting or replacing the SIM card ..................9 Switching The Terminal On ....................10 Connecting to the Network ....................10 Wi-Fi .......................... - Page 3 Welcome Thank you for choosing your S900 terminal from NetPay. The S900 is designed to process transactions as quickly as possible whilst providing valuable reporting and other functionality. This user guide is designed to provide users of S900 with everything needed to set-up, register and process transactions.
-
Page 4: Initial Setup
IMPORTANT PLEASE CONFIRM THAT THE TAMPER BAG AND TERMINAL SERIAL NUMBER MATCHES EMAIL NOTIFICATION(S) FROM OPTOMANY. If anything is missing or damaged or you experience issues during the installation/activation, please contact NetPay on 0333 311 0200 or via email: customer.services@netpay.co.uk... -
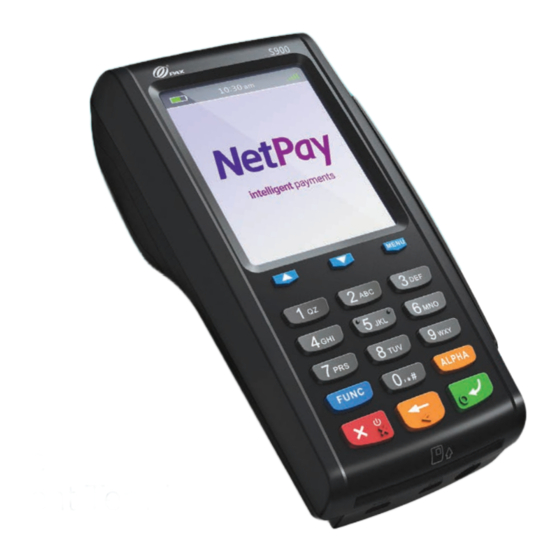
Page 5: Terminal Overview
Terminal Overview An overview of the S900 terminal. -
Page 6: Screen Overview
Screen Overview An overview of the S900 screen. -
Page 7: Screen Icons Overview
Screen Icons Overview Descriptions of the S900 screen icons. Icon Description Battery strength indicator ( indicates battery is charging) Internet connection present No internet connection present GRPS signal indicator Wi-Fi signal indicator Flight mode enabled Transaction data stored on the terminal (not displayed once data uploaded) In cases where the icon remains on the screen for more than a minute after a payment completes, please select option ‘5: Menu’... -
Page 8: Inserting Battery And Paper Roll
Inserting Battery and Paper Roll To Insert the thermal paper roll into the S900 terminal: Pull lever on the terminal to open the cover (as highlighted). Insert paper roll leaving at least 1cm exposed and close the cover. To insert the battery, turn the S900 terminal over so the battery cover latch is visible. -
Page 9: Inserting Or Replacing The Sim Card
Inserting or replacing the SIM card If the use of GPRS is required, a valid active SIM card will need to be inserted in the terminal. A SIM card will already be in place for orders which have requested GPRS functionality. The following steps describe the process of inserting or replacing the SIM card should this be necessary. -
Page 10: Switching The Terminal On
Switching the Terminal On To switch the S900 terminal on, hold the key on the keypad for a few seconds until the terminal screen lights up (the start-up process may take a few minutes). Connecting to the Network Before starting the activation process, please ensure that you have the installation/activation details sent by Optomany. - Page 11 Automatically Configure Wi-Fi Settings The following steps describes the process for automatically configuring the Wi-Fi Network Settings. If the option to manually configure Wi-Fi was not selected, S900 will start to scan for available Wi-Fi networks. The Wi-Fi networks available are displayed. Using the keys on the keypad, select the network required and press the...
- Page 12 Please wait whilst the connection is validated. If all the settings are valid, a confirmation that the network configuration has successfully completed will briefly be displayed. S900 will return to the ‘Select Networking Type’ screen. • INFO Optomany recommends that the Wi-Fi network used is secure and requires authentication as this will adhere to PCI DSS guidelines.
- Page 13 Manually Configuring Wi-Fi Settings The following steps describes the process for manually configuring the Wi-Fi Network Settings. If the option to manually configure the network settings was selected, the SSID for the network will be required. Enter the SSID using the terminal’s keypad. (To use alpha characters, press the numeric key containing the alpha character required multiple times until it is displayed).
- Page 14 S900 supports Dynamic Host Configuration Protocol (DHCP) which automatically obtains all network settings. To use DHCP, press the key on the keypad to continue. If a fixed IP address is required rather than using DHCP, please refer to the S900 User Guide for more information.
-
Page 15: Gprs
GPRS To use a GPRS connection, either as a back-up for Wi-Fi or in place of, configure the S900 using the procedure outlined below. Once the loading process is complete, the Network Configuration menu will appear. Highlight ‘GPRS’ using the keys on the keypad and press the key on the keypad to continue. -
Page 16: Logging On
LOGGING ON Now set-up and activation are complete, S900 is ready for the first logon. If your account has been setup with multiple departments, select the one you wish to use using the navigation keys ( ) on the keypad and press key on the keypad to continue. - Page 17 Please wait whilst S900 processes the log on details. Once the log on has been completed, the main menu will be displayed. INFO The terminal includes a “Check for Updates” feature which necessitates a check every 7 days for mandatory updates. If a terminal has not performed the check for updates after 7 days, the user will automatically be logged out of the terminal.
-
Page 18: Processing A Chip And Pin Sale
PROCESSING A CHIP AND PIN SALE Once the logging on process has been completed, S900 is ready to process transactions. The following describes the end-to-end operation of a Chip & PIN sale: From the main menu, select option 1: Sale (Press the key on the keypad). - Page 19 INFO Press the key to change to a different currency if required - The option to select different currencies is only available if specified on the order form and setup with the Acquirer. Use the navigation keys ( ) on the keypad to highlight the required currency and press the key on the keypad to confirm.
- Page 20 Once the card is inserted, S900 will process the card. Please wait and do not remove the card whilst this is in progress. Press the key on the keypad to confirm cashback is required or the key on the keypad to skip. Only Merchants offering cashback and have this option setup will have the cashback facility.
- Page 21 On the Enter PIN screen, pass the S900 terminal to the cardholder and ask them to enter their PIN. After the PIN has been keyed in, the cardholder will then need to press the key on the keypad to continue. S900 will provide a PIN OK confirmation if the PIN has been correctly entered.
- Page 22 Once the payment is complete, S900 will prompt for the card to be removed. Once the card is removed, the Merchant Receipt will begin printing. Tear off the receipt (after printing has completed) from the S900 terminal and press the key on the keypad to continue.
- Page 23 The payment processing procedure is now complete and S900 will return to the main menu.
-
Page 24: Processing A Contactless Sale
PROCESSING A CONTACTLESS SALE S900 supports contactless payments (including technologies such as Android Pay, Apple Pay etc.) and can be used where a cardholder has the contactless feature enabled on their card or device. The following describes the end-to- end operation of a contactless payment sale: From the main menu, select option 1: Sale (Press the key on the keypad). - Page 25 If required, enter the reference for the transaction. If a reference is not needed, press the key on the keypad to skip. Please note this screen is only shown if configured to do so. (To use alpha characters, press the numeric key containing the alpha character required multiple times until it is displayed) Press the key on the keypad to continue.
- Page 26 S900 will attempt to authorise the transaction with your chosen acquirer. S900 will confirm that the payment is complete if authorisation is successful. The Merchant Receipt will begin printing. Tear off the receipt (after printing has completed) from the S900 terminal and press the key on the keypad to continue.
- Page 27 The payment processing procedure is now complete and S900 will return to the main menu.
- Page 28 INFO A customer/cardholder copy of the receipt is not automatically printed for contactless transactions as it is not a mandatory requirement. However, S900 provides a facility to print a customer/cardholder copy of the receipt if required. The following steps describe the process for printing a customer/cardholder copy of the receipt for contactless transactions.
-
Page 29: Contact Details
CONTACT DETAILS FOR TECHNICAL ISSUES If you have any questions or require support, please get in touch using the details below: Optomany Customer Support Phone: +44 (0) 20 8102 8102 Email: customersupport@optomany.com Customer Support Hours are: Days Hours Covered Monday - Saturday 08:00 –... - Page 30 Ireland +353 (0)1 447 5299 getintouch@netpay.ie www.netpay.ie NetPay are the first payment processor in the UK and Ireland to offer ‘green payments’ and offset the carbon emissions of our payments network. My MID: My Terminal Model: My Terminal ID: intelligent...
Need help?
Do you have a question about the Pax S900 and is the answer not in the manual?
Questions and answers