
Subscribe to Our Youtube Channel
Related Manuals for TriMark e-ASK UM26

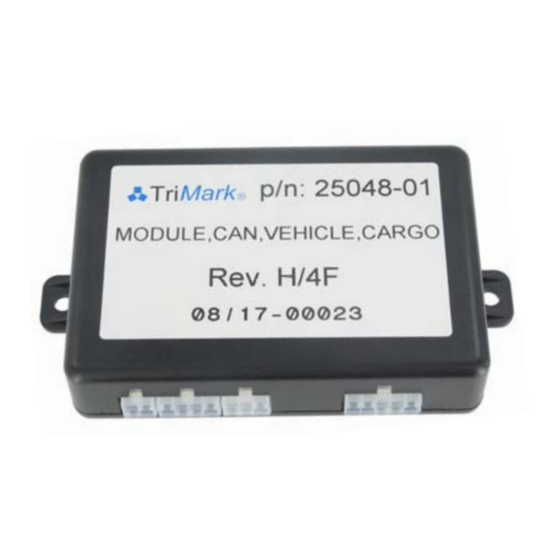
Summary of Contents for TriMark e-ASK UM26
- Page 1 e-ASK lectronic ccess ecurity eyless-entry CAN Multiplex System CAN Multiplex System Installation & Instructions (UM26 ~ 24324-02)
-
Page 2: Table Of Contents
Table of Contents Introduction ................... 1 e-FOB Operation and Features - Standard Mode ...... 2 e-FOB Operation and Features - Cargo Mode ......3 Standard e-PAD Operation and Features ........4 Locking Doors With Keypad ............4 Secure Operations ..............4 Doorbell e-PAD Operation and Features ........ - Page 3 Deactivate Lock Confirmation ........... 10 Door Ajar Warning ..............10 Alarm ..................10 Timed Dome/Porch Light Activation .......... 11 Compartment Light Activation ........... 11 Auxiliary 1 Output Activation ............. 11 Teaching Additional Transmitter FOBs ........11 Teaching Keypad New Authority/Access Codes ...... 13 Assign New Access Codes ............
-
Page 4: Introduction
Introduction This manual provides the necessary information for the proper installation and use of TriMark’s CAN e-ASK system including vehicle module and keypad. The nature of CAN multiplex communications mandates that at least 2 CAN-enabled devices must be connected via a CAN network in order for any of the devices to function. -
Page 5: E-Fob Operation And Features - Standard Mode
e-FOB Operation and Features - Standard Mode Lock button Panic button Auxiliary button Unlock button Button Function Lock Locks doors and arms security system. Unlocks doors and disarms security system. Also Unlock activates the dome light. Activates panic mode when pressed and held for 2 Panic seconds. -
Page 6: E-Fob Operation And Features - Cargo Mode
e-FOB Operation and Features - Cargo Mode Entry Lock Cargo Lock Cargo Unlock Entry Unlock Button Function Entry Lock Locks entry door and arms security system. Unlocks entry door and disarms security system. Entry Unlock Also activates the dome light. Cargo Lock Locks cargo doors and arms security system. -
Page 7: Standard E-Pad Operation And Features
Standard e-PAD Operation and Features The e-PAD is shipped with default Authority and Access Codes. If the OEM or dealer has not changed the default codes, the Authority and Access Codes are: Access code: Digit 1 Digit 2 Digit 3 Digit 4 Digit 5 1 / 2... -
Page 8: Doorbell E-Pad Operation And Features
Doorbell e-PAD Operation and Features Access code: Digit 1 Digit 2 Digit 3 Digit 4 Digit 5 Authority code: Digit 1 Digit 2 Digit 3 Digit 4 Digit 5 Locking Doors With Keypad Press and hold down the (1) button for 1-2 seconds. An Access Code is not needed to lock the doors. -
Page 9: E-Ask Can Dip Switch Configuration
e-ASK CAN DIP Switch Configuration DIP Switches 1-3: The settings of DIP switches 1-3 define CAN address of the IO receiver module. A unique address must be assigned when multiple modules are used on a CAN network. If only one module is used on network then all DIP switches should be set... -
Page 10: Configuration C [Sw 4 Off / Sw 5 On / Sw 6 Off]
Configuration C [SW 4 off / SW 5 on / SW 6 off]: Button (1 / 2) (1): Unlocks all entry door(s) Button (3 / 4) (2): Unlocks all doors assigned to relay bank A Button (5 / 6) (3): Unlocks all doors assigned to relay bank B ... -
Page 11: Configuration D [Sw 4 Off / Sw 5 On / Sw 6 On]
Configuration D [SW 4 off / SW 5 on / SW 6 on]: J1 pin 1: Unlock curb-side compartment doors (banks C-D) J1 pin 2: Unlock driver-side compartment doors (banks A-B) J1 pin 9: Unlock entry door(s) ... -
Page 12: Additional Keyless Entry System Features
Additional Keyless Entry System Features Dome/Porch Light Activation The dome/porch light is activated for a timed duration (5-60 seconds) whenever a keypad button is pressed or when system is unlocked from FOB transmitter or vehicle switch. The time duration is dependent on the trim pot setting. -
Page 13: Lock And Unlock Confirmation
Lock and Unlock Confirmation Standard mode e-FOB: The headlights flash once and the horn honks once with a lock command. On unlock, the headlights flash twice. Cargo mode e-FOB: There is no unlock confirmation. The headlights flash once and the horn honks once when either the entry or compartment doors are locked. -
Page 14: Timed Dome/Porch Light Activation
The following table describes audio/visual activations at various conditions in standard mode. Unlock Lock Outputs Alarm Confirmation Confirmation Siren Not used Not used 1 minute or when shut off Horn 1 chirp 2 chirps Not used 1 flash 2 flashes 1 minute or when shut off Headlights The following table describes audio/visual activations at various... - Page 15 Option 1 (CAN keypad connected to network): 1. Hold the (5 / 6) (3) button of keypad for 5 seconds. The keypad will beep and the LEDs will flash. 2. Enter authority code. The buzzer stays on. 3. Hold (9 / 0) (DB) for 5 seconds. A double-beep plays. 4.
-
Page 16: Teaching Keypad New Authority/Access Codes
Teaching Keypad New Authority / Access Codes IMPORTANT: READ ALL INSTRUCTIONS FOR EACH OPTION AND ALL NOTES BEFORE BEGINNING TO KNOW WHAT TO EXPECT DURING THE PROGRAMMING PROCESS. The Authority Code has only one purpose: it grants the owner sthe ability to set new Access Codes. -
Page 17: Assign New Access Codes
The following area can be used to document the new Authority Code: My New Authority Code Digit 1 Digit 2 Digit 3 Digit 4 Digit 5 Notes: While in “Learn Mode,” each button push provides a double- chirp and the backlight flashes. ... - Page 18 3. Press and release the button that corresponds to the memory bank. For example, press (1 / 2) or (1) button for Memory #1 and press (3 / 4) or (2) button for Memory #2. During this activity you are choosing 1 of 5 (4) memory banks. 4.
-
Page 19: Troubleshooting
Troubleshooting The keypad’s “Yellow Programming Wire”: In order to complete many higher-level reprogramming tasks, access to the keypad’s “yellow programming wire” is required. Access to this wire is usually intentionally restricted and difficult in an effort to detract unauthorized manipulation of the security system. Typically, a vehicle manufacturer will provide an access panel inside the vehicle to allow users with access to the inside of the vehicle relatively unobstructed access to the harness. -
Page 20: Can Error Diagnostic Codes
3. For some problems, the keypad provides five short beeps followed by a pause to indicate a CAN bus error. Make sure that both network wires are intact and connected to all TriMark CAN- enabled devices. -
Page 21: Can Communication Protocol Settings
CAN Communication Protocol Settings: TriMark CAN-enabled devices support two communication protocols on the CAN bus, but only one at a time. Most RVs use the RV-C communication protocol, while all other vehicles use the SAE J1939 protocol. For the control module, changing this setting is described on page 8. -
Page 22: Can Communication Configuration
CAN Communication Configuration In some cases, CAN needs to be disabled for either proper operation or for troubleshooting the system. Follow these instructions for enabling or disabling CAN communication. Disable CAN Communication (module): 1. Disconnect power from module by unplugging the 24-pin connector. -
Page 23: E-Ask Doorbell Mode Configuraiton
5. A single chirp sounds followed by one 1/2-second beep for doorbell mode disabled and two 1/2-second beeps for doorbell mode enabled. 6. If a TriMark vehicle I/O module is recognized on the CAN network, it will be automatically updated to doorbell mode. -
Page 24: Setting The Keypad Can Function Instance (Location)
Setting CAN Keypad Function Instance (Location): The following procedure sets the keypad’s CAN address and identifies the keypad’s location within the vehicle. Each keypad installed in a vehicle must have a unique location. The default function instance is 0. 1. Ground the yellow programming wire for about 2 seconds. The buzzer will sound for 3 seconds and the keypad backlights will flash continuously (See page 16). -
Page 25: More Eask Hints
Problem Description Possible Solution e-FOB Hints Verify RF receiver is powered and active. Button press does not provide correct operation Re-teach the FOB transmitter to the receiver. Move RF receiver away from enclosed metal areas and fully extend antennae. No operation or intermittent Check FOB transmitter battery voltage. -
Page 26: Warrenty Information
Remote transmitter FOBs, batteries, and other equipment subject to normal ear and deterioration may need to be replaced periodically by dealer and/or end user and are not covered by this warranty. TriMark will not be liable for indirect, special, incidental or consequential damages. -
Page 27: Appendix A: Installation And Application Notes
NOT a test light. Most test lights pull too much current, and can cause permanent damage to the control module that is not covered under TriMark’s warranty. I/O signals that are sensitive to excessive current draw are marked with an asterisk on... -
Page 28: Clean +12V Power And Ground
Clean +12V Power and Ground: Inductive devices that may share a circuit or power supply with the keyless entry system can cause noise on the power or ground connections that could cause unexpected behavior in the security system, including artificial brown-outs. Make sure that all electric devices that generate magnetic fields powered by the same power source as the keyless entry system have proper noise suppression in place, such as TVS diodes or properly sized decoupling capacitors to... -
Page 29: Appendix B: Drawing And Wiring Tables
Appendix B: Drawing and Wiring Tables The following tables and diagrams are provided to show connector and pin assignments for the e-ASK CAN Multiplex system. Table 1: Connector and Pin Information Connector Mating Connector Mating Terminal AMP 2-106527-4 AMP 106529-2 for AMP 1-106527-0 18-22 AWG wire AMP 106527-6... - Page 30 Function Pin Location J1 Connector Bank C-D Unlock Input (GND)* Bank A-B Unlock Input (GND)* Compartment Door Ajar Input (GND)* Ground Bank D Lock (Relay 30A) Bank D Unlock (Relay 30A) Vehicle Power Unlock Entry Output (Relay 30A) Unlock Entry Input (Gnd)* Unlock All Input (Gnd)* Lock All Input (Gnd)* Lock Entry Input (Gnd)*...
- Page 31 Function Pin Location J3 Connector Bank C Lock (Relay 25A) Bank B Lock (Relay 25A) Bank A Unlock (Relay 25A) Bank B Unlock (Relay 25A) Bank C Unlock (Relay 25A) Bank A Lock (Relay 25A) J4 Connector External Relay Power (+12V) Horn Output (-500 mA)* Headlight Output (-500 mA)* Auxiliary 1 Output (-500 mA)*...
- Page 32 UM26 24324-02 12/13-4...
Need help?
Do you have a question about the e-ASK UM26 and is the answer not in the manual?
Questions and answers