
Summary of Contents for Game On Sport MEGA PRO
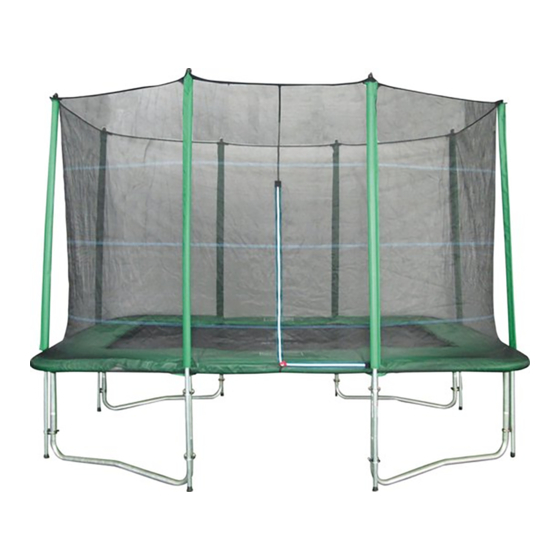
- Page 1 TRAMPOLINE GUIDE Jump for joy SIZE Ø 210 x 300 cm NUMBER OF SPRINGS www.gameonsport.com...
- Page 2 WARNINGS - Max 120 kg - Only one user. Collision hazard - Always close the net opening before practice - Practice without shoes - Do not use the mat when it is wet - Empty pockets and hands before practice - Always jump in the middle of the mat - Do not exit the mat by a jump - Limit the time of continuous usage (make regular stops)
- Page 3 INTRODUCTION Thank you for purchasing our product. Before using this trampoline, please read all information provided in this manual carefully. To reduce the risk of injury, please follow appropriate safety rules and tips. * Misuse and abuse of this trampoline is dangerous and can result in serious injury! * Inspect the trampoline before each use for wear and tear, loose or missing parts.
- Page 4 INFORMATION ON USE OF THE TRAMPOLINE Initially, get accustomed to the feel and bounce of the trampoline. The focus must be on the fundamentals of your body position and you should practice each bounce (the basic bounces) until you can perform each with ease and control ( SEE PAGE 10) To brake a bounce, flex your knees sharply before your feet come in contact with the mat.
- Page 5 ACCIDENT CLASSIFICATION Mounting and Dismounting: Be very careful when getting on and off the trampoline. DO NOT mount the trampoline by grabbing the frame pad, by stepping onto the springs, or by jumping onto the mat from any surface (e.g. a deck, roof, or ladder) as this will increase your risk of injury. DO NOT dismount by jumping off the trampoline.
-
Page 6: Safety Instructions
Poor Maintenance of Trampoline: A trampoline in poor condition will increase your risk of injury. Please inspect the trampoline before each use for bent steel tubes, torn mat, loose or broken springs, and overall stability of the trampoline. Weather Conditions: Please be aware of the weather conditions when using the trampoline. Do not use trampoline if the mat is wet. -
Page 7: Trampoline Placement
TRAMPOLINE PLACEMENT The minimum overhead clearance required is 24 feet (7.3 meters). Ensure that no hazards or obstructions are near the trampoline such as tree branches, swing sets, swimming pools, electrical power wires, walls, fences, etc. Please be aware of the following when selecting a place for your trampoline: Trampoline must be placed on a level surface The area must be well-lit. - Page 8 LESSON PLAN The following lessons are recommended in order to learn basic steps and bounces before moving onto more difficult, complicated bounces. You should read and understand all safety instructions before mounting the trampoline. The basic bounce 1. Start from standing position, feet shoulder width apart and head up and eyes on mat 2.
- Page 9 Front bounce 1. Start with a low bounce 2. Land in prone ( face down) position and keep hand and arms extended forward on mat 3. Push off the mat with arms to return to standing position Figure 4 180 Degrees bounce 1.
- Page 10 Consumer service ( only in the Netherlands) 0900-22 333 00. Please use gloves to protect your hands from pinch points during assembly. Always assemble with two persons! Please select your trampoline and its size. PARTS LIST MEGA PRO TRAMPOLINE RECTANGULAR Parts Description 210 x 300 cm...
- Page 11 STEP 1 – Frame Layout Check that you have received all parts using the relevant illustrations below. These illustrations are a general instruction. All parts with the same part are interchangeable and do not have “right” or “left” orientation, To connect the parts, simply slide a section of tubing into the adjacent section.
- Page 12 STEP 3 - Trampoline Mat Assembly Take care when attaching springs to the trampoline mat. You will need another person to help you with this part of the assembly. ATTENTION-When attaching the Springs, the Connector Points can pinch as the trampoline is tightening up. Lay out the Trampoline Mat (1) inside the frame The white cross and safety labels should be facing upwards How to use the springtool...
- Page 13 Be careful where you place your hands etc. during spring assembly as connector points can pinch! C. The following figure tells you how to connect the springs most easily and tighten the trampoline mat as steady as possible. If you notice that you have skipped a hole and V Ring connection, recount and remove or attach any springs required to maintain the count of springs.
- Page 14 STEP 4 -Safety placard Attachement Using the tie wrap, attach the Safety Instruction Placard (8) to the trampoline. The tie wrap should go around the Vertical Frame joint and the Top Rail to ensure it remains attached. STEP 5 Frame Pad Assembly Assemble the pad by choosing your type below and the following the figures.
-
Page 16: Parts List
ASSEMBLY INSTRUCTION - SAFETY NET Please select your trampoline and its size. PARTS LIST Parts Description 210 x 300 cm Steel Pipe Steel Pipe U-bolt Screw Set Safety Net Spacer Pole Cover Safety Nut Spanner... - Page 17 STEP 1: Connect poles #1 and #2 together as shown in figure 1, ensuring the locking mechanism clicks into place. Pull the foam pole cover into the poles as shown in figure 2. figure 1 figure 2 figure 3 STEP 2: Use the U-bolts (see figure 5).
- Page 18 The screw set must be on the inside, underneath the trampoline. IMPORTANT - Do not attach the upper U-bolt to the “T” piece on the frame. The U-bolt must be located on the leg only. figure 5 Attach the tubes of the net to the trampoline as follows: - insert a spacer between the two legs - pass the U-bolt through the spacer, around the legs of the trampoline and the safety net.
- Page 19 STEP 3: Installation of the net (#5). Locate the panel with the doorway and align the net as to where you would like to get in and out of the trampoline. The edge with the pre-sewn hanging loop is the upper part of the net and will be hooked at the top of the pole. (See B) figure 6...
- Page 20 STEP 4: select your method Attach the end of the hook to the Attach the end of the hook to the V-ring as shown A and B. V-ring as shown in A and B. STEP 5 Hook the net to the V-rings, as shown in figure 7. figure 7...
- Page 21 STEP 6: Attach the net, as is shown in figure 8. For the last hooks, you need force to pull down the net: maybe you have to ask 2 adults for help. The net will fit very tight. figure 8 Now, please check if all attachment hooks are tight.
-
Page 22: Care And Maintenance
CARE AND MAINTENANCE This trampoline was designed and manufactured with quality materials and craftsmanship. With proper care and maintenance, it will provide all jumpers with years of exercise, fun, and enjoyment. Please follow the guidelines below: This trampoline is designed to withstand a specific weight and usage. Ensure only one person uses the trampoline at any one time. - Page 23 DISASSEMBLING THE TRAMPOLINE REMARKS: If you want to disassemble the trampoline, some parts maybe you need a rubber mallet (not supplied). 1. Maybe the leg tubes (#6) with T-section (#4) are very tight, not easy to disassemble. Please use the rubber mallet and hit the top rail (#3).
- Page 24 ACCESSOIRIES Optional accessories are available. Please contact your dealer. Ladder To help mounting and dismounting. with lobsided, non skid steps and rust preventing frame. Pads We offer a wide range of pads, in various qualities and colours.
- Page 25 www.gameonsport.com...
Need help?
Do you have a question about the MEGA PRO and is the answer not in the manual?
Questions and answers