
Related Manuals for V-fit-ST HERCULEAN STB09-4


Summary of Contents for V-fit-ST HERCULEAN STB09-4
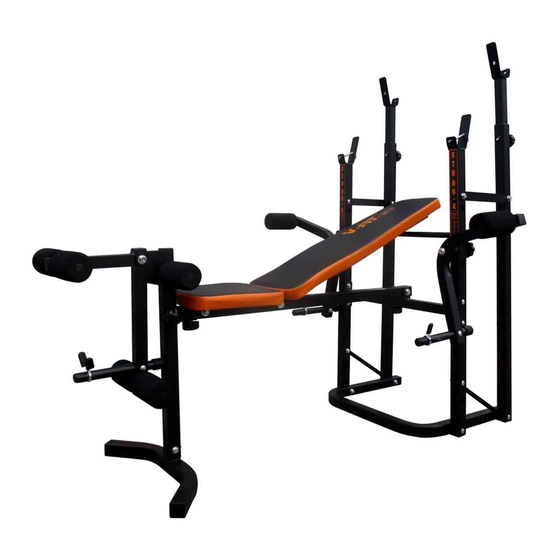
- Page 1 SERIAL NO. AB2632-UK HERCULEAN STB09-4 FOLDING WEIGHT BENCH Assembly & User Manual Please ensure that you read this manual carefully before attempting to assemble or use your new product and retain for future use...
-
Page 3: Table Of Contents
Contents Section Page General Information ..4 Before You Start ..5 Safety ....6 Exercise Information . -
Page 4: General Information
General Information Guarantee Quality This exercise product has been designed and Beny Sports Co. UK Ltd. guarantee's its product manufactured to comply with the latest (BS EN range for DOMESTIC USE ONLY. For specific guarantee periods please consult the 957) British and European Safety Standards. Guarantee Registration Card supplied with your product. -
Page 5: Before You Start
Before You Start Tools To enable you to successfully assemble your product. You will require 1 x 13mm, 2 x 14mm Combination Spanners and 1 x Screw Driver, you may also find it beneficial to have a Soft-Headed Hammer and perhaps an Adjustable Spanner handy as this may help. Prepare the Work Area It is important that you assemble your product in a clean, clear, uncluttered area. -
Page 6: Safety
Safety Before you undertake any programme of exercise that will increase cardiovascular activity please be sure to consult with your doctor. Frequent strenuous exercise should be approved your doctor and proper use of your product is essential. Please read this manual carefully before commencing assembly of your product or star ting to exercise. - Page 7 Exercising Information Beginning How you begin to exercise will vary from person to person. If you have not exercised for a long period of time, have been inactive for a while, or are severely overweight you MUST start slowly, increasing your exercise time gradually, by perhaps only a few minutes for each session per week.
-
Page 8: Exercise Information
Exercising Information Warm Up A successful exercise programme consists of three parts, Warm Up, Aerobic Exercise and Cool Down. Never start a training session without warming up. Never finish one without cooling down correctly. Perform between five and ten minutes of stretching before starting your workout to prevent muscle strains, pulls and cramps. - Page 9 Exercising Information Cool Down To decrease fatigue and muscle soreness, you should also cool down by walking at a slow relaxed pace for a minute or so, to allow your heart rate to return to normal. Warm Up and Cool Down Exercises Hold each stretch for a minimum of ten seconds and then relax.
- Page 10 Exercising Information Basic Aerobic Training Programme For your basic Aerobic Exercise routine we suggest that you try the following. Remember, breathe correctly, exercise at your own pace and do not over-train as injury may result. Week 1 & 2 Exercise 4 minutes at 'A' Rest 1 minute Warm Up 5 - 10 Minutes Exercise 2 minutes at 'A'...
- Page 11 Exercising Information GETTING STARTED You will often read about terms referring to exercise that may be confusing. Below are some of the definitions that are regularly used. Repetition - Commonly referred to as 'REPS'. This is a complete movement from start to finish. Set - This is a complete number of consecutive repetitions.
- Page 12 Exercising Information INTERMEDIATE EXERCISE This is a slightly longer programme which we suggest you use for the next 6 - 8 weeks, to be ideally performed not more than 5 times during the week. This suggested routine is specifically for intermediate users or those that are familiar with exercise routines.
- Page 13 Exercise Notes Page 13...
-
Page 14: Assembly
Assembly ACCESSORY FITMENT LIST The are all the accessories you will need to complete the assembly of your V-fit product. The following accessories are supplied in a pack and should be checked before attempting assembly. Item 47 Item 19 Item 18 Item 68 Item 17 Item 20... - Page 15 Assembly Connect both Uprights (2) to the Upright Support Bar (3) using 4 x M8 x 50mm Carriage Bolts (17) fitted from the inside as per illustration, 4 x M8 Flat Washers (23) and 4 x M8 Nylon Locknuts (26). Place both Uprights (2) on the outside of the Rear Stabiliser (1) and secure in place using 2 x M8 x 85mm Carriage Bolts (19) fitted from the outside, 2 x M8 Flat Washers (23) Note...
- Page 16 Assembly Connect the REAR of the Main Frame (4) to the assembled Uprights using 1 x M10 x 60mm Hex Head Bolt (20), 2 x M10 Flat Washers (25) and 1 x M10 Nyion Locknut (29) bolted from the SIDE. Place an M8 x 90mm Carriage Bolt (44) in the UPPER hole and secure in position using 1 x M8 Flat W asher (23) 1 x M8 Spring Washer (24) and 1 x M8 Locking Knob (Female) (28).
- Page 17 Assembly Connect the Backrest Supports (11) to the Main Frame (4) using the fittings in the following sequence. 1 x M10 x 130mm Hex Bolt (21), 1 x M10 Flat Washer (25), 1 x Backrest Supports (11) 1 x Backrest Support Bushing (32) on one side then 1 x Note 1 x Backrest Support Bushing (32) Backrest Support (11), 1 x M10 Flat Washer (25) and 1 x M10 Nylon Locknut (29).
- Page 18 Assembly Slide a Butterfly Arm Pad Bar (45) into each Butterfly Arm (43) , now slide 1 x Foam Roller (40) onto each Butterfly Arm Pad Bar (45). Fit a Weight Support (14) to each Butterfly Arm using 1 x M8 x 45mm Carriage Bolt (68), 1 x M8 Flat Washer (23) and 1 x M8 Nylon Locknut (26).
- Page 19 Assembly Set a Squat Stand Insert (53) at the desired height in each Squat Stand Tube and secure in place with 1 x M8 Locking Knob (27) for each side. Assembly Accessories 5 PART No. DESCRIPTION ....QTY M8 LOCKING KNOB (MALE) .
- Page 20 Assembly Fit the Preacher Curl Pad (51) to the Preacher Curl (55) using 2 x M6 x 16mm Bolts (15) and 2 x M6 Flat Washers (22). Secure in place at the desired height (after having removed the Leg Extension) using the M8 Locking Knob (Male) (27).
- Page 21 Assembly Slide the Lat Tower Weight Slide (59) onto the Upper Lat Tower Frame (57) now connect the Upper Lat Tower Frame to the Lower Lat Tower Frame (56) using the Lat Tower Central Support (58) with 4 x M8 x 50mm Carriage Bolts (17), 4 x M8 x Flat Washers (23) and 4 x M8 Nylon Locknuts (26).
- Page 22 Assembly Securely tighten ALL bolts and other fixings and your Weight Training Bench is ready to use. Page 22...
- Page 23 Assembly FOLDING THE BENCH FOR STORAGE (FITTED WITH LEG UNIT) Unscrew the REAR M8 Locking Knob (Female) (28) and remove the M8 x 90mm Carriage Bolt (44), M8 Flat Washer (23) and M8 Spring Washer (24). Lift the front of the Main Frame. Remove the Leg Extension Assembly by unscrewing the M8 Locking Knob (Male) (27).
- Page 24 Assembly FOLDING THE BENCH FOR STORAGE (FITTED WITH PREACHER PAD) Unscrew the REAR M8 Locking Knob (Female) (28) and remove the M8 x 90mm Carriage Bolt (44), M8 Flat Washer (23) and M8 Spring Washer (24). Lift the front of the Main Frame. Remove the Arm Curl Assembly by unscrewing the M8 Locking Knob (Male) (27).
- Page 25 Assembly FOLDING THE BENCH FOR STORAGE (FITTED WITH LAT TOWER) Unscrew the REAR M8 Locking Knob (Female) (28) and remove the M8 x 90mm Carriage Bolt (44), M8 Flat Washer (23) and M8 Spring Washer (24). Lift the front of the Main Frame. Remove the Leg Tower Assembly by unscrewing the M8 Locking Knob (Male) (27).
- Page 26 Assembly Page 26...
- Page 27 Assembly SQUARE INTERNAL BUSHING 38mm . . 7 PART No. DESCRIPTION ....QTY FOAM ROLLERS ....8 REAR STABILISER .
- Page 28 Beny Sports Co. UK Ltd. Unit 8, Riparian Way, The Crossings, Cross Hills, West Yorkshire BD20 7BW CUSTOMER SUPPORT is open from 9.00am to 5.00pm from Monday to Friday Tel: 01535 637711 Fax: 01535 637722 E-mail: support@benysports.co.uk Website: www.benysports.co.uk © Copyright BSCL - SEPTEMBER 2016...
Need help?
Do you have a question about the HERCULEAN STB09-4 and is the answer not in the manual?
Questions and answers