Advertisement
Quick Links
2
Smart Thermostat
EN – Replacing a wireless thermostat or installing your first thermostat | Smart Thermostat
FR – Vous remplacez un thermostat sans-fil ou vous installez votre premier thermostat | Thermostat Intelligent
IT – Sostituzione di un termostato wireless oppure installazione del primo termostato | Termostato Intelligente
ES – Sustitución de un termostato inalámbrico o instalación de un primer termostato | Termostato Inteligente
DE – Ersetzen eines drahtlosen Thermostats oder installation Ihres ersten Thermostats | Smart Thermostat
PT – Substituição de um termostato sem foi ou instalação de um termostato pela primeira vez | Termóstato Inteligente
Advertisement

Related Manuals for Starck Netatmo NTH01

Summary of Contents for Starck Netatmo NTH01
- Page 1 Smart Thermostat EN – Replacing a wireless thermostat or installing your first thermostat | Smart Thermostat FR – Vous remplacez un thermostat sans-fil ou vous installez votre premier thermostat | Thermostat Intelligent IT – Sostituzione di un termostato wireless oppure installazione del primo termostato | Termostato Intelligente ES –...
- Page 2 Read these instructions carefully before starting the installation. Lea estas instrucciones detenidamente antes de comenzar la instalación. The Netatmo Thermostat must be installed according to applicable standards. El Termostato Netatmo se debe instalar en conformidad con la normativa vigente. Before any intervention, make sure power is turned off. Antes de realizar cualquier intervención, compruebe que la alimentación The Netatmo Thermostat cannot control electric converters.
- Page 3 To replace a wireless thermostat, you can watch an installation tutorial To install a first thermostat, you can watch an installation tutorial video video online at the following address: online at the following address: Pour remplacer un thermostat sans fil, vous pouvez regardez Pour installer un premier thermostat, vous pouvez regardez une vidéo d’aide à...
-
Page 4: Pack Contents
Pack contents Contenu du pack 4. Adaptateur chaudière 8. Adaptateur secteur* 1. Thermostat 5. Support mural* 9. Adhésif double face 2. Support mobile 6. Plaque murale* 10. 3 piles AAA 3. Relais 7. Adhésifs couleur 11. 4 vis & 4 chevilles *Non utilisé... - Page 5 1/3 Identify the wires 1/3 Identifier les fils Coupez le courant. Ouvrez la porte de votre chaudière. Si nécessaire, retirez le capot de protection en plastique pour accéder à la borne de raccordement. Identifiez les deux connecteurs de l’entrée thermostat de votre chaudière, souvent labellisés Ls-Lr, TA ou RT. Voir les conseils de résolution de problème p.
- Page 6 2/3 Identify the wires 2/3 Identifier les fils Si vous remplacez un thermostat sans-fil, retirez votre ancien relais de thermostat. Si vous installez votre premier thermostat, vous devez peut-être retirer le pont entre les deux connecteurs thermostat. Branchez les fils noir et gris de l’adaptateur chaudière sur l’entrée thermostat que vous avez identifiée (pas de polarité).
- Page 7 3/3 Identify the wires 3/3 Identifier les fils Identifiez les connecteurs d’alimentation 220/230V ; ils portent généralement les indications P/N ou L/N. Connectez le fil bleu de l’adaptateur chaudière au terminal N de votre chaudière, puis connectez le fil marron au terminal P ou L. Si des fils sont déjà...
- Page 8 Set the Relay Fixez le Relais L’adaptateur chaudière doit être éloigné autant que possible d’éléments métalliques (tableau électrique, tuyaux, câblages…). Vous pouvez fixer l’adaptateur chaudière à l’aide de l’adhésif double face ou le visser. The boiler adaptor should be placed Fissare il Relè...
- Page 9 Test the Relay Testez le Relais 1. Connectez le Relais sur l’adaptateur chaudière. 2. Rétablissez le courant. 3. La LED du Relais clignote. Voir les conseils de résolution de problème p. 31 pour plus d’aide. Connect the Relay into the boiler adaptor.
- Page 10 Test the Relay Testez le Relais 4. Appuyez brièvement sur le bouton du Relais. 5. La LED du Relais émet une lumière et la chaudière s’allume. 6. Appuyez de nouveau sur le bouton du Relais. 7. La LED du Relais s’éteint et la chaudière s’arrête. Voir les conseils de résolution de problème p.
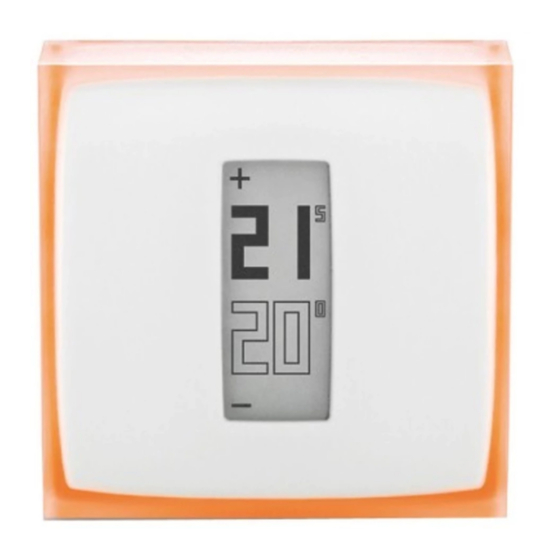
- Page 11 Prepare the Thermostat Préparez le Thermostat 1. Insérez les piles dans le Thermostat en respectant la polarité. 2. Le Thermostat affi che l’écran de démarrage ci-contre, et recherche le Relais. 3. Quand le Thermostat a trouvé le Relais, il affi che la température de consigne (haut) et la température mesurée (bas).
- Page 12 Customise your Thermostat Personnalisez votre Thermostat 1. Vous pouvez choisir de personnalisez votre Thermostat avec l’un des adhésifs couleur. 2. Décollez le cadre extérieur de l’adhésif. 3. Collez-le sur l’arrière du Thermostat. You can choose to customize your Thermostat by using one Personalizzare il suo Termostato of the colour adhesives.
- Page 13 Set the Thermostat Fixez le Thermostat Fixez le Thermostat sur son support mobile et placez-le sur un meuble dans la pièce à vivre, ou fixez-le au mur à l’aide de son support mural en le vissant. Le Thermostat doit être placé à plus d’un mètre des ouvertures, et loin des sources de chaleur et de froid.
- Page 14 Test the Thermostat Testez le Thermostat 1. Appuyez plusieurs fois sur le haut du Thermostat jusqu’à ce qu’il affi che « MAX ». Le Thermostat allume la chaudière. 2. Appuyez sur le bas du Thermostat jusqu’à ce qu’il affi che « OFF ». Le Thermostat éteint la chaudière.
- Page 15 Download the Netatmo Energy mobile app Téléchargez l’application mobile Netatmo Energie Pour piloter votre Thermostat à distance depuis votre smartphone ou tablette, rendez-vous sur : Scaricare l’applicazione mobile Energy Netatmo Per controllare a distanza il Termostato dal proprio smartphone o tablet, visitare il sito: Descárgate la aplicación de móvil Energy Netatmo Para controlar el Termostato a distancia desde tu smartphone o tableta, consulta: Netatmo Energy...
- Page 16 EN – Installation troubleshooting FR – Résolution des problèmes d’installation Page Problem Possible causes Solutions Page Problème Causes possibles Solutions Use your boiler manual. They Utilisez le manuel de votre chau- Je n’arrive pas à identifier I can’t identify the room thermostat may be identifiable thanks to a dière.
- Page 17 IT – Risoluzione dei problemi di installazione ES – Solución de problemas durante la instalación Pagina Problema Possibili cause Soluzioni Página Problema Posibles causas Soluciones Usare il manuale della caldaia. Use el manual de la caldera. Non riesco a individuare i No puedo identificar los terminales Possono essere identificabili Pueden ser identificables gracias...
- Page 18 DE – Installation Fehlersuche PT – Conselho de instalação Seite Problem Mögliche Ursachen Lösungen Página Problema Causas possíveis Soluções Verwenden Sie dasKesselhand- Use o manual da caldeira. Eles Ich kann die Raumthermosta- Não consigo identificar os buch. Sie sind dank eines Shunts podem ser identificáveis graças tanschlüsse meines Heizkessels p.
- Page 19 support.netatmo.com Copyright Netatmo © 2020 All rights reserved. Reproduction and distribution prohibited without written authorization from Netatmo Apple and the Apple logo are trademarks of Apple Inc., registered in the U.S. and other countries. App Store is a service mark of Apple Inc., registered in the U.S.
-
Page 20: Smart Thermostat
Smart Thermostat EN – Replacing a wall-mounted thermostat | Smart Thermostat FR – Vous remplacez un thermostat filaire | Thermostat Intelligent IT – Sostituire un termostato a parete | Termostato Intelligente ES – Sustitución de un termostato montado en la pared | Termostato Inteligente DE –... - Page 21 Read these instructions carefully before starting the installation. Lea estas instrucciones detenidamente antes de comenzar la instalación. The Netatmo Thermostat must be installed according to applicable standards. El Termostato Netatmo se debe instalar en conformidad con la normativa vigente. Before any intervention, make sure power is turned off. Antes de realizar cualquier intervención, compruebe que la alimentación The Netatmo Thermostat cannot control electric converters.
- Page 22 To replace a wall-mounted thermostat, you can watch an Puedes ver en línea un tutorial de sustitución de un ter- installation tutorial video online at the following address: mostato montado en la pared en la siguiente dirección: Für den Austausch eines wand-montierten Thermostats Pour remplacer un thermostat filaire, une vidéo d’aide können Sie sich eine Video-Installationshilfe unter folgender à...
- Page 23 Pack contents Contenu du pack 4. Adaptateur chaudière* 8. Adaptateur secteur 1. Thermostat 5. Support mural 9. Adhésif double face* 2. Support mobile* 6. Plaque murale 10. 3 piles AAA 3. Relais 7. Adhésifs couleur 11. 4 vis & 4 chevilles *Non utilisé...
- Page 24 Plug the Relay Branchez le Relais 1. Connectez l’adaptateur secteur sur le Relais. 2. Branchez le Relais dans la pièce où se trouve votre thermostat actuel. 3. La LED du Relais clignote. 4. Coupez le courant. Collegare il Relè 1. Collegare l’alimentatore al relè. 2.
-
Page 25: Identify The Wires
Identify the wires Identifiez les fils 1. Retirez le boitier de votre ancien thermostat. Prenez une photo du câblage. 2. S’il n’y a que deux fils, ce sont les fils de contrôle. S’il y a plus de deux fils, repérez les deux fils de contrôle à... - Page 26 Replace Remplacez le Thermostat 1. Débranchez votre ancien thermostat et retirez le du mur. 2. Faites passer les fils à travers le support mural et vissez-le au mur. Utilisez la plaque murale pour masquer d’éventuels anciens trous de fixation. Disconnect your old thermostat. 3.
- Page 27 Customise your Thermostat Personnalisez votre Thermostat 1. Vous pouvez choisir de personnalisez votre Thermostat avec l’un des adhésifs couleur. 2. Décollez le cadre extérieur de l’adhésif. 3. Collez-le sur l’arrière du Thermostat. You can choose to customize your Thermostat by using one Personalizzare il suo Termostato of the colour adhesives.
- Page 28 Set the Thermostat Fixez le Thermostat 1. Insérez les piles dans le Thermostat en respectant la polarité. 2. Fixez le Thermostat sur le support mural. 3. Rétablissez le courant. Insert the batteries in the Thermostat Fissare il Termostato ensuring the positive and negative ends 1.
- Page 29 Set the Thermostat Fixez le Thermostat 4. Le Thermostat affi che l’écran de démarrage, et recherche le Relais. 5. Quand le Thermostat a trouvé le Relais, il affi che la température de consigne (haut) et la température mesurée (bas). Voir les conseils de résolution de problème p. 25 pour plus d’aide. Fissare il Termostato 4.
- Page 30 Test the Thermostat Testez le Thermostat 1. Appuyez plusieurs fois sur le haut du Thermostat jusqu’à ce qu’il affi che « MAX ». Le Thermostat allume la chaudière. 2. Appuyez sur le bas du Thermostat jusqu’à ce qu’il affi che « OFF ». Le Thermostat éteint la chaudière.
- Page 31 Download the Netatmo Energy mobile app Téléchargez l’application mobile Netatmo Energie Pour piloter votre Thermostat à distance depuis votre smartphone ou tablette, rendez-vous sur : Scaricare l’applicazione mobile Energy Netatmo Per controllare a distanza il Termostato dal proprio smartphone o tablet, visitare il sito: Descárgate la aplicación de móvil Energy Netatmo Netatmo Energy Para controlar el Termostato a distancia desde tu smartphone o tableta, consulta:...
- Page 32 EN – Installation troubleshooting FR – Résolution des problèmes d’installation Page Problem Possible causes Solutions Causes possibles Page Problème Solutions Please send a picture to photo@ I cannot identify the control wires netatmo.com and our support Envoyez une photo à l’adresse p.
- Page 33 IT – Risoluzione dei problemi di installazione ES – Solución de problemas durante la instalación Pagina Problema Possibili cause Soluzioni Página Problema Posibles causas Soluciones Enviar una imagen a Inviare una foto a photo@netatmo. photo@netatmo.com para que Non riesco a identificare i cavi com e al nostro team assistenza No identifico los cables de control p.
- Page 34 DE – Installation Fehlersuche PT – Conselho de instalação Seite Problem Mögliche Ursachen Lösungen Página Problema Causas possíveis Soluções Em caso de dúvida, envie uma Senden Sie ein Bild an Ich kann die Steuerleitungen Se existirem mais de dois fios, os fotografia para photo@netatmo.
- Page 35 Notes...
- Page 36 support.netatmo.com Copyright Netatmo © 2020 All rights reserved. Reproduction and distribution prohibited without written authorization from Netatmo Apple and the Apple logo are trademarks of Apple Inc., registered in the U.S. and other countries. App Store is a service mark of Apple Inc., registered in the U.S.
- Page 37 Smart Thermostat Netatmo Thermostat NTH01 Important Product Information Guide Български: Важно информационно Lietuvių: Svarbus produkto informacijos vadovas Ръководство за продукта Nederlands: Belangrijke gids voor productinformatie Česky: Důležitý informační průvodce výrobkem Malti: Panduan Maklumat Produk Yang Penting Dansk: Vejledning med vigtige Magyar: Fontos termékadat útmutató...
- Page 38 Setup and Compatibility Setup and compatibility Instalación y compatibilidad Compatible with gas, oil, wood-fired boilers and heat pumps Compatible con calderas de gas, fuel, madera y bombas de calor Dry contact Themostat and Relay, potential free (ON/OFF) Termostato y Relé de contacto seco, libre de potencial (ON / OFF) Switching current: max 4 (1) A Corriente de conmutación : máximo 4 (1) A Switching voltage: max 250 VAC...
- Page 39 HomeKit Controlling this HomeKit-enabled accessory automatically and away Controlar este accesorio con HomeKit habilitado automáticamente from home requires an Apple TV with tvOS 10 or later or an iPad y desde fuera de casa requiere una Apple TV con tvOS 10 o posterior with iOS 10 or later set up as a home hub.
- Page 40 HomeKit legal notice HomeKit legal notice Aviso legal HomeKit Use of the Works with Apple HomeKit logo means that an electronic accessory El uso del logotipo de HomeKit significa que un accesorio electrónico ha sido has been designed to connect specifically to iPod, iPhone or iPad, respectively, diseñado para conectarse específicamente a un iPod, iPhone o iPad, respec- and has been certified by the developer to meet Apple performance standards.
-
Page 41: Safety Warnings
Safety Warnings EN - Safety warnings ES - Advertencias de seguridad This device must be installed according to the applicable norms. Use only with supplied power plug adaptor. Este dispositivo se debe instalar en conformidad con la normativa vigente. Utilizar solamente con el adaptador This device is for indoor use only. - Page 42 Europe EU Declaration of Conformity Česky [Czech] - Netatmo tímto prohlašuje, že tento NTH01 je ve shodě se základními požadavky a dalšími příslušnými Français [French] - Par la présente Netatmo déclare que l’appareil NTH01 est conforme aux exigences essentielles et aux ustanoveními směrnice 2014/53/UE a ROHS 2011/65/ES.
- Page 43 Europe EU Declaration of Conformity Magyar [Hungarian] - Alulírott, Netatmo nyilatkozom, hogy a NTH01 megfelel a vonatkozó alapvetõ követelményeknek és az Slovensky [Slovak] - Netatmo týmto vyhlasuje, že NTH01 spĺňa základné požiadavky a všetky príslušné ustanovenia Smernice 2014/53/UE i ROHS 2011/65/EC irányelv egyéb elõírásainak. 2014/53/UE a ROHS 2011/65/ES.
-
Page 44: Erp Directive
ErP directive Български [Bulgarian] Енергийни продукти, Директива EП (directive ErP 2009/125/CE) Nederlands [Dutch] ErP-richtlijn voor energiegerelateerde producten (ErP 2009/125/CE • Клас на регулирането на температурата: IV • Categorie van de temperatuurcontrole: IV • Принос на регулатора на температурата за енергийната ефективност на сезонното отопление: 2% •... - Page 45 Notes...
- Page 46 Notes CE marking is the manufacturer’s declaration that the product meets the requirements of the applicable EC directives. WEEE symbol designates safe and responsible collection, recycling and recovery procedures for all types of electronic waste. Recycling Universal recycling symbol M/N : Model number...
- Page 47 support.netatmo.com M/N : NTH01 Copyright Netatmo © 2020 All rights reserved. Reproduction and distribution prohibited without written authorization from Netatmo Apple and the Apple logo are trademarks of Apple Inc., registered in the U.S. and other countries. App Store is a service mark of Apple Inc., registered in the U.S.
Need help?
Do you have a question about the Netatmo NTH01 and is the answer not in the manual?
Questions and answers