
Related Manuals for Jack Wolfskin ELLOWSTONE VENT II


Summary of Contents for Jack Wolfskin ELLOWSTONE VENT II
- Page 1 YELLOWSTONE II-III VENT / SQUAMISH II-III Gebrauchsanleitung Tent Manual Notice de Montage N60689_Yellowstone_134099_Instruction_Sheets_130813_rz.indd 1 13.08.13 16:46...
- Page 2 Abbildungen der Aufbauanleitung können vom aktuellen Produkt abweichen. At JACK WOLFSKIN we are continually improving and upgrading our products. We therefore reserve the right to make changes to individual components. Diagrams used for the pitching instructions may differ slightly from the actual product.
- Page 3 BELÜFTUNG VENTILATON Ihr Zelt ist mit ausreichenden Belüftungs-Möglich- Your tent is equipped with sufficient ventilation keiten ausgestattet. Sorgen Sie immer für eine gute options. Try to ensure that there is always a good Luftzirkulation, um die Gefahr der Kondenswasser- flow of air through the tent to reduce the risk of Bildung zu vermindern.
- Page 4 SCHRITT 1 STEP 1 Beim ersten Aufbau: Sie sollten Ihr neues Zelt erst Pitching your tent for the first time: We recommend einmal probeweise aufbauen und sich vor Antritt you to do a dry run with your new tent in order to der ersten Reise mit allen Aufbauschritten vertraut familiarise yourself with all the pitching instructions machen.
- Page 5 ÉTAPE 1 Lors du premier montage : Avant d’entamer votre voyage, il est conseillé tout d’abord de procéder au montage de votre nouvelle tente, afin de vous fami- liariser avec les différentes étapes de montage. Choisissez d’abord un emplacement adapté pour votre tente (1) et enlevez tous les objets pointus qui pourraient endommager le sol de la tente.
- Page 6 SCHRITT 2 STEP 2 Legen Sie das verbundene Stangenkreuz über das Spread out the inner tent and lay the linked pole ausgebreitete Innenzelt. Achten Sie dabei darauf, frame work on top. Ensure that the T-shaped connec- dass das T-förmige Verbindungselement am Kunst- tor piece located on the plastic cross joint points stoff-Kreuzgelenk nach unten zum Innenzelt zeigt (1).
- Page 7 ÉTAPE 2 Disposez les arceaux croisés assemblés sur la tente intérieure étalée à plat. Veillez à ce que le raccord en forme de T, au niveau du croisillon en plastique, pointe vers le bas en direction de la tente intérieure (1).
- Page 8 SCHRITT 3 STEP 3 45° Fixieren Sie das Innenzelt an den Bodeneckpunkten Anchor the inner tent at the bottom corners with pegs mit Heringen (1). (1). Schieben Sie die kurze Dachstange B durch den Stan- Slide the short roof pole through the pole channel genkanal am Außenzelt und fixieren Sie die spitzen on the flysheet and slot the pointed end tips into the Dachstangenenden in die Bandösen an den Ecken der...
- Page 9 ÉTAPE 3 Fixez la tente intérieure au sol avec des sardines (1). Glissez l’arceau court du toit dans le fourreau de la tente extérieure et fixez-le en plaçant les extrémités pointues dans les oeillets situés sur les sangles aux coins de la tente extérieure (2). Posez à présent la tente extérieure avec l‘arceau du toit sur la tente intérieure (3) et fixez-la avec les velcros prévus à...
- Page 10 SCHRITT 4 STEP 4 Fixieren Sie nachfolgend alle vier Ecken des Über- Attach all four corners of the flysheet to the corre- zeltes an den jeweiligen Bodeneckpunkten des sponding corners of the inner tent by clicking each Innenzeltes. Dazu jeweils den Kunststoffclip in den plastic clip into its respective pole foot.
- Page 11 ÉTAPE 4 Fixez ensuite tous les quatre points de fixation de la tente extérieure aux fixations respectives au sol de la tente intérieure. Pour ce faire, accrochez les clips en plastique respectifs sur les traverses plastiques prévu à cet effet, situées au-dessus du logement des arceaux. Mettez à...
- Page 12 FALTANLEITUNG FOLDING INSTRUCTIONS Achten Sie beim Abbau unbedingt darauf, die When dismantling the tent, please release the flysheet Spannung des Außenzeltes zu lösen, bevor Sie die before removing the ceiling pole. In order to simplify Dachstange entnehmen. Um das Einpacken und the packing and future pitching procedures, roll the den nächsten Aufbau zu erleichtern, fassen Sie die guy lines up as short as possible and take note of the...
- Page 13 INSTRUCTIONS DE PLIAGE Pour démonter la tente, veillez absolument à retirer la tension de la tente extérieure avant d’enlever l’arceau du toit. Afin de simplifier le rangement et un futur montage, roulez les haubans au plus court et suivez les étapes suivantes : Pliez la tente extérieure séparément en rabattant les apsides vers l’intérieur et en repliant la tente deux fois dans le sens de la longueur (1).
- Page 14 JACK WOLFSKIN übernimmt keine Garantie für Schä- the tarp to intensive sunlight for extended periods of den durch UV-Strahlung. time. JACK WOLFSKIN will not assume any liability for damage caused by ultraviolet light. RÉPARATIONS Un kit de réparation pour les petites répara tions en voyage est fourni.
- Page 15 NOTES WEITERE TIPPS ADDITIONAL TIPS Correct initial tensioning of the poles, the flysheet Die stramme Grundspannung der Stangen, des Über- zeltes und der Abspannleinen ist die Voraussetzung and the guy lines are the pre requisites for a secure pitch and optimum wind stability. Check that the für besten Stand und Sturmstabilität Ihres Zeltes.
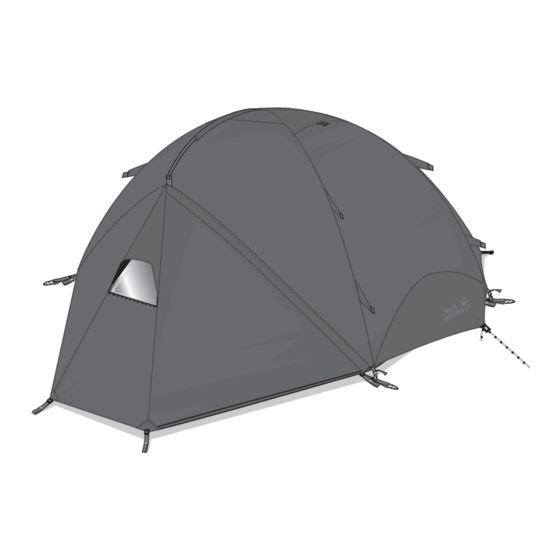
- Page 16 YELLOWSTONE II-III VENT/SQUAMISH II-III sind YELLOWSTONE II-III VENT/SQUAMISH II-III are classic klassische 2-Bogen-Kuppelzelte für 2-3 Personen mit 2-3 person dome tents with innovative JACK WOLFSKIN innovativen JACK WOLFSKIN Details. Die zusätzliche details. The additional roof pole can be used to rig...
Need help?
Do you have a question about the ELLOWSTONE VENT II and is the answer not in the manual?
Questions and answers