JAYLINE IS550 Installation & Operation Instructions
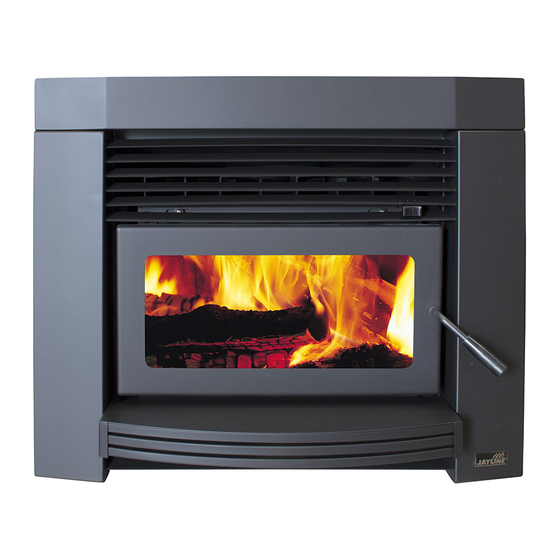
Insert wood fire
Hide thumbs
Also See for IS550:
- Installation & operation instructions (17 pages) ,
- Installation instructions manual (15 pages)

Related Manuals for JAYLINE IS550

Summary of Contents for JAYLINE IS550
- Page 1 JAYLINE IS550 INSERT WOOD FIRE INSTALLATION & OPERATION INSTRUCTIONS Please leave this information with the appliance NOVEMBER 2016...
-
Page 2: Product Registration
RETAIL LINKS LTD PO BOX 9056 ANNESBROOK, 7044 NELSON NAME: ________________________________________________________________________ ADDRESS: ____________________________________________________________________ ______________________________________________________________________________ ______________________________________________________________________________ EMAIL: ________________________________________ PHONE: ________________________ MODEL: ______________________________________________________________________ SERIAL NUMBER: ______________________________________________________________ DATE PURCHASED: ____________________________________________________________ PURCHASED FROM: ____________________________________________________________ DATE INSTALLED: ______________________________________________________________ INSTALLED BY: ________________________________________________________________ www.jayline.co.nz page 2 NOVEMBER 2016... -
Page 3: Pre-Installation
Check the cavity dimensions to ensure the insert will t. It is usually necessary to remove the bricks from the lower replace cavity. The base of the replace on which the Jayline Insert will rest must be level. If not, it should be leveled using mortar. -
Page 4: Installation
Installation requirements for Jayline IS550 replace insert and ue system, where timber framing is less than 50mm from the chimney structure. The installation should be carried out by a suitably quali ed installation technician who will ensure the following: The minimum clearances determined by tests in accordance with AS/NZS 2918:2001 are complied with to prevent overheating of nearby combustibles. - Page 5 The appliance can then be bolted to the oor protector with two 6mm x 50mm dynabolts (or equivalent). BAFFLE Before lighting your appliance for the rst time, make sure the ba e is in the correct position being as far to the rear as possible. www.jayline.co.nz page 5 NOVEMBER 2016...
- Page 6 WRITING BY THE TESTING AUTHORITY IS CONSIDERED TO BE IN BREACH OF THE APPROVAL GRANTED FOR COMPLIANCE WITH AN/NZS 4013:1999. 3. PLEASE ENSURE THAT ONLY COMPONENTS APPROVED BY JAYLINE ARE USED FOR THE INSTALLATION as substitutes may adversely a ect performance and might nullify compliance with the requirements of AS/NZS 2918:2001.
- Page 7 CORRECT OPERATION OF YOUR JAYLINE WOOD FIRE Simply by burning your Jayline re correctly, you can improve e ciency, reduce fuel consumption and minimise air pollution. Please note: Wood with a moisture content of 25% or less is the only approved wood to use in Clean Air Zones.
- Page 8 Placing the pieces on the burning kindling can help prevent smothering. Your Jayline heater requires approximately 45-60 minutes to preheat the steel rebox before it can e ectively emit heat into the room. A well maintained, hot re will reduce the preheat cycle.
- Page 9 AS VIEWED FROM DOOR Fire in cycles: Don’t expect perfectly steady heat output from your Jayline heater. Solid fuel heaters burn in cycles. A cycle is the time between the ignition of a load from charcoal and the consumption of the load back to a coal bed.
- Page 10 The exhaust coming from the top of the ue system should be clear or white. A plume of blue or grey smoke indicates smouldering, ine cient combustion, air pollution and probably low operating temperatures. www.jayline.co.nz page 10 NOVEMBER 2016...
- Page 11 Correctly installed and operated, Jayline solid fuel heaters do not spill smoke into the house. There are three main reasons why some woodstoves smoke: Bad installation design: Incorrect ue installation, resulting in low ue temperatures and low draught, can make a wood heater more likely to spill smoke. For example, each elbow in the ue pipe assembly slows down the ow of gases and causes a small restriction to ow.
-
Page 12: Burning Coal
(6 in.) across the largest dimension and a range of smaller pieces will be needed for e ective stoking. Maximum log length varies according to model. BURNING COAL Due to their construction, the burning of coal in Jayline solid fuel heaters is prohibited. Please also refer to ‘Exclusions’ in the Warranty Page 16. www.jayline.co.nz... - Page 13 General maintenance checks should include the following:- ASH REMOVAL – Due to the high e ciency of your Jayline re, ash removal should only be necessary every few weeks. Ashes can be removed easily through the re door when the re is at its lowest, such as rst thing in the morning, or when it is completely out.
- Page 14 Flue pipes can deteriorate very quickly with incorrect ring. CONSUMABLES Some parts of your Jayline re are considered consumable. They are designed to be replaced as they will degrade over time. The life of the consumables will vary depending on;...
- Page 15 WARNINGS Below is a list of warnings to ensure e cient and safe operation of your Jayline wood re: • WARNING: DO NOT USE FLAMMABLE LIQUIDS OR AEROSOLS TO START OR REKINDLE THE FIRE. WARNING: DO NOT USE FLAMMABLE LIQUIDS OR AEROSOLS IN THE VICINITY OF THIS APPLIANCE •...
- Page 16 We select only certain companies to act as our Jayline dealers. They must have high standards and be able to provide a total service both pre and post sale to you the customer. Therefore we have every con dence that our dealers will be able to answer your questions or x any problem that may occur.
- Page 17 All claims (in the rst instance) should be directed to the store of purchase. Any repairs undertaken without the manufacturer’s authority will render the guarantee void. Water boosters must be a Jayline model speci ed with the re to be covered; this guarantee applies to the original purchaser only.
Need help?
Do you have a question about the IS550 and is the answer not in the manual?
Questions and answers