
Related Manuals for Dillenger Comfort


Summary of Contents for Dillenger Comfort
- Page 1 Comfort User Manual English Please read through carefully before riding your new Comfort...
-
Page 2: Thankyou
Thankyou for purchasing the Dillenger Comfort! We know you’ll love it, and with some care it should last for a very long time. Please read through this manual carefully before operating the bike. SAfEtY Helmet: Always wear an approved helmet when riding your Dillenger electric bike and follow the helmet manufacturer’s instructions for fit, use and care of your helmet. -
Page 3: Item Check List
Before you set up your bike, it can be helpful to lay everything out first and make sure all the ● parts are there. Something damaged or broken? Snap some photos and send them along to Dillenger and ● we’ll sort it out for you. -
Page 4: Table Of Contents
Contents thankyou SAfEtY Item check list Quick start guide Parts of tHE BIkE Safety warning SEtuP Seat Installing the Front Wheel Handlebars Pedals Brakes Removing the Front Wheel Removing the Rear Wheel Tyres Wheels Repairing a Puncture Folding the Bike Suspension Lights Drivetrain... -
Page 5: Quick Start Guide
QuICk StArt guIdE remove Bike Take your bike out of its box. Check the box for the additional parts such as chargers, or any parts that may have come loose in shipping. Remove the protective packaging and any zip ties that secure the bike for transit. Keep track of all the parts that you remove from the box and bike. -
Page 6: Parts Of The Bike
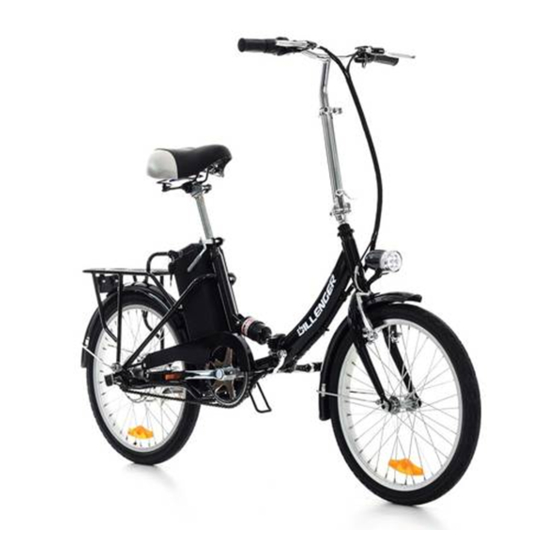
PArtS of tHE BIkE Below are some of the main components of the Dillenger Comfort Handlebar Height Adjustment Handlebar Folding Joint Rear Rack Seat Adjustment Battery Switch Frame Folding Joint Pedals Motor Chainwheel Bike Stand... -
Page 7: Safety Warning
SAfEtY WArNINg Safety first! Always wear an approved helmet when riding your Dillenger electric bike and follow the helmet manufacturer’s instructions for fit, use and care of your helmet. mechanical Safety Check Routinely check the condition of your bike before every ride. Make sure no nuts, bolts or spokes are loose. -
Page 8: Setup
It is important to be comfortable while riding, with this in ● mind the Dillenger Comfort is fitted with a plush double- sprung saddle. The height of the saddle can be adjusted by undoing the fastening bolt, moving the seat to the desired height, then re-fastening the bolt. -
Page 9: Handlebars
Handlebars The handlebars on the Dillenger Comfort are adjustable for ● height and foldable to reduce the stored size. ● Depending on how the bikes were packed the bike may arrive without the handlebar folding joint inserted into the frame. Fitting it is very simple. When in the upright position, the tightening bolt for the folding joint is hidden. -
Page 10: Brakes
Brakes front V-Brake ● To adjust the brakes, loosen the clamp that holds the brake cable with an Allen key. ● Hold each arm in towards the rim of the wheel and pull the loose brake cable through the clamp. Once you have pulled the cable tight, use an Allen ●... -
Page 11: Removing The Front Wheel
Wheel Removing the rear wheel is slightly more involved than the front wheel. Because of this Dillenger highly recommends riding with the correct pressures in the tyres as it greatly reduces the risk of getting a puncture. If you do suffer a puncture it can be easier to repair the puncture without removing the rear wheel. -
Page 12: Tyres
tyres The inflation pressure of the tyres is very important and has a big impact on the performance and range of any electric bike. Before riding check that the pressure is in-between the recommended pressure written on the sidewall of the tyre. If the tyre is bald or the tread has worn down, replace the tyre immediately as you could get a puncture or loose traction and fall. -
Page 13: Repairing A Puncture
If the valve is functioning properly but the tyre still loses air, then unfortunately you have a puncture. With the proper repair tools, such as the Dillenger repair toolkit this can be fixed swiftly in 6 steps. In some cases the tube can be repaired without removing the wheel from the bike. -
Page 14: Folding The Bike
Bike The Dillenger Comfort conveniently folds so that it can be put in the boot of a car, taken on a bus or train, or taken away in a caravan. Folding takes only seconds and can be completed in a few easy steps. -
Page 15: Suspension
Tighten the shock and make sure all the bolts are tight. soft lights The Comfort is fitted with a built in headlight. This unit is powered off of the main battery and is switched on an off by a button found next to the left hand handlebar grip. Press the button to turn the light on, and press it again to turn the light off. -
Page 16: Drivetrain
The Dillenger Comfort is fitted with a single- speed sprocket; there is a specific way to tighten the chain. It is essential that the chain has the correct tension. If the chain is too tight, it will require extra force to get the bike moving. -
Page 17: Motor
The motor on the Dillenger Comfort features a planetary gearbox paired with a brushless motor to increase the available torque while providing smooth and quiet operation and a lifetime of maintenance free use. The motor can be activated by two means:... -
Page 18: Battery
Battery The battery and drive system on the Dillenger Cheetah is designed to be robust and reliable and provide years of service. The system is also designed to be easy to use. To turn the system on, insert the key into the top of the battery and turn it clockwise. - Page 19 The batteries do not get a memory effect, so the battery can be “topped off” after short rides without damaging the battery. Dillenger recommends the battery be charged regularly. If the bike is stored for a long period the battery should be charged every few weeks. Failure to do so could see the battery loose charge which if left for a long period, can dramatically reduce the capacity of the battery.
-
Page 20: Lithium Battery (Option)
BAttErY (oPtIoN) The lithium powered version of the Dillenger Comfort features a few upgrades over the standard model, the main difference being the lithium battery. The lithium battery has a much higher energy density when compared with older technologies such as lead-acid. This means that the lithium battery is much lighter for the same amount of stored electricity. - Page 21 Do this by removing the battery from the bike. Use only the charger provided with your Dillenger Comfort or an identical original Dillenger charger. Only this charger is matched to the lithium-ion battery pack used in your Dillenger Comfort.
- Page 22 The lithium equipped Dillenger Comfort is fitted with an LED display on the handlebars. This provides a few extra features than the standard model. To turn the bike on, turn the switch on the battery on (clockwise), then press and hold the ON/ OFF button for 1 second.
-
Page 23: Bottom Bracket, Cranks And Pedals
Bottom Bracket, Cranks and Pedals The pedals of your bike are attached via cranks to the bottom bracket; these bearings are lubricated by grease. Most of the time the grease only needs to be changed every few years, however with frequent riding it may need to be cleaned out and replaced more often. -
Page 24: Maintenance Of The Frame
maintenance of the frame Proper maintenance prolongs the service life of your new bike. Therefore it is wise to regularly check it or have it checked and keep it clean. It’s best to use a brush that is not too stiff. With that you can clean off the worst of the dirt. -
Page 25: Specifications
SPECIfICAtIoNS general model (year) Comfort (2015) designation Folding Electric Bike main use Commuting and recreation Nominal Power 250W Cruise Speed 20km/h max Speed 25km/h max rider Weight 120kg max range 50km Battery Battery Chemistry Sealed Lead Acid (dry cell) Nominal Battery Voltage... -
Page 26: Contact Us
CoNtACt uS dillenger HQ 3/13 olympic Circuit Southport Qld 4215 AuStrAlIA Tel.: +617 5532 9235 dillenger.zendesk.com www.dillengerelectricbikes.com 3/13 olympic Circuit, Southport, Queensland 4215 Australia Tel.: +61 7 5532 9235 dillenger.zendesk.com ● www.dillengerelectricbikes.com © Dillenger 2015...
Need help?
Do you have a question about the Comfort and is the answer not in the manual?
Questions and answers