Table of Contents
Advertisement
Quick Links
Advertisement
Table of Contents

Related Manuals for Martin MAC 401 Dual

Summary of Contents for Martin MAC 401 Dual
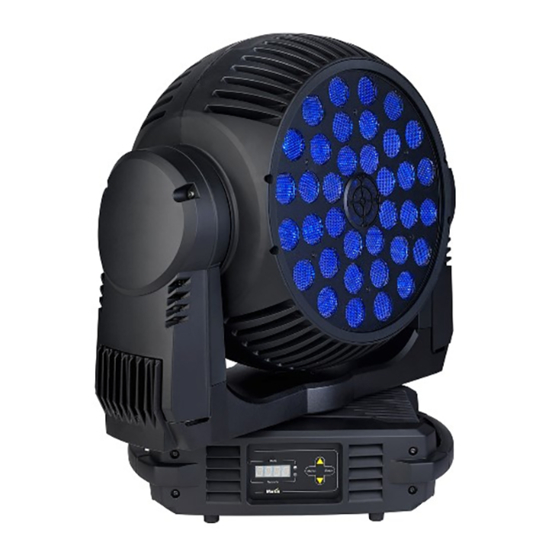
- Page 1 MAC 401 Dual MAC 401 CT Zoom user manual...
-
Page 2: Dimensions
The Martin logo, the Martin name and all other trademarks in this document pertaining to services or products by Martin Professional A/S or its affiliates and subsidiaries are trademarks owned or licensed by Martin Professional A/S or its affiliates or subsidiaries. -
Page 3: Safety Information
If you have questions about how to operate the fixture safely, please contact your Martin supplier or call the Martin 24-hour service hotline on +45 8740 0000, or in the USA on 1-888-tech-180. - Page 4 • Do not modify the fixture in any way not described in this manual • Install only genuine Martin parts. P R O T E C T I O N F R O M I N J U R Y •...
-
Page 5: Table Of Contents
MAC 401 Dual / RGB Zoom LED module ....... . . -
Page 6: Introduction
MAC 401™. Unpacking The following items are included with the MAC 401: • One LED head module (installed): RGB Zoom module in MAC 401 Dual, CTC Zoom module in MAC 401 CT Zoom • Two clamp attachment brackets with quarter-turn fasteners •... -
Page 7: Connections Panel
Connections panel A – AC mains power input (Neutrik PowerCon) B – Fuseholder, mains fuse 1 C – Fuseholder, mains fuse 2 D – Ethernet 1 (RJ-45, for future use) E – Ethernet 2 (RJ-45, for future use) F – DMX in (5-pin XLR) G –... -
Page 8: Ac Power
AC power Warning! Read “Safety Information” starting on page 3 before connecting the MAC 401 to AC mains power. For protection from electric shock, the MAC 401 must be grounded (earthed). The AC power distribution circuit must be equipped with a fuse or circuit breaker and ground-fault (earth-fault) protection. - Page 9 Attaching a cable to the male input connector Housing Insert Chuck Bushing To attach a power cable to the supplied input connector: 1. Slide the bushing over the cable. 2. Slide the white chuck over cables with a diameter (D ) of 5 - 10 mm (0.2 - 0.4 in.), or the black chuck over cables with a diameter of 10 - 15 mm (0.4 - 0.6 in.).
-
Page 10: Data Link
1. Connect the DMX data output from the controller to the MAC 401’s 5-pin male XLR input socket. 2. Continue connecting fixtures, DMX output to DMX input, in one single chain. 3. Use a splitter-amplifier such as the Martin RS-485 Optosplitter (P/N 90758060) if you need to branch the link into two chains. -
Page 11: Physical Installation
Physical installation The MAC 401 can be placed on a horizontal surface such as a stage or clamped to a truss in any orientation using the quarter-turn clamp brackets supplied with the fixture and a half-coupler (not supplied). Warning! Attach an approved safety cable to the attachment point on the connections panel (see Figure 2). -
Page 12: Setup
Setup Warning! Read “Safety Information” on page 3 before installing, powering, operating or servicing the MAC 401. Control panel and menu navigation The onboard control panel and LED display are used to set the MAC 401’s DMX address, configure individual fixture settings (personality), read out data and execute service utilities. See “Onboard control menus”... -
Page 13: Restoring Factory Default Settings
Three sets of custom user settings can also be stored and recalled from the main FACT menu. Pixel grouping In all DMX control modes, the LEDs in the MAC 401 Dual and CT Zoom can be controlled as one single group or split into two or four segments that can be controlled as individual pixels. - Page 14 Whether one or two LED modules are installed on a fixture, all modules’ DMX addresses must be set manually using the ADDR menu for that module. You can set the address of each module on the rear of the head immediately after the channels used by the module on the front of that head, or group similar modules together, for example, or set addresses according to any other preference.
- Page 15 DMX channels used by RGB Zoom module The following table gives an overview of the control menu settings available and number of DMX channels used in the RGB Zoom module. Number of Number of channels, channels, PSET PGRP Mode front of head rear of head RGB, no dynamic effects, individual control of 4 quadrant-split LED groups...
-
Page 16: Tailoring Performance
DMX channels used by CT Zoom module The following table gives an overview of the control menu settings available and number of channels used in the various modes available in the CT Zoom module. Number of Number of channels, channels, PSET PGRP Mode... - Page 17 Whatever cooling mode is selected, a thermal cutout shuts down power to the LEDs if the fixture temperature exceeds safe limits. If this occurs, you must reset the fixture via the control menus or via DMX, or cycle power to the fixture off and on again. If a thermal shutdown occurs, you are pushing the fixture to its limits.
-
Page 18: Effects
MAC 401 Dual / RGB Zoom LED module This section describes the lighting effects available in the RGB LED module that is fitted as standard to the MAC 401 Dual and available as an accessory for the MAC 401 CT Zoom. Raw RGB color mixing Uncalibrated red, green, blue color mixing is available, with 0 - 100% intensity control on one DMX channel for each color. -
Page 19: Mac 401 Ct Zoom / Ct Zoom Led Module
HSV control is calibrated at the factory. From fixture software v. 1.2.0, the MAC 401 Dual’s RGB Zoom LED module can vary the color temperature of any color being displayed. White light color temperature is variable from a very cool blue sky (10 000 K) to a warm sunrise (2000 K). -
Page 20: Service And Maintenance
Please contact your Martin supplier for details. It is Martin policy to apply the strictest possible calibration procedures and use the best quality materials available to ensure optimum performance and the longest possible component lifetimes. However, LEDs are subject to wear and tear over the life of the product, resulting in gradual changes in color and overall brightness over many thousands of hours of use. -
Page 21: Removing And Installing Head Modules
Removing and installing head modules From software version 1.2.0 (available for download free of charge from www.martin.com for fixtures with earlier software versions), two head modules can be installed and controlled in the MAC 401™. To remove a head module:. -
Page 22: Control Menu Service Utilities
• The latest version of the MAC 401 software, available for download from www.martin.com • The Martin™ Software Uploader Application, available for download from www.martin.com • A Martin Universal USB/DMX Interface device (P/N 90702045) with USB cable (supplied with the device) and 5-pin XLR male to 5-pin XLR female DMX cable. -
Page 23: Fixture Readouts
3. Replace defective fuses with ones of the same type and rating only. Replacement fuses are available from Martin. 4. Reinstall the fuseholders before reapplying power. If a fuse blows repeatedly, disconnect the fixture from power immediately and consult your Martin supplier. Service and maintenance... -
Page 24: Diagnostic Feedback
Try to upload the firmware again. A fixture firmware upload was unsuccessful CSER and has resulted in a Checksum Error Contact Martin Service if problem persists. D1CO Driver PCB 1 temperature cut off D2CO Driver PCB 2 temperature cut off... -
Page 25: Dmx Protocols
DMX protocols Two DMX protocols are given below: for the MAC 401 RGB Zoom module and CT Zoom module. Certain channels in the CT Zoom module’s DMX protocol are intentionally left without function to avoid having to repatch channels if one type of module is replaced with another. For each protocol, pan, tilt and fixture control channels are only available if the module is installed on the front of the head. - Page 26 RAWX RGBX DMX Value Percent Function Dynamic effect 1 0 - 19 0 - 7 No Effect 20 - 39 7 - 16 Effect 1 - White Single Segment Chase 40 - 59 17 - 24 Effect 2 - White Double Segment Chase 60 - 79 25 - 32 Effect 3 - Red Single Segment Chase...
- Page 27 RAWX RGBX DMX Value Percent Function Dynamic effect 2 0 - 19 0 - 7 No Effect 20 - 39 7 - 16 Effect 1 - White Single Segment Chase 40 - 59 17 - 24 Effect 2 - White Double Segment Chase 60 - 79 25 - 32 Effect 3 - Red Single Segment Chase...
- Page 28 RAWX RGBX DMX Value Percent Function Fixture control 0 - 9 0 - 1 No function 10 - 14 2 - 3 Reset Entire fixture1 15 - 19 4 - 5 No function 20 - 24 6 - 7 Reset Effects only1 25 - 29 8 - 9 No function...
- Page 29 RAWX RGBX DMX Value Percent Function Color wheel effect 0 - 9 0 - 1 Open (white) 10 - 14 2 - 3 LEE 790 - Moroccan Pink 15 - 19 4 - 5 LEE 157 - Pink 20 - 24 6 - 7 LEE 332 - Special Rose Pink 25 - 29...
- Page 30 RAWX RGBX DMX Value Percent Function The following block of four channels is only available and used if individual quarter or half PGRP groups of LEDs are to be controlled. The level of control is set using the option on the control menu on the fixture.
-
Page 31: Dmx Protocol, Ct Zoom Module
DMX protocol, CT Zoom module DMX Value Percent Function Strobe/Virtual shutter effect 0 - 19 0 - 7 Shutter closed 20 - 49 8 - 19 Shutter open Strobe (fast → slow) 50 - 64 20 - 25 65 - 69 26 - 27 Shutter open Opening pulse (fast →... - Page 32 DMX Value Percent Function Dynamic effect 2 0 - 19 0 - 7 No effect 20 - 39 7 - 16 Effect 1 - White Single Segment Chase 40 - 59 17 - 24 Effect 2 - White Double Segment Chase 60 - 189 25 - 73 No effect...
- Page 33 DMX Value Percent Function Fixture control 0 - 9 0 - 1 No function 10 - 14 2 - 3 Reset Entire fixture1 15 - 19 4 - 5 No function 20 - 24 6 - 7 Reset Effects only1 25 - 29 8 - 9 No function...
- Page 34 DMX Value Percent Function CTC (Color Temperature Control) – calibrated 0 - 19 0 - 7 No function, Warm and Cold channels (14 and 16 in CT Fade mode/22 and 24 in CTX mode) enabled CTC 7 000 K → 3 000 K, Warm and Cold channels disabled 20 - 255 8 - 100 The following four channels are only available and used if individual quarter groups of LEDs are to be controlled...
-
Page 35: Lee Colors And Rgb Equivalents
LEE colors and RGB equivalents The table below gives approximate RGB equivalents for the LEE colors available in the RGB Zoom module’s color wheel effect (DMX channel 9). DMX Integer Lee no. Name Green Blue Moroccan Pink Pink Special rose Pink Follies Pink Fuchsia Pink Surprise Pink... -
Page 36: Onboard Control Menus
Onboard control menus Single head module operation When only one module is installed on the head, the HEAD menu is automatically set to SNGL. The MAC 401 automatically detects whether an RGB Zoom or CT Zoom module is installed and adjusts the control menu accordingly. - Page 37 Menu Item Options Notes (Default settings in bold print) Return all settings (except calibrations) to factory defaults FACT LOAD NB: can take up to 2 minutes to complete! FACT CUS1, LOAD Load custom configuration CUS2, SAVE CUS3 Save current custom configuration MAIN CPU firmware version in main processor VERS...
-
Page 38: Dual Head Module Operation
Menu Item Options Notes (Default settings in bold print) DUAL Sets head to dual head module operation HEAD SNGL Sets head to single head module operation Table 6: Control menu: single head module operation Dual head module operation When you install a second head module on the rear of the head, DUAL is automatically selected in the HEAD menu and FRNT and REAR menus become available in the control panel: •... - Page 39 Menu Item Item Options Notes (Default settings in bold print) Current elapsed time in hours since the air filter was cleaned or changed. Display the counter and press the up button for five seconds TOTL to reset it.This counter must be reset manually when the air filter is cleaned.
- Page 40 Menu Item Item Options Notes (Default settings in bold print) CURR Display current average pixel PCB temperature PTMP Display highest pixel PCB temperature since last reset Display highest pixel PCB temperature since manufacture Current elapsed time in hours since the air filter was cleaned or changed.
- Page 41 Menu Item Item Options Notes (Default settings in bold print) DINT Display errors at 100% intensity (regardless of setting) and NORM illuminate the service light. ERRM Silent error mode. The error message does not appear in the display, SLNT but the service lamp is illuminated PERS Sending a value on a CTC channel adjusts the temperature of WITH...
-
Page 42: Adjustment Submenu
Adjustment submenu This menu is accessed under ADJ in the SERV service menu. Adjustments are for service use only. RSET Reset fixture Red if RGB module installed, Warm white if CT module installed, intensity 0%/50%/100% Green 1 if RGB module installed, intensity 0%/50%/100% FRNT GRN1 Not displayed if CT module installed... -
Page 43: Troubleshooting
Clean the fixture, especially air vents. Ensure free airflow around fixture. Check that ambient Light output shuts down temperature does not exceed max. permitted level. Fixture is too hot. unexpectedly. Switch to FULL cooling mode. If problem persists, contact Martin for advice. Table 9: Troubleshooting Troubleshooting... -
Page 44: Mac 401 Specifications
'pixel wheel' rotation speed RGB Zoom module, MAC 401 Dual Color mixing............RGB + CTC or HSV Red or hue . - Page 45 Installation Mounting points ........... . 2 pairs of 1/4-turn locks Orientation .
- Page 46 Martin Universal USB/DMX Interface Device........
- Page 48 • • • www.martin.com Olof Palmes Allé 18 8200 Aarhus N Denmark Tel: +45 8740 0000 • Fax +45 8740 0010...
Need help?
Do you have a question about the MAC 401 Dual and is the answer not in the manual?
Questions and answers