
Related Manuals for Janome 5812


Summary of Contents for Janome 5812
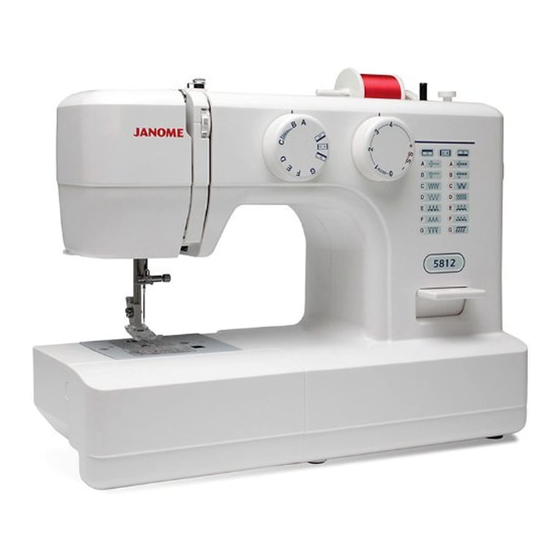
- Page 1 Janome 5812 Instruction Manual Janome 5812 Instruction Manual www.toews.com 5812 Owners Manual/ User Guide...
- Page 2 The design and specifications are subject to change without a prior notice. Please note that on disposal, this product must be safely recycled in accordance with relevant National legislation relating to electrical/electronic products. If in doubt please contact your retailer for guidance. (European Union only) www.toews.com 5812 Owners Manual/ User Guide...
-
Page 3: Table Of Contents
4-step Buttonhole ............21 Corded Buttonhole ............22 SECTION VI. DECORATIVE STITCHES Satin Stitching ..............23 Monogramming ............... 23 Applique ................24 Pin Tucking ..............24 Lace Work ............... 25 Shell Stitch ..............25 www.toews.com 5812 Owners Manual/ User Guide... -
Page 4: Section I. Names Of Parts
@3 Carrying handle @4 Handwheel @5 Power switch @6 Machine socket @7 Drop feed dogs lever @8 Free-arm @9 Presser foot lifter NOTE: Sewing machine design and specifications are subject to change without prior notice. www.toews.com 5812 Owners Manual/ User Guide... -
Page 5: Standard Accessories
Seam ripper t t t t t r r r r r y y y y y o Screwdriver o o o o o u u u u u i i i i i www.toews.com 5812 Owners Manual/ User Guide... -
Page 6: Section Ii. Getting Ready To Sew Connecting Machine To Power Supply
Do not modify the plug in any way. The foot controller Model YC-482J or TJC-150 is used with this sewing machine (USA market only). www.toews.com 5812 Owners Manual/ User Guide... -
Page 7: Presser Foot Lifter
Slot r Accessory storage Free-arm Sewing Free-arm sewing is used for stitching sleeves, waistbands, pant legs or any other tubular garments. It is also useful for darning socks or mending knees or elbows. www.toews.com 5812 Owners Manual/ User Guide... -
Page 8: Changing The Needle
Match the hole in the foot holder with the threaded hole in the presser bar. Fit the setscrew into the hole. Tighten the screw by turning it clockwise with a screwdriver. q Setscrew w Foot holder e Hole r Threaded hole www.toews.com 5812 Owners Manual/ User Guide... -
Page 9: Selecting Needle And Fabric
16 (100) Double Faced Wool, Heavy Coating, Fake Fur, Heavy Drapery Fabrics 16 (100) Leather, Suede Wedge Point Leather 18 (110) Universal Canvas, Duck, Upholstery Fabrics 11 (75) Topstitching for Special Finish Topstitching 14 (90) www.toews.com 5812 Owners Manual/ User Guide... -
Page 10: Bobbin Winding
Push the hook cover plate release button q to the right and remove the cover plate. q Hook cover plate release button w Hook cover plate x Lift out the bobbin. e Bobbin www.toews.com 5812 Owners Manual/ User Guide... -
Page 11: Winding The Bobbin
Remove the bobbin from the bobbin winder spindle. NOTE: The machine will not sew until the spindle has been returned to the left. www.toews.com 5812 Owners Manual/ User Guide... -
Page 12: Inserting The Bobbin
Pull out about 6˝ (15.0 cm) of thread. v Attach the hook cover plate. Check the threading by referring to the diagram r shown on the hook cover plate. 1/8 3/8 5/8 www.toews.com 5812 Owners Manual/ User Guide... -
Page 13: Threading The Machine
Turn the handwheel slowly toward you one complete turn. Bring the bobbin thread up by pulling the needle thread as illustrated. q Needle thread w Bobbin thread c Pull 4˝ (10 cm) of both threads back and under the presser foot. www.toews.com 5812 Owners Manual/ User Guide... -
Page 14: Adjust The Needle Thread Tension For A Straight Stitch
Wrong side (Bottom side) of fabric The needle thread shows through on the wrong side of the fabric, and the stitch feels bumpy. Turn the dial to a higher tension setting number to tighten the needle thread tension. www.toews.com 5812 Owners Manual/ User Guide... -
Page 15: Adjust The Needle Thread Tension For A Zigzag Stitch
• Tension is too loose q Right side (Top side) of fabric w Wrong side (Bottom side) of fabric The corner of each zigzag pulls together on the wrong side of the fabric. www.toews.com 5812 Owners Manual/ User Guide... -
Page 16: Stitch Pattern Selector Dial
To raise the feed dogs, push the lever in the direction of the arrow, as illustrated, and turn the handwheel toward you. Feed dogs must be up for normal sewing. www.toews.com 5812 Owners Manual/ User Guide... -
Page 17: Section Iii. Straight Stitch Sewing Straight Stitch
2. Lower the needle by turning the hand wheel counterclockwise. 3. Raise the presser foot and turn the fabric counterclockwise 90°. 4. Lower the presser foot, and begin stitching in the new www.toews.com 5812 Owners Manual/ User Guide direction. -
Page 18: Zipper Sewing
Sew in reverse a few stitches to lock. y, set needle Set the stitch pattern selector dial to thread tension to 0, and sew basting stitch t the entire length of the zipper sewing. www.toews.com 5812 Owners Manual/ User Guide... - Page 19 At end of seam, sew in reverse a few stitches to lock. Once both sides of zipper are sewn, use seam ripper to open the basting stitch. www.toews.com 5812 Owners Manual/ User Guide...
-
Page 20: Section Iv. Zigzag Stitch Sewing Basic Zigzag
Start overcasting with the rightmost needle position about 1/8˝ (0.3 cm) from the row edge of a seam. The right tip of the stitch should just clear the seam edge. www.toews.com 5812 Owners Manual/ User Guide... -
Page 21: Bar Tacking
4. Press the foot control and sew about 10 stitches. 5. Sew the other row of holes (if applicable) using the steps above. Trim excess threads from both sides of the fabric. www.toews.com 5812 Owners Manual/ User Guide... -
Page 22: Section V. Utility Stitches
Place your fabric to allow a 5/8˝ (1.5 cm) seam. Trim excess close to stitching. Be careful not to cut the stitches. • Mending Position the tear under the needle so that the stitch catches both sides. www.toews.com 5812 Owners Manual/ User Guide... -
Page 23: 4-Step Buttonhole
Place a piece of paper under the fabric when you make a buttonhole on the edge of a thick fabric. This prevents the fabric edge from being trapped into the feed dog window. q Piece of paper www.toews.com 5812 Owners Manual/ User Guide... -
Page 24: Corded Buttonhole
The sewing sequence is the same as the 4-step buttonhole. c Pull the left end of the filler cord to tighten it and cut the excess tails. To cut the buttonhole opening, refer to the instructions on page 54. www.toews.com 5812 Owners Manual/ User Guide... -
Page 25: Section Vi. Decorative Stitches Satin Stitching
Zigzag foot: A Attach a piece of stabilizer on the wrong side (Bottom side) of the fabric. Draw letters on the fabric with tailor’s chalk. Form each pattern with satin stitch, adjusting stitch width. www.toews.com 5812 Owners Manual/ User Guide... -
Page 26: Applique
Lower the foot and turn the screw to align the guide on the foot with the folded edge. Sew slowly while guiding the folded edge along the guide. Open the fabric and iron press the tucks. q Screw w Guide e Folded edge www.toews.com 5812 Owners Manual/ User Guide... -
Page 27: Lace Work
If you sew rows of shell stitches, space the rows at least 5/8˝ (1.5 cm) apart. You can also sew shell stitches on knits or soft silky woven fabrics, in any direction. www.toews.com 5812 Owners Manual/ User Guide... -
Page 28: Section Vii. Stretch Stitches Straight Stretch
Needle thread tension: 2 – 5 r Presser foot: Zigzag foot: A Sew on stretch fabrics in any area that you might use a zigzag stitch. This stitch is used as a decorative topstitch as well. www.toews.com 5812 Owners Manual/ User Guide... -
Page 29: Overcast Stretch Stitching
It is also great for sewing spandex swim wear. Place the fabric under the presser foot [A] so that the stitches are made over the raw edge. www.toews.com 5812 Owners Manual/ User Guide... -
Page 30: Smocking
(bottom threads) to distribute the gathers evenly and secure the threads. Sew the smocking stitches between the gathered rows. Cut the knots and remove the straight stitches by pulling the bobbin threads out. www.toews.com 5812 Owners Manual/ User Guide... -
Page 31: Section Viii. Care Of Your Machine
Clean the feed dogs and hook area with a brush. e Feed dogs b Wipe the hook race with a soft, dry cloth. r Hook race NOTE: You may also use a vacuum cleaner. www.toews.com 5812 Owners Manual/ User Guide... -
Page 32: Replacing The Bobbin Holder
Remove the needle plate in order to remove the tangled threads. CAUTION: Do not apply oil to the bobbin holder or hook area, as oil may degrade the bobbin holder. www.toews.com 5812 Owners Manual/ User Guide... -
Page 33: Troubleshooting
Page 5 Patterns are distorted. 1. The stitch is not balanced. Page 14 1. The feed dog is packed with lint. Page 29 Noisy operation 2. Lint has collected in the bobbin holder. Page 29 www.toews.com 5812 Owners Manual/ User Guide... - Page 34 Janome 5812 Instruction Manual www.toews.com 5812 Owners Manual/ User Guide...
- Page 35 Janome 5812 Instruction Manual www.toews.com 5812 Owners Manual/ User Guide...
- Page 36 Janome 5812 Instruction Manual 508-800-122 (EN) www.toews.com 5812 Owners Manual/ User Guide...
Need help?
Do you have a question about the 5812 and is the answer not in the manual?
Questions and answers